
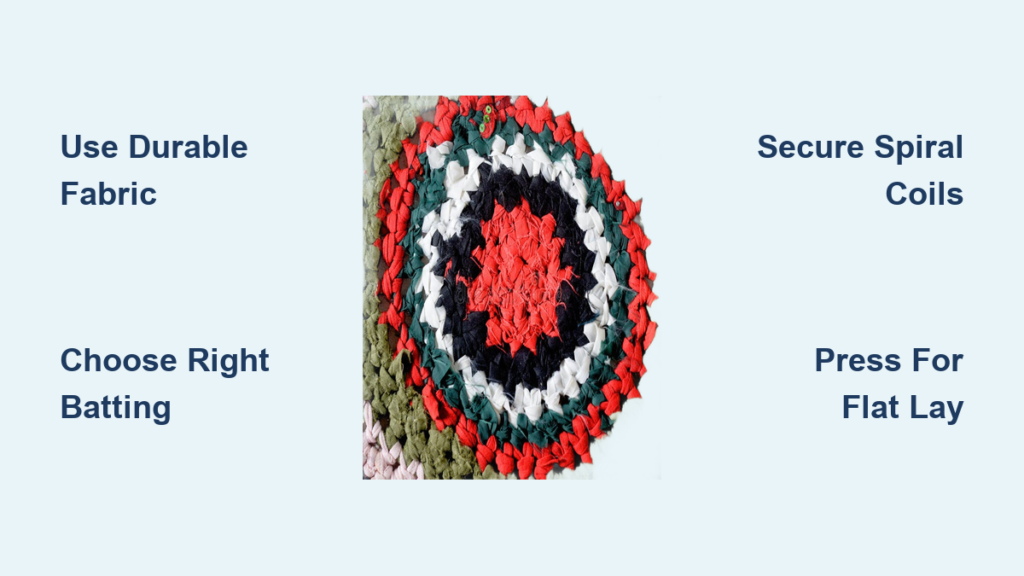
You’ve seen the bold, colorful floor quilts that turn heads in entryways and kitchens. Now it’s time to make your own. A quilt rug blends the artistry of quilting with the durability of floor coverings, giving you a handmade piece that’s both beautiful and functional. Whether you’re using jelly roll strips, fabric scraps, or large cuts of home decor fabric, this guide walks you through every step from material selection to final press. You’ll learn how to build a rug that withstands foot traffic, stays flat, and can even be washed. No perfection required: this is floor art, not a show quilt.
Let’s dive into the three most popular methods: jelly roll spiral, quilt-as-you-go crumb, and traditional large-piece construction. Each has its strengths, and all can be completed with a standard sewing machine and basic tools.
Choose the Right Fabric for Floor Durability
Not all quilting cotton can handle being walked on. For a quilt rug that lasts, you need tightly woven, heavy-duty fabrics that resist wear and fraying.
Best Materials for Quilt Rugs
Home decor fabric is affordable at around $3 per yard and thick enough for statement rugs, though you’ll need to cut pieces slightly larger to compensate for fraying. Cotton duck offers more durability than quilting cotton while being easier to handle than decor fabric. Quilting denim holds shape well but may wear needles faster, so use a 90/14 denim needle. Jelly roll strips come pre-cut in coordinated colors and are perfect for spiral rugs with no prep needed.
Poly-cotton blend thread is stronger than 100% cotton and resists wear from foot traffic. Avoid flimsy quilting cottons for high-traffic areas and save them for wall hangings instead.
Matching Fabric to Your Method
For jelly roll spiral rugs, use jelly roll strips paired with 2.5″ batting. Crumb rugs work best with scraps 1″ to 3″ wide in cotton or cotton blend. Traditional rugs call for large pieces (6″ or larger) of home decor or cotton duck fabric. If you’re repurposing old jeans or linens, always pre-wash and press them first to prevent shifting during construction.
Pick a Rug Pattern With Visual Impact
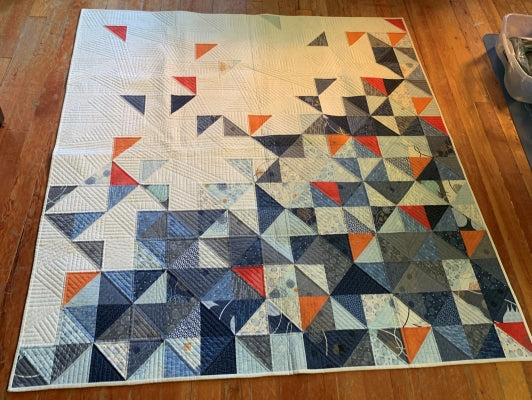
Quilt rugs need bold, large-scale designs to read well on the floor. Tiny pieces get lost underfoot and create weak, bulky seams that wear out faster.
Top Rug-Friendly Patterns to Consider
The Suncake Quilt by Stefanie Satterwhite features a starburst design available in five sizes, perfect for bold modern spaces. The Dart Quilt by Natalia Bonner offers angular, graphic lines that pop on floors. Dogwood Blossoms provides floral-meets-geometric appeal for traditional rooms. Crumb Cake uses improv scrap design with no pattern needed. The Jelly Roll Spiral requires no formal pattern at all.
Large blocks or triangles (6″ minimum) create fewer seams and stronger structure. Simple geometry means easier assembly and flatter lay. Turn a square quilt into a rectangle by adding border strips if needed.
Build a Jelly Roll Spiral Rug
This is the fastest, most satisfying method. One jelly roll makes one full rug, and the process feels meditative as you watch it take shape.
Assemble the Tubing
Gather your materials: one jelly roll (40+ strips), 50 yards of 2.5″ wide cotton batting, poly-cotton thread, 6 to 8 extra bobbins, a walking foot, Wonder Clips, and an extension table.
Sew all jelly roll strips end-to-end into one long continuous strip. Press seams open to reduce bulk. Starch and press the strip in half, wrong sides together, creating a crisp fold for clean tubing. Place 2.5″ batting along the wrong side of the folded strip, then fold both edges over the batting and fold in half again to fully encase it. Raw edges should meet in the center. Clip or pin every 6″ to prevent shifting, then straight-stitch down the center to secure the batting inside.
Use pre-cut 2.5″ batting rolls to save significant time on this step.
Coil Into a Spiral
Start the spiral by folding the first 15″ into a U-shape for an oval rug, or begin with a tight circle for a round rug. Use your widest zigzag stitch (5.5mm wide, 1.4mm long) to sew the tubing to itself as you coil. Ease extra fabric on the outer edge as you go to prevent cupping. Keep all layers flat throughout the process. If the rug starts to wave, stop and re-flatten before continuing.
Use the needle-down function when pausing to keep your position locked. Support the weight with an extension table to prevent machine drag. If the rug curls, don’t force it. Unravel slightly, re-flatten, and continue.
Finish and Press
Once coiled to your desired size, trim excess tubing. Press with steam to remove waviness and flatten the rug. Let it cool under a pressing board for a crisp lay.
The result is a 30″ by 44″ oval or up to 54″ round rug ready for your kitchen or entryway.
Make a Quilt-as-You-Go Crumb Rug

This method eats up fabric scraps and finishes fast, making it perfect for using up remnants from other projects.
Prepare the Quilt Sandwich
Layer a 31″ square cotton batting between a 31.5″ to 32″ square backing fabric and an optional stabilizing top fabric. Spray baste to fuse the layers and press flat. Find the center by folding the sandwich twice and marking the center point.
Add Crumb Strips
Cut your scraps into 1″ to 3″ wide strips. Press and trim jagged edges before use. Place your first strip (such as a 4″ square) right side down on the center. Sew a 1/4″ seam without backstitching, as the next seam will lock it in place. Press open, then trim excess leaving about 1″ of background if desired.
Add the next strip with an offset seam to avoid creating a grid effect. Use different lengths to stagger seams and prevent a boxed-in look. Repeat, working in one direction at a time.
Shape and Bind
When the rug reaches about 30″ diameter, draw a 29″ circle from the center. Trim excess to create the round shape, widening outer strips slightly to minimize trimming.
For binding, cut 2.75 yards of 2.5″ wide bias strips. Fold in half, attach to the back about 1/2″ from the edge, wrap to the front, and stitch close to the edge. Leave a small gap when joining ends and finish the seam by hand for a clean join.
This method produces a washable, durable 29″ floor rug in 3 to 5 hours.
Use Traditional Quilt Construction for Large-Block Rugs

Traditional construction works best for patterns like Suncake or Dart that use large geometric pieces.
Piece a Large-Block Top
Cut large pieces (6″ to 12″) from home decor fabric or cotton duck. Assemble the quilt top with standard piecing techniques, pressing seams open to reduce bulk. Remember: this is floor art, not a show quilt. Imperfections are perfectly acceptable.
Layer and Quilt
Cut the backing 1.5″ larger than the top. Layer backing, batting, and top in that order. Quilt using a longarm machine for thick fabrics if available. A domestic machine works for smaller rugs with a walking foot. Avoid quilting over seam intersections to reduce bulk and prevent needle breakage.
Use 100% polyester batting like Hobbs Tuscany for loft and durability.
Bind the Edges
Two options work well for traditional rugs. The wrap-back binding method involves trimming the backing to 1.5″ larger, folding it to the front, and stitching down. Use bias binding for curved or irregular edges. For rectangles, zigzag stitch the cut ends or bind with reserved jelly roll strips.
Choose the Right Batting
Batting choice affects both durability and ease of construction. For jelly roll rugs, use 2.5″ cotton or cotton blend batting. For traditional rugs, choose 100% polyester for loft and durability. For crumb rugs, cotton provides washability while fleece adds softness.
Save money by cutting your own 2.5″ batting from scraps and zigzag butting the ends together to create a continuous roll. Avoid wool batting for spiral rugs because it’s too lofty and hard to sew through.
Master the Stitching Techniques
Using the right stitch for each job makes the difference between a rug that falls apart and one that lasts for years.
Select the Proper Stitch
Straight stitch secures the tubing center in jelly roll rugs. Wide zigzag (5.5mm or wider) joins spiral layers and must be dense and continuous. Free-motion quilting is optional for adding texture to flat quilt rugs.
Use blending thread like gray for a subtle look, or go bold with contrast colors. For thick layers, always use a 90/14 denim needle. An extension table supports weight and keeps fabric flat. The needle-down function prevents shifting when you stop to reposition.
Domestic machines can handle crumb and jelly roll rugs with patience. Go slow and let the machine do the work.
Finish With Durable Binding
Binding protects edges and defines the final shape of your rug.
Seal Edges Right
Spiral rugs need no binding because the zigzag stitching seals the edge naturally. Round rugs benefit from bias binding (2.75 yards) for flexibility. Rectangular rugs work well with wrap-back binding or tassel trim.
Use leftover jelly roll strips to bind ends of rectangular rugs for a coordinated look. Always leave a small gap when joining binding ends and finish the seam by hand inside for a clean finish.
Ensure Flat Lay and Prevent Curling
A quilt rug that cups or waves defeats the purpose of having a functional floor piece.
Fix Curling and Waving
Ease the outer edge during coiling to prevent curling. Keep all layers flat as you sew. After completion, press with steam and let cool under weight to set the flat shape.
Never put your quilt rug in the dryer because heat causes shrinkage and distortion.
Add Non-Slip Protection
For tile or hardwood floors, apply washable gripper backing or use a non-slip pad underneath. This is essential for kitchens, bathrooms, and entryways where safety matters. Even durable rugs need grip.
Wash and Maintain Your Quilt Rug
Good news: most quilt rugs are washable with proper care.
Keep It Clean and Fresh
Machine wash on gentle cycle. Lay flat to dry never hang or tumble dry. Steam press after washing to restore flatness.
Cotton batting may shrink slightly, so pre-wash your scraps if possible. With poly-cotton thread and durable fabric, your rug can last for years.
Customize With Creative Twists
One quilt rug technique opens the door to multiple creative projects.
Try Different Shapes
Make round rugs by starting with a tight circle and spiraling outward. Create oval rugs by beginning with a U-shape. Build rectangle rugs by sewing tubing straight and binding the ends. Use traditional piecing for square formats.
Make Matching Decor
Cut 7-yard tubing segments and coil into small rounds for placemats. Build up sides with coiled tubing to create baskets or bowls. Skip backing and non-slip for wall hangings using the same techniques.
One method yields endless possibilities.
Avoid Common Mistakes
Learn from others’ experience to save time and frustration.
Troubleshoot Like a Pro
If your rug curls, ease the outer edge and press with steam. Bulky seams result from pressed-open seams, trimming excess, and avoiding seam intersections. Tubing unravels when not clipped securely and stitched center before zigzag. Batting gaps appear when butted ends aren’t zigzagged tightly. Fabric fraying means you should use cotton duck or tighter weave fabrics next time.
Embrace imperfections. As one maker says, this is floor art.
Save Time and Money
Quilt rugs don’t need to break the budget.
Budget-Friendly Tips
Buy fabric offcuts at $3 per yard from discount stores. Use scrap batting by zigzagging pieces into a continuous roll. One jelly roll equals one rug with no extra fabric needed. Skip the longarm a domestic machine works fine for smaller rugs.
Sewing a quilt rug is meditative, perfect for listening to podcasts or watching your favorite shows.
Tools You’ll Need
Having the right tools makes any project smoother.
Essential equipment includes a sewing machine with wide zigzag and needle-down functions, a 90/14 denim needle, a walking foot (optional but helpful), an extension table, iron and starch, Wonder Clips, an erasable marker, a rotary cutter and mat for crumb cutting, and a bias tape maker if making your own binding.
No specialty machines are required. Patience and preparation are what really matter.
Frequently Asked Questions About Making a Quilt Rug
What is the best fabric for making a quilt rug?
Home decor fabric, cotton duck, and quilting denim work best because they withstand foot traffic and resist fraying. Avoid lightweight quilting cotton for floor use.
How long does it take to make a jelly roll rug?
A jelly roll spiral rug takes 6 to 8 hours to complete, spread over one or two sessions. Crumb rugs are faster at 3 to 5 hours.
Can quilt rugs be washed?
Yes, most quilt rugs are machine washable. Use gentle cycle, lay flat to dry, and steam press afterward to restore flatness.
Do I need a special sewing machine?
No. A standard sewing machine with wide zigzag capability works fine. Use a 90/14 denim needle for thick fabrics and go slowly.
How do I keep my quilt rug from slipping on floors?
Apply washable gripper backing or place a non-slip pad underneath. This is essential for safety on tile and hardwood surfaces.
What size quilt rug will one jelly roll make?
One jelly roll (40 strips) produces approximately a 30″ by 44″ oval or up to a 54″ round rug.
Key Takeaways for Making Your Own Quilt Rug
A quilt rug transforms any room with color, texture, and handmade charm while serving as a durable, functional floor covering. Choose heavy-duty fabrics like home decor fabric or cotton duck, use poly-cotton blend thread for strength, and select batting that matches your construction method. The jelly roll spiral technique offers the fastest results, while crumb rugs provide a creative way to use fabric scraps. Regardless of method, embrace imperfections since this is floor art, not a gallery piece. With proper materials and techniques, your quilt rug will last for years, adding warmth and personality to your home. Start with a small project like a kitchen mat or entryway rug to practice the techniques before tackling larger pieces.







