
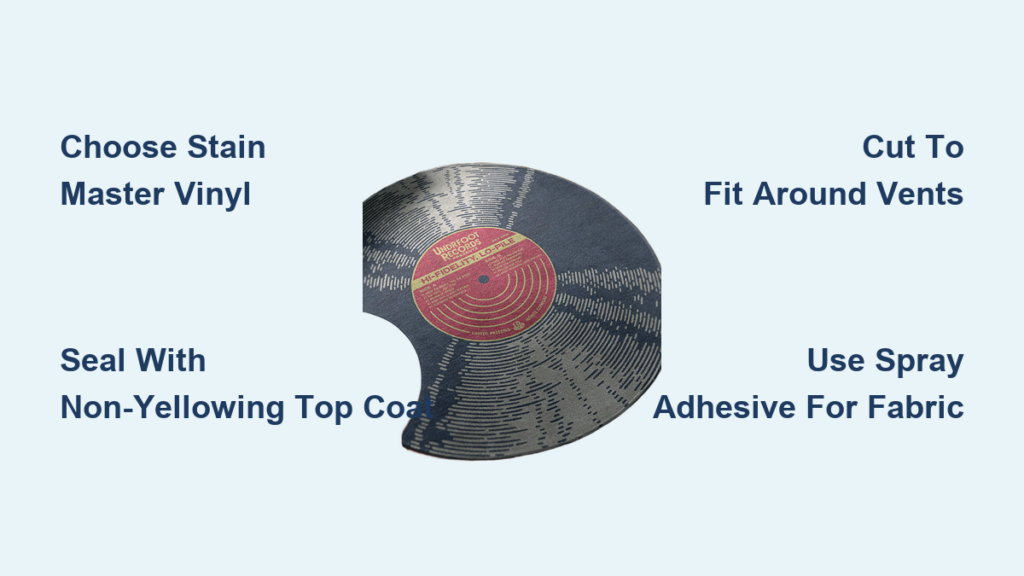
You step inside after a snowy walk, boots dripping slush, and instead of scrambling for towels, you glance down at your stylish, mud-resistant floor cloth holding the mess like a champ. That’s the power of a vinyl rug. More than just a trend, it’s a smart, customizable solution for protecting floors while adding charm to entryways, kitchens, and dining rooms. Unlike expensive store-bought versions costing $300 or more, a DIY vinyl rug costs as little as $30 to $70 and fits your space perfectly, down to the last inch.
From selecting the right vinyl remnant to sealing for long-term wear, this guide covers two proven methods: painted vinyl rugs and fabric-laminated floor cloths. You’ll learn how to avoid common mistakes like peeling paint or bubbling fabric, how to cut around vents and trim, and how to maintain your rug for years. Let’s build a floor cloth that’s as functional as it is stunning.
Choose the Right Vinyl Base Material

Your rug’s durability starts with the base. Not all vinyl is created equal. Some curl, crack, or fail under foot traffic. Pick one designed to last.
Pick Stain Master or Sheet Vinyl
For high-traffic areas like dining rooms or entryways, Stain Master vinyl from Lowe’s is a top-tier choice. It comes with padding, resists tearing, and won’t curl thanks to its stability. Its weight keeps it flat without adhesive, even under furniture. If you’re mimicking vintage tile, go for penny tile or hex-patterned sheet vinyl, sold in rolls or remnants. These are affordable, easy to cut, and deliver instant old-world charm.
Flooring remnants, often 8 by 12 feet or larger, are ideal for big projects and cost under $70. Ask at local stores. Many sell scraps at deep discounts.
Try Linoleum or Canvas for Fabric Rugs
If you’re covering your rug with fabric, skip the vinyl and use linoleum or heavy canvas. The textured backside of linoleum grips spray adhesive better, while canvas offers a sturdy, paint-ready surface. Both accept fabric lamination well and can be sealed for moisture resistance.
Pro Tip: Always pre-wash cotton or canvas fabric to prevent shrinkage after application.
Gather Essential Tools and Materials
Skip the guesswork. Here’s exactly what you need to get started, split by method.
Essential Tools for All Projects
- Utility knife or box cutter for straight cuts
- Sharp craft scissors for trimming curves or fabric edges
- Rotary cutter with cutting mat for long, precise cuts
- Tape measure, framing square, and pencil for accurate measurement
- Foam roller and brayer for applying paint and sealer smoothly
Materials for Painted Vinyl Rugs
- Vinyl flooring remnant with backside used as canvas
- Chalk paint or exterior-grade paint like Linen White or Zinsser Perma-White
- Reusable stencils in hex, floral, or border patterns
- Decorative paint roller for borders
- Painter’s tape
- General Finishes High-Performance Top Coat for sealing
- Wax paper and masking tape to protect work surfaces
Materials for Fabric-Laminated Rugs
- Heavy cotton, canvas, or duck cloth for the decorative top
- 300-grade heavy-duty spray adhesive for strongest bond
- Minwax Polycrylic or polyurethane for clear, non-yellowing sealer
- Foam brush or paint roller for even sealer application
Warning: Some sealers like shellac yellow light fabrics. Always test on a scrap piece first.
Create a Painted Vinyl Rug Step by Step
Want a one-of-a-kind look? A painted vinyl rug lets you stencil, roll, and design freely. This method turns plain vinyl into art.
Prepare the Vinyl Surface
Start by unrolling your vinyl inside out and letting it lie flat for at least 24 hours. This prevents edge curling. Use the backside, the solid neutral side, as your painting surface. It’s smoother and accepts paint better.
Set up in a large, flat area like a garage or kitchen. Protect the floor with wax paper taped at edges to stop paint from seeping through.
Apply a Base Coat
Use chalk paint or exterior-grade paint for maximum adhesion. Roll on one even coat with a foam roller. Let it dry for 24 hours or more before taping. This is critical. Taping too soon causes paint to peel when you remove the tape.
Plan and Tape the Design
Measure borders with a ruler or framing square. For symmetry, work from center outward. Use painter’s tape to mask off border areas. If adding multiple layers like inner and outer frames, apply inner tapes the next day after the base coat fully cures.
Pro Tip: Use online hex grid templates to space stencils evenly.
Stencil the Center Pattern
Secure stencils with tape to prevent shifting. Dip a stencil brush lightly, blot excess paint on paper towel, and press straight down. Never swipe. Work from the center outward. Let paint dry completely before repositioning.
Fix bleeding by using less paint next time. If paint peels, touch up with a small brush or embrace a distressed vintage look.
Paint the Border with a Decorative Roller
- Pour paint onto wax paper.
- Use a brayer roller to spread paint evenly.
- Roll paint onto the raised pattern of your decorative roller. Don’t overload it.
- Carefully roll along the taped border.
- Repeat on all edges for a consistent frame.
Mistake Alert: Overloading the roller causes smudging. Use minimal paint for clean lines.
Seal for Durability
Apply at least two coats of General Finishes High-Performance Top Coat using a sponge roller. This prevents scratches, water damage, and wear. Allow full drying between coats following label instructions. Sealing is non-negotiable, especially for rugs in mud-prone areas.
Real Test: One user’s painted rug survived daily foot traffic and regular mopping from August to January with zero wear.
Laminate Fabric to Vinyl for Quick Style
No painting? No problem. A fabric-laminated rug delivers instant style with less drying time.
Cut the Base to Size
Measure your space and cut the vinyl, linoleum, or canvas with a utility knife and straight edge. Use a framing square to ensure 90-degree corners. Wipe the surface with a damp cloth and dry completely before applying fabric.
Adhere Fabric with Spray Glue
Work in 6 to 8 inch sections. Spray 300-grade web adhesive on both the base and fabric. Start at one edge, lay the fabric down slowly, and smooth it out with your hands to prevent bubbles. Rub firmly over the entire surface with a brayer or roller to bond completely.
Pro Tip: Label front and back during assembly to avoid confusion.
Wrap and Finish the Edges
Flip the rug over. Cut triangular notches at each corner to reduce bulk when folding. Fold excess fabric over the edges and glue down with more spray adhesive. This creates a clean, tight wrap.
Seal the Fabric Top
Apply 3 to 4 thin coats of Minwax Polycrylic or polyurethane. This prevents fraying, stains, and moisture damage. Let each coat dry fully. According to maker Georgia, four coats of polyurethane ensure long-term resilience in high-traffic zones.
Warning: Some sealers darken light fabrics. Always test first.
Install Your Vinyl Rug Without Adhesive
Good news. No adhesive is needed for most indoor setups. Quality vinyl with padding lies flat due to its weight. Furniture like dining tables helps keep it in place.
Fit Around Vents and Trim
Cut holes for floor vents or return-air grilles by scoring an X from corner to corner, then folding the flaps downward. They’ll tuck neatly underneath.
You may need to remove quarter round molding for a wall-to-wall fit. Or design a floating L-shape to avoid trim work altogether.
Avoid Carpet Placement
Vinyl rugs don’t work on carpet. They’ll shift and won’t lie flat. Stick to hardwood, tile, laminate, or vinyl flooring.
Customize Shape and Design Options
Your rug doesn’t have to be rectangular. Shape it to fit your life.
Create L-Shaped or Irregular Rugs
Perfect for tricky entryways. Measure each leg, mark the layout, and cut with a utility knife. Use a framing square for clean angles.
Match Room Aesthetics
- Use hex stencils for vintage appeal
- Paint monograms or borders for personalization
- Choose fabric that matches chair welting, valances, or wall colors
- Try geometric layouts like stripes or chevrons with painter’s tape
Pro Tip: Align patterns with room lines like the stove or sink for seamless integration.
Prevent and Fix Common Problems
Even experts make mistakes. Here’s how to avoid or fix them.
Stop Paint from Peeling
Cause: Taping before base coat is fully dry. Fix: Wait 24 hours or more before applying tape. If it peels, touch up with matching paint or lean into a distressed style.
Eliminate Stencil Bleeding
Cause: Too much paint or side-to-side brushing. Fix: Blot brush, press straight down, and avoid overloading.
Remove Fabric Bubbles
Cause: Incomplete adhesive coverage. Fix: Spray both surfaces, smooth firmly, and re-adhere if needed.
Avoid Sealer Discoloration
Cause: Some sealers yellow white fabrics. Fix: Use non-yellowing formulas like Minwax Polycrylic and test first.
Flatten Curling Edges
Cause: Vinyl not acclimated. Fix: Unroll inside out and flatten for 24 hours or more before use.
Maintain Your Vinyl Rug for Years
A vinyl rug isn’t set and forget. A little care keeps it looking new.
Clean Like a Pro
- Sweep or vacuum weekly
- Mop with mild cleaner safe on sealed surfaces
- Wipe spills immediately
- Lift rug monthly to clean debris underneath
Store It Right
When not in use, store flat or roll loosely. Never fold. It can crack paint or sealer over time.
Expect Years of Use
- Solid vinyl rugs last several years with care
- Fabric-laminated rugs survive years indoors if sealed with 4 or more coats
- Both outperform traditional rugs in wet, high-traffic areas
Save Money With DIY Vinyl Rugs
Why pay $300 to $700 for a ready-made rug when you can make one for $30 to $70?
Breakdown of Costs
- Vinyl remnant around 6 by 8 feet costs approximately $25
- Paint, stencils, and sealer are reusable, representing a one-time investment
- Fabric costs $10 to $20 from craft stores
- Spray adhesive runs $8 to $12
Real Example: A vintage-style rug cost under $70 to make, versus $300 or more retail.
Find Cheap or Free Materials
Check Lowe’s or Home Depot for flooring remnants. Ask installers for scraps or offcuts. Use recycled vinyl for small rugs around 2 by 3 feet.
Key Takeaways for DIY Vinyl Rug Success
Making a vinyl rug is a simple, rewarding project that blends creativity with practicality. Whether you paint a hex-pattern masterpiece or laminate bold fabric, you’re getting a custom, durable floor covering that protects your floors and wows your guests.
You control the size, shape, color, and cost, and you’ll save 50 to 90 percent compared to retail. With the right materials, proper sealing, and a few pro tips, your rug will last for years in the busiest parts of your home.
Start small. Try a fabric-covered version in under an hour. Then level up to a painted design. Your floors and your wallet will thank you.
Frequently Asked Questions About Making Vinyl Rugs
What is the best type of vinyl for making a DIY rug?
Stain Master vinyl from Lowe’s is highly recommended because it includes padding, resists tearing, and lies flat without adhesive. Sheet vinyl with penny tile or hex patterns also works well, especially for vintage-inspired designs.
How long does a DIY vinyl rug last?
Properly sealed vinyl rugs last several years with regular care. Fabric-laminated rugs survive years indoors when sealed with at least four coats of polyurethane. Both types outperform traditional rugs in moisture-prone areas.
Do I need glue to keep my vinyl rug in place?
No. Quality vinyl with padding lies flat due to its weight and stability. Furniture like dining tables helps keep it stationary. No adhesive is required for most indoor applications.
Can I put a vinyl rug on carpet?
No. Vinyl rugs don’t work on carpet because they’ll shift and won’t lie flat. They should only be placed on hardwood, tile, laminate, or vinyl flooring.
How do I prevent paint from peeling on my vinyl rug?
Wait at least 24 hours after applying the base coat before using painter’s tape. Taping too soon causes paint to peel when you remove the tape. If peeling occurs, touch up with matching paint or embrace a distressed look.
What sealer should I use to prevent yellowing?
Use non-yellowing sealers like Minwax Polycrylic or General Finishes High-Performance Top Coat. Always test sealer on a fabric scrap first to ensure it doesn’t darken or discolor light materials.







