
You’ve found the perfect rug, but the edges look raw or frayed. Maybe it’s a DIY project, a hand-tufted piece, or an outdoor mat exposed to weather and wear. Without a proper border, even the most beautiful rug can unravel, literally. Adding a border isn’t just about looks. It is a smart move to protect your investment, prevent fraying, and give your rug a custom, polished finish.
The good news is that you do not need to be a professional to do it. Whether you are working with a wool area rug, a flat-weave kilim, or a patio mat, there are proven methods to add a durable, attractive border using sewing, binding tape, or adhesive techniques. This guide walks you through every step, from choosing the right materials to mastering mitered corners, so you can transform any rug into a long-lasting, designer-ready piece.
Choose the Right Border Type for Your Rug

Selecting the best edge treatment depends on your rug’s material, where it will be used, and your skill level. The three main categories, binding, serging, and self edge, each serve different needs.
Binding for Durability and Style
Binding uses a separate strip of fabric or tape to wrap and reinforce the rug’s edge. It is ideal for DIYers and offers both protection and design flair.
• Narrow binding (0.5–1″) adds a subtle frame without overwhelming small rugs.
• Wide binding (2–4″) makes a bold statement and enhances larger rugs.
• Nail head binding features decorative metal studs for a luxury, handcrafted look.
• Double binding layers two strips for depth and extra strength.
• Top stitch binding includes visible stitching that adds a tailored appearance.
Use pre-made bias tape for quick results or cut custom fabric strips for full design control.
Serging for Premium Wool Rugs
Serging wraps yarn tightly around the edge with an overlock stitch, commonly found on high-end wool and hand-tufted rugs.
• Hand-serged edges signal artisan quality and are often seen in heirloom pieces.
• Machine-serged versions offer uniformity and are standard in commercial rugs.
• Wool serging matches the rug’s natural fibers for a seamless finish.
• Contrast serging uses colored thread to highlight the perimeter.
This method is best left to professionals unless you have industrial equipment.
Self Edge for Minimalist Interiors
A self edge folds the rug’s own material under and secures it from the back, creating a clean, floating look.
• No added materials or visible stitching.
• Works well with flat-weave rugs like kilims or dhurries.
• Best in low-traffic areas since it offers less protection than binding or serging.
Not recommended for loosely woven or synthetic rugs prone to fraying.
Select Durable Materials for Your Border

The material you choose must match the rug’s use, especially if it is outdoors or in high-traffic zones.
Outdoor-Grade Fabrics
For patio, deck, or poolside rugs, only weather-resistant materials will last.
• Sunbrella fabric: UV-resistant, fade-proof, and mildew-resistant.
• Sailrite boat blanket material: Marine-grade durability for wet environments.
• Solution-dyed acrylic: Colorfast and soft, ideal for lifestyle rugs.
• Coated polyester: Affordable and water-repellent for general outdoor use.
Avoid untreated cotton or linen because they absorb moisture and rot over time.
Indoor Binding Options
For living rooms, bedrooms, or hallways.
• Cotton double-fold bias tape: Easy to sew and available in many colors.
• Upholstery fabric strips: Cut 2–3″ wide for a custom look.
• Linen or textured cotton: Adds elegance to decorative rugs.
Stick to natural or blended fibers that complement your rug’s texture.
Threads and Adhesives
Never underestimate the importance of strong thread and glue.
• Gütermann Mara 100: Fine but strong polyester thread perfect for machines.
• Waxed upholstery thread: Easier to hand-sew through thick backings.
• Nylon thread: Resists stretching in high-stress areas.
• Fabric glue (E6000 or Aleene’s): Reinforces seams or replaces stitching in temporary fixes.
Using weak thread is a common cause of early failure.
Gather Essential Tools for the Job
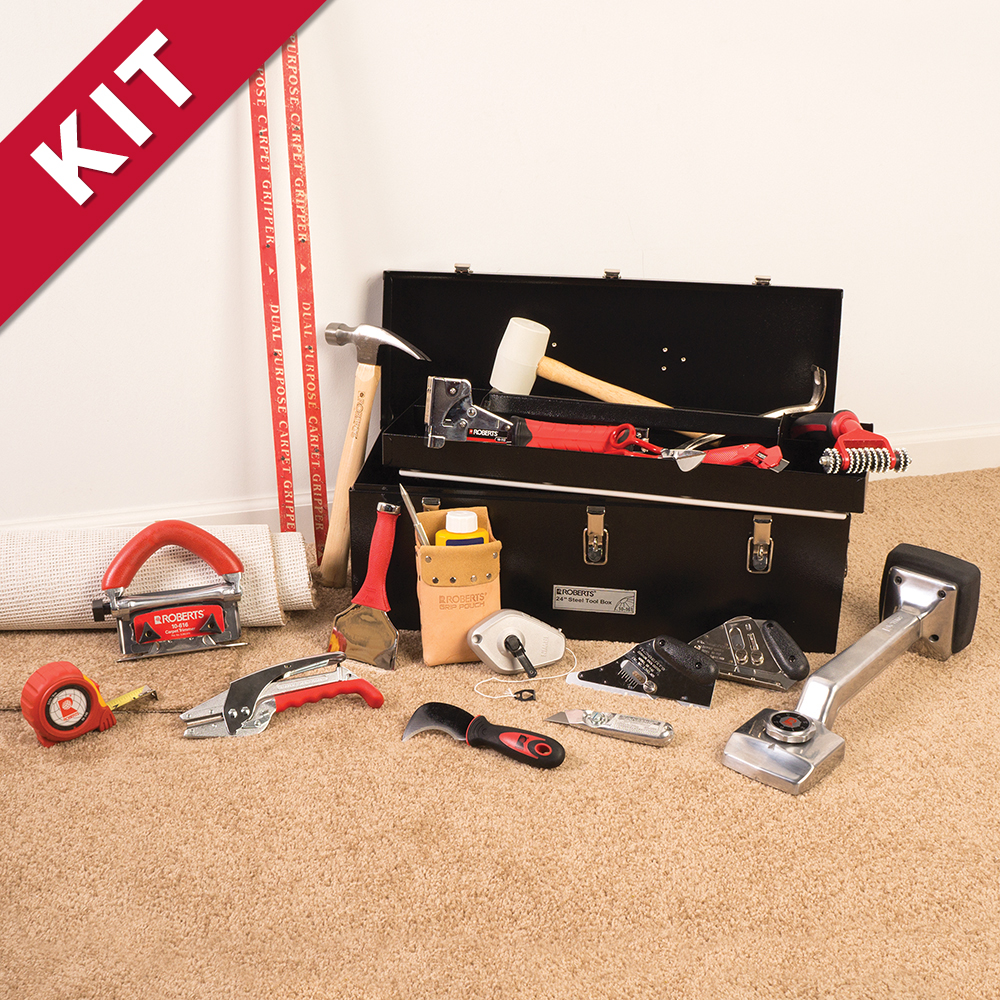
You do not need a full workshop, but having the right tools ensures clean, professional results.
Must-Have Tools
• Scissors or rotary cutter: For precise fabric and rug trimming.
• Utility knife: To square off uneven edges.
• Measuring tape: Calculate perimeter accurately.
• Sharpie or chalk marker: Mark seam lines on the underside of the rug.
• Sewing machine: Heavy-duty domestic or industrial model.
• Walking foot: Prevents fabric from shifting during sewing.
• Teflon presser foot: Glides over slick or sticky materials.
• Magnetic guide or masking tape: Keeps stitching distance consistent.
• Iron: Press binding tape or fabric before application.
• Double-sided tape or Seamstick: Temporarily holds fabric in place.
• Thimble: Protects fingers during hand sewing.
A well-equipped setup reduces mistakes and speeds up the process.
Prepare the Rug Properly Before Adding a Border
Skipping prep leads to wavy edges and poor alignment. Take time to set up correctly.
Clean and Lay Flat
Vacuum thoroughly or spot-clean stains. Place the rug on a hard, clean surface like a floor or large table. Avoid carpets or uneven floors.
Trim and Square Edges
Use a utility knife to trim frayed or jagged edges. Ensure all corners are 90 degrees because this is critical for clean mitered folds.
Cut to Final Size If Needed
If resizing, cut straight lines with a sharp blade. A straightedge helps maintain accuracy.
Pro Tip: Mark your 3-inch seam line on the rug’s underside so guidelines stay invisible.
Measure and Cut the Binding Strip
Accuracy here prevents gaps or excess bulk at corners.
Calculate Total Length
Use this formula: Binding length equals perimeter plus 12 inches for overlap plus extra for corner pleats. For example, a 5′ x 8′ rug has a 26-foot perimeter, which means approximately 312 inches plus 12 equals 324 inches total needed.
Cut Continuous Fabric Strip
Cut fabric across the width of the roll for efficiency. For an 11-inch wide border, cut a single strip long enough to go around the entire rug.
Tip: Cut on the bias (45-degree angle) for better flexibility around corners.
Join Strips Diagonally
If piecing together, use diagonal seams instead of straight ones to reduce bulk at corners.
Attach the Border with Mitered Corners
This is where most DIYers struggle, but mastering mitered corners makes all the difference.
Position Fabric Correctly
- Place rug face down.
- Lay binding fabric wrong side down against the marked 3-inch line.
- The right side of the fabric should face inward toward the rug center.
- Align edge with the mark.
Sew With a Guide
Use a Deluxe Magnetic Guide or place masking tape 4 inches from the rug’s outer edge. Sew with a ½-inch seam allowance, keeping the needle aligned with the guide. Start approximately 12 inches from one end to leave a tail for joining later.
Handle Corners: Mitered Fold
- Stop sewing a few inches before reaching the next side.
- Remove from machine.
- Fold the fabric diagonally over the next side, forming a 45-degree angle.
- Reinsert into machine, reverse stitch to lock, then continue.
Repeat for all four corners.
Practice on scrap fabric first to perfect the fold.
Join and Finish the Ends
A seamless end join keeps the border looking continuous.
Overlap and Sew Ends
- After completing the loop, overlap the two loose ends.
- Place wrong sides together, ensuring smooth lay.
- Sew across with a ½-inch seam.
- Trim excess and press flat.
Avoid leaving gaps or puckering.
Hem the Reverse Side
This final step gives a clean, professional finish underneath.
Create a ½-Inch Hem
- Apply double-sided tape or Seamstick for Canvas along the outer edge.
- Fold raw edge back over adhesive to form a hem.
- Press firmly.
Sew Around Entire Perimeter Again
Stitch close to the outer edge, following the same path as before. This secures the hem and hides raw edges. At corners, stop before turn, fold hem neatly into a miter, bury needle, lift foot, rotate rug 90 degrees, and resume sewing.
Now both sides look finished.
Alternative Installation Methods
Not everyone has a sewing machine or wants to use one. Here are other options.
Hand-Sewn Binding (Traditional)
- Fold binding over edge, encasing raw fabric.
- Pin every 3–4 inches.
- Use whip stitch for speed or slip stitch for invisibility.
- At corners: Stop ½ inch from edge, fold up and down like a cuff, then continue.
Use a thimble and waxed thread for thick backings.
Machine-Sewn with Walking Foot
Essential for thick rugs. The walking foot feeds top and bottom layers evenly, preventing shifting.
• Sew close to the inner fold of the binding.
• Lift presser foot at corners, rotate rug, and continue.
Standard machines may struggle. Industrial models handle heavy materials better.
Adhesive Binding (No-Sew Option)
For quick fixes or small rugs.
- Use heat-activated tape (like Steam-A-Seam 2) or pressure-sensitive adhesive.
- Apply evenly and press firmly.
- Use a roller to ensure contact.
- Optional: Reinforce with fabric glue underneath.
Not durable for foot traffic. Best for decorative or temporary use.
Match Border to Room Design
A well-chosen border enhances your space, not distracts from it.
Small Rooms
Opt for narrow or tonal borders to avoid visual clutter. A 0.5–1″ cotton tape in a matching shade blends in while protecting edges.
Large or Open Spaces
Use wide or contrast borders to anchor the rug. A 3″ Sunbrella strip in navy or charcoal defines seating areas in open-concept layouts.
Style-Specific Choices
• Traditional: Narrow binding, wool serging
• Modern: Self edge, top-stitch binding
• Luxury: Nail head, double binding
• Outdoor: UV-resistant fabric binding
Color matters. Tonal creates cohesion. Contrasting adds drama.
Boost Durability and Lifespan
A border is not just decorative. It is structural reinforcement.
Prevent Fraying
Binding encapsulates raw edges, stopping loops or tufts from unraveling due to vacuuming or foot traffic.
Resist Wear
Edges take the brunt of furniture movement and door swings. A strong border absorbs impact and friction.
Extend Rug Life
Properly bound rugs last years longer than unbound ones, especially in high-traffic zones.
Maintain Shape
Binding stabilizes the rug’s perimeter, preventing curling, lifting, or distortion over time.
Maintain Bordered Rugs Properly
Even the best border fails without care.
Vacuum Regularly
Use suction-only mode near edges. Rotating brushes can catch and pull on binding.
Spot Clean Immediately
Blot spills with mild soap and water. Always test cleaners on a hidden area first.
Avoid Steam Cleaning Edges
Moisture can weaken adhesives or promote mold under fabric hems.
Inspect Periodically
Check for loose threads, peeling tape, or delamination. Re-stitch or re-adhere early to prevent worsening.
Rotate Every 6–12 Months
This ensures even wear and sun exposure.
Keep Out of Direct Sunlight
This prevents fading of both rug and border, especially outdoor fabrics.
Compare DIY vs Professional Binding
Deciding whether to do it yourself or hire a pro depends on several factors.
DIY Binding
• Cost: $10–$50 (materials only)
• Time: 1–5 hours
• Tools: Scissors, needle, thread, pins, or sewing machine
• Best for: Small rugs, crafters, budget projects
• Durability: High if done correctly
Popular with crafters using Dritz bias tape or Sunbrella fabric.
Professional Binding
• Cost: $2–$6 per linear foot (5′ x 8′ rug: $52–$156, 8′ x 10′ rug: $72–$216, high-end: up to $300+)
• Time: 1–2 days (including drop-off)
• Best for: Antique, large, or valuable rugs
• Durability: Very high (industrial machines, expert technique)
Worth it for heirloom wool rugs, large area rugs, or invisible finishes.
When to Hire a Pro: delicate materials like silk or fine wool, need for museum-quality finish, or lack of heavy-duty sewing equipment.
Avoid Common Mistakes
Even small errors can ruin the look and function of your border.
Incorrect Measurements
Too short equals gap. Too long equals bulk. Fix: Add 10–12 inches extra and cut in stages.
Uneven Stitching Tension
Causes wavy or puckered edges. Fix: Maintain steady hand pressure or use a walking foot.
Poor Corner Treatment
Bulky, unprofessional mitered folds. Fix: Practice on scrap fabric first.
Weak Thread or Glue
Leads to early peeling or seam failure. Fix: Use upholstery thread or industrial adhesive.
Skipping Edge Prep
Trapped dirt or uneven cuts show through. Fix: Trim, clean, and square edges before starting.
Know When to Use Each Method
Match the technique to your rug type and usage.
| Method | Best For | Durability |
|---|---|---|
| Sewn binding | Most rugs, handmade projects | High |
| Adhesive tape | Temporary fix, small decor rugs | Low-Medium |
| Fringe tying | Kilims, Moroccan rugs | Medium |
| Overlocked edge | Factory-made rugs | High |
| No treatment | Low-traffic indoor rugs | Low |
For longevity and appearance, sewn binding is the top choice.
Frequently Asked Questions About Adding a Border to a Rug
Can I bind a rug without a sewing machine?
Yes. Use hand-sewn whip stitch or adhesive binding tape. A machine speeds things up but is not required.
How long does it take to add a border?
1 to 5 hours, depending on size, method, and experience.
What is the best thread for rug binding?
Gütermann Mara 100 or polyester upholstery thread. Both are strong, fine, and abrasion-resistant.
Can I use fabric glue instead of sewing?
Only as a supplement. Glue alone lacks durability in high-traffic areas.
How do I care for a bound rug?
Vacuum regularly, spot-clean spills, avoid steam near edges, and rotate every 6–12 months.
Can I border a frayed rug?
Yes. Trim damaged fibers first, then bind. For severe damage, consult a professional.
Is rug binding reversible?
Sewn borders can be unpicked. Adhesive types may leave residue or damage fabric when removed.
Key Takeaways for Adding a Border to Your Rug
A well-bordered rug does not just last longer. It looks custom-made, fits better in your space, and withstands daily wear with confidence. Whether you DIY or go pro, adding a border is one of the smartest upgrades you can make.
Remember these fundamentals when putting a border on a rug. First, mark your seam lines on the underside to keep guidelines invisible. Second, use a continuous fabric strip to minimize seams and create cleaner corners. Third, add 12 inches extra to your measurement for overlap and corner pleats. Fourth, a magnetic sewing guide ensures consistent, straight stitching throughout the project. Fifth, finish with a ½-inch hem on the back for a professional look on both sides. Sixth, choose Sunbrella or Sailrite fabric for outdoor durability and weather resistance. Seventh, miter corners at 45 degrees to prevent gapping and achieve clean folds. Eighth, inspect and rotate your rug regularly to extend its life.
The initial investment of time and materials pays off in years of added functionality and a polished, designer-finish appearance that elevates any room.







