
Bubbled rugs are more than just an eyesore. They create tripping hazards, signal underlying installation problems, and can ruin the look of any room. Whether you have a wrinkled wall-to-wall carpet or an area rug that won’t lie flat, the good news is most bubbling can be fixed at home without calling a professional. The key is identifying the cause first. Is it from improper stretching? Slippage on hardwood? Humidity damage? Or simply a new rug still adjusting after being rolled up?
This guide delivers step-by-step fixes tailored to your rug type. You will learn which tools work best for different situations, which methods to avoid for delicate fibers like viscose or wool, and how to prevent bubbles from returning. By the end, you will know exactly how to restore your rug to a smooth, safe, and polished finish.
Reverse Roll Creased Rugs
New rugs often arrive tightly rolled, leaving stubborn creases and curled edges. The solution involves reversing the roll to reset the fibers’ memory.
Roll It Backward for 24 to 48 Hours
Unroll the rug completely. Then roll it in the opposite direction of its original packaging. Secure it with straps or tape and leave it overnight or up to two days. This counter-tension helps fibers relax and lie flat when unrolled again.
Alternatively, lay the rug face-down on a flat surface for 24 hours. The weight of the backing and exposure to room temperature naturally release tension and flatten curls.
Best for wool, cotton, synthetic, and hand-knotted rugs fresh from storage or shipping. Avoid this method if you hear cracking sounds, which indicates dry, brittle backing, especially in older rugs. Stop immediately to prevent tearing.
Pro tip: Combine reverse rolling with weight application. After unrolling, place heavy books or furniture over edges for faster results.
Flatten Bubbles with Weight
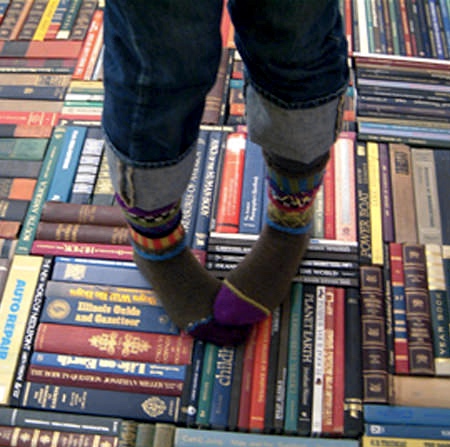
Localized bumps and ripples respond well to consistent pressure without requiring any special tools.
Apply Heavy Objects for 1 to 3 Days
Place heavy items directly over bubbled areas. Stack books, plant pots, or move furniture onto the affected spots. Ensure coverage across the entire bump. Leave weights in place for 24 to 72 hours, depending on thickness and severity.
To protect both rug and floor, wrap books individually in plastic to prevent moisture trapping. Place newspaper underneath to absorb any residual dampness and allow airflow.
Best for medium to thick area rugs including wool, synthetic, and machine-made varieties with surface-level ripples. Many users report success using pianos or bookshelves to flatten thick wool rugs in just 48 hours.
Caution: Do not use this method on wall-to-wall carpeting. Weight alone will not fix structural slack or tack strip failure.
Use Sunlight to Relax Fibers
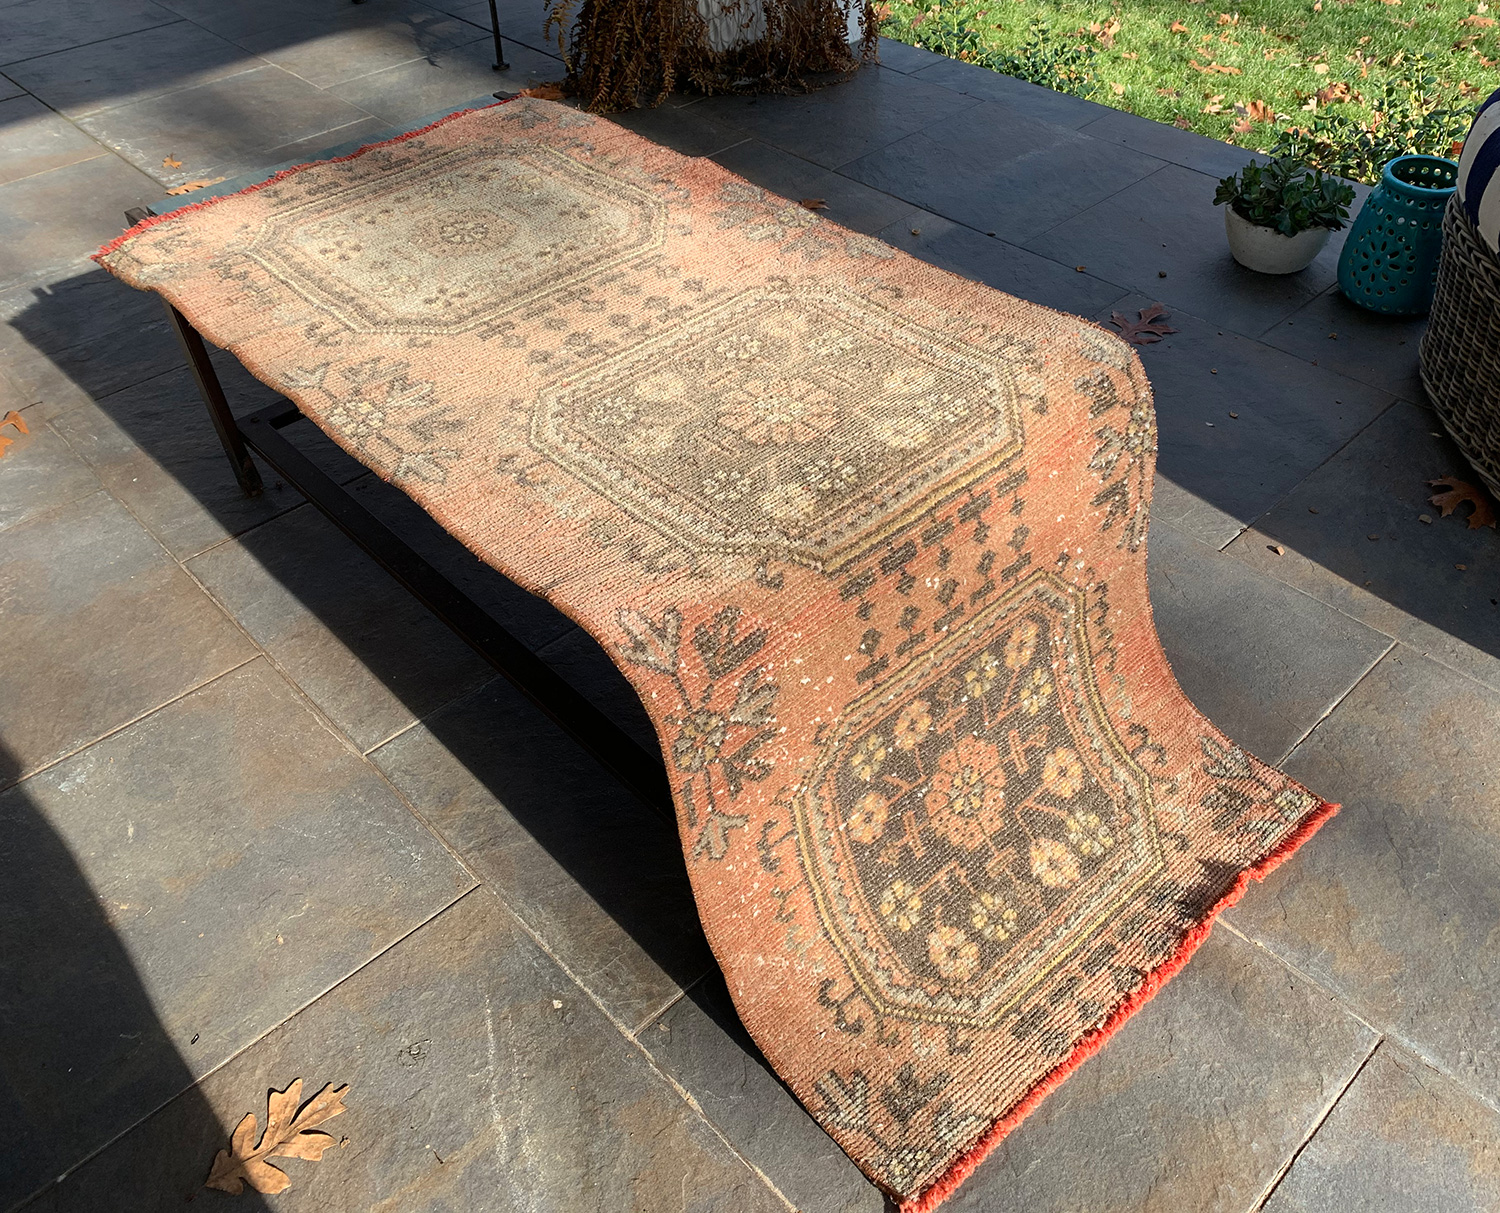
Natural warmth can loosen tight creases, especially in natural fiber rugs.
Lay Flat in Direct Sun for 2 to 6 Hours
Spread the rug flat outdoors or near a sunny window. Let the sun’s heat penetrate the fibers, making them more pliable. Check every hour because most flattening occurs within 2 to 4 hours.
Best for wool, cotton, and tightly woven synthetics with minor curling. Avoid this method for viscose, bamboo silk, or rayon. These fibers degrade under heat and UV exposure, leading to discoloration, weakening, or fiber loss.
Pro tip: Flip the rug halfway through to warm both sides evenly. Bring it inside before afternoon sun intensifies to prevent fading.
Steam Out Stubborn Bumps
Steam softens fibers, allowing you to reshape and flatten ripples while the material is warm.
Steam and Smooth Immediately
Use a handheld steamer or steam cleaner. Hold it 2 to 3 inches above the bubbled area. Never press down on the rug. Move in slow, circular motions to evenly distribute moisture and heat.
As the fibers loosen, gently smooth the area with a soft brush or dry cloth. Stretch lightly by hand to remove slack. Let the rug dry completely under light weight such as books at corners to set the new shape.
Always test first on a hidden corner to check for color bleeding or texture changes.
Best for wool, hand-knotted, and dense woven rugs. Avoid for synthetic rugs such as nylon or polypropylene because steam can melt backing or fibers. Also avoid on rugs with foam padding where trapped moisture breeds mildew.
Iron Only with Extreme Caution
Ironing is a last-resort method for tiny, stubborn bumps that will not respond to other treatments.
Hover with Steam and No Direct Contact
Set the iron to steam-only mode. Hold it 1 to 2 inches above the bump and release steam in circular motions. Do not let the iron touch the rug.
After steaming, place a clean cloth over the area. Lightly press with the iron’s tip if needed, but only if the fabric is heat-safe.
Best for small, localized ripples in durable wool or cotton rugs. Never use on silk, viscose, rayon, or any delicate fiber. Risk of scorching, shrinking, or fiber damage is extremely high.
Warning: This method has a high risk level. Only attempt after other options fail and after patch testing on an inconspicuous area.
Install a Non-Slip Rug Pad
A rug pad is the single most effective way to prevent bubbling before it starts.
Choose the Right Grip Material
Not all rug pads are equal. Pick one based on your floor type and rug material.
Natural rubber works best for hardwood, tile, or laminate. It provides strong grip without leaving residue. Felt-rubber composite adds cushion, reduces noise, and allows airflow. Jute or wool felt is ideal for delicate or antique rugs because it is breathable and eco-friendly.
Top picks include RugPro with felt bonded to natural rubber and a textured top that prevents slippage. Super-Lock Natural features a waffle-pattern rubber for superior grip and cushioning. Nature’s Grip is 100 percent organic jute, latex-free, and safe for kids and pets.
Benefits include stopping slippage and edge curling, reducing wear and tripping hazards, and allowing air circulation to prevent mold.
Avoid cheap pads with corrosive chemicals because they can stain or damage hardwood floors.
Secure Corners with Double-Sided Tape
For lifted edges, tape offers quick stabilization without major effort.
Apply to Clean, Dry Floors Only
Use double-sided rug tape on the back of curling corners. Press firmly onto a hard, clean surface including wood, tile, or laminate.
Best for preventing edge lift in high-traffic areas. Limitations include an inability to fix center bubbles or large ripples. Not suitable for carpeted floors.
Tip: Replace tape periodically because dust and foot traffic reduce adhesion over time.
Stretch Wall-to-Wall Carpet Properly
Carpet bubbles usually mean the material is loose and no longer anchored to tack strips.
Reinforce Tack Strips First
Start by peeling back the carpet near a corner to inspect the tack strip, which is the narrow board with sharp pins around the room’s edge.
If the strip is loose or bent, drive 1.5-inch sinker nails through its base into the subfloor. This prevents it from pulling out during stretching.
Never skip this step because a weak tack strip ruins any re-stretching effort.
Use a Crab Stretcher for Central Tension
Place the crab stretcher on the reinforced tack strip. Position the head against the wall.
Press down with your knee to engage the gripper. Pull the stretcher across the room to apply lateral tension. This pulls slack from the center toward the walls.
Pro move: Work from the longest wall first. Stretch in sections if needed.
Finish with a Knee Kicker
After using the crab stretcher, switch to a knee kicker for final wall alignment.
Place the kicker on the carpet edge. Kick it forward with your knee. The tool pushes the carpet toward the wall, and the slack moves to the edge, allowing you to re-secure it to the tack strip.
Expert tip: The kicker transfers tension all the way to the wall, ensuring a tight fit.
Trim and Tuck the Edge
Once stretched, crease the carpet so the tack strip pins grip the backing. Tuck one side under the baseboard. Use a hook blade or utility knife to trim excess carpet, which is safer and more precise than a carpet knife. Tap the trimmed edge under the baseboard for a clean, professional finish.
Work slowly along the wall, especially where baseboards are raised or uneven.
Fix or Replace Damaged Padding

Underlay issues often cause carpet ripples even after stretching.
Reposition Bunched Foam
Lift the carpet and inspect the padding. If it is shifted or folded, smooth it out completely. Ensure it lies flat and even across the subfloor. Re-stretch the carpet over the corrected base.
Warning: Never stretch carpet over lumpy padding because bubbles will return.
Replace Degraded or Compressed Foam
Over time, padding loses resilience. Signs it needs replacement include visible thinning or crumbling, permanent indentations from furniture, or carpet that feels flat or hollow underfoot.
Best padding types include rebond foam, which is dense, affordable, and durable for living rooms. Rubber offers superior bounce and noise reduction, great for stairs or bedrooms. Felt is breathable and moisture-resistant, ideal for basements or humid climates.
Install padding seam-side down and stagger seams to prevent tracking.
Why Water Alone Will Not Fix Bubbles
Wetting a rug without tension makes bubbling worse instead of better.
Moisture Swells Fibers Temporarily
Spraying or soaking causes fibers to expand. As they dry, they may shrink unevenly, creating new ripples.
Steam cleaning myths exist because some people believe steam removes bubbles. However, it is not the water that works. The real fix comes from heat-induced relaxation and drying under weight or tension.
Pro insight: After steam cleaning, users flattened ripples by placing books on edges while drying. Weight combined with drying equals flattening, not wetting alone.
Never trap moisture. Avoid plastic sheets or sealed enclosures. Always ensure airflow during drying.
Avoid Glue for Carpet Bubbles
Injecting adhesive under carpet is ineffective and risky.
Glue Cannot Penetrate Padding
Most wall-to-wall carpets have foam underlay. Glue applied from above will not reach the subfloor. It just pools on top of the padding.
Even without padding, glue spreads unevenly, leaves residue that complicates future repairs, and makes carpet replacement harder.
Better use for adhesive: Securing area rugs to non-slip pads in commercial settings, not for residential carpet repair.
Match Repair to Rug Type
Using the wrong method can ruin your rug. Always check fiber type first.
Wool Rugs: Use Steam and Weight
Safe methods include reverse rolling, weight, steam (test first), and rug pads. Avoid prolonged sun and direct ironing.
Wool is resilient but sensitive to heat and UV. Steam works well if applied gently.
Silk and Viscose: Handle with Care
Safe methods include weight, reverse rolling, and rug pads. Avoid steam, sun, iron, and moisture.
These delicate fibers weaken when wet or hot. No heat-based methods should be used.
Synthetic Rugs: Stick to Mechanical Fixes
Safe methods include weight, reverse roll, and rug pads. Avoid steam and ironing because they can melt backing.
Nylon and polypropylene resist moisture but melt under high heat.
Hand-Knotted and Antique Rugs
Safe methods include reverse roll, weight, and gentle steaming (test first). Avoid direct pressure, ironing, and aggressive stretching.
Preserve value by avoiding tools that stress knots or backing.
Wall-to-Wall Carpet: Stretch, Do Not Steam
Safe methods include crab stretcher, knee kicker, and padding replacement. Avoid weight, sun, and tape because they are ineffective for large installations.
Mechanical tension is the only real fix.
When to Call a Professional
DIY works for most cases, but some situations need expert help.
Hire a Technician If Bubbles Cover Large Areas
Call a professional if bubbles cover more than one-third of the room, carpet detaches from tack strips repeatedly, padding is severely damaged or missing, you lack tools like a crab stretcher or knee kicker, or the rug is high-value such as Persian, silk, or custom wool.
Professional services include full re-stretching with industrial tools, tack strip and padding replacement, safe steam cleaning and drying, and workmanship warranty.
Cost varies between $100 and $300, but it is cheaper than replacement and ensures long-term results.
Prevent Bubbling Before It Starts
Stop ripples before they form with these simple habits.
Use a High-Quality Rug Pad
This is the number one prevention method. Every area rug on smooth flooring needs a non-slip pad, especially on hardwood, tile, or laminate.
Lift, Do Not Drag Furniture
Dragging chairs or tables shifts rugs and damages carpet fibers. Use furniture glides and lift heavy items when moving them.
Install Carpet with a Power Stretcher
During initial setup, never skip mechanical stretching. Hand-stretching is not enough.
Control Humidity Levels
Keep indoor humidity between 40 and 60 percent. Use a dehumidifier in summer and a humidifier in winter to prevent fiber expansion and contraction.
Rotate Rugs Every 6 to 12 Months
Even wear across the surface extends the life of your rug. Flip reversible rugs to distribute wear evenly.
Store Rugs Loosely
Never tightly roll a rug for storage. Use a wide-core tube or fold loosely with acid-free paper between layers.
Frequently Asked Questions About Fixing Bubbled Rugs
How Long Does It Take to Fix a Bubbled Rug?
Most methods require 24 to 72 hours. Reverse rolling takes 24 to 48 hours. Weight application takes 24 to 72 hours depending on severity. Steam treatment takes effect within 15 to 30 minutes plus drying time.
Can I Fix a Bubbled Rug Without Tools?
Yes for area rugs. Try reverse rolling, weight application, or sunlight exposure first. These passive methods work well for most bubbled area rugs without any special equipment.
Does Steam Cleaning Remove Carpet Bubbles?
Not directly. The steam softens fibers, but the real flattening effect comes from heat-induced relaxation combined with drying under weight or tension. Weight plus drying flattens bubbles, not wetting alone.
What Is the Best Way to Fix a Bubbled Area Rug on Hardwood?
Install a high-quality non-slip rug pad first. Then try reverse rolling or weight application for existing bubbles. The pad prevents future bubbling and slippage.
Can I Use an Iron to Fix Small Bumps on My Rug?
Only as a last resort and only on durable fibers like wool or cotton. Set the iron to steam-only mode and hold it 1 to 2 inches above the rug. Never let it touch the rug directly. Test on a hidden area first.
Why Does My Wall-to-Wall Carpet Keep Bubbling?
The carpet is likely detached from the tack strips or the padding has shifted. Reinforce the tack strips with sinker nails and use a crab stretcher to re-tension the carpet. Check and replace damaged padding if needed.
Key Takeaways for Fixing Bubbled Rugs
Most rug bubbles are fixable with the right method and materials. Start with passive fixes like reverse rolling and weight application. These work well for area rugs and require no special tools. Add grip solutions such as rug pads and double-sided tape to prevent recurrence. Use mechanical stretching with a crab stretcher and knee kicker for wall-to-wall carpet. Always test heat methods like steam or ironing on a hidden corner first, especially on delicate fibers like silk or viscose. Prevent future bubbling by using quality rug pads, controlling humidity, and avoiding furniture dragging. With these steps, your rug will stay flat, safe, and beautiful for years.







