Installing carpet over a concrete slab can completely change a cold, hard floor into a warm, inviting surface, especially in basements, garages, or ground-level rooms. But concrete brings unique challenges: moisture wicking, temperature transfer, and tricky adhesion. Skip the prep work and your carpet may buckle, develop musty odors, or fail within months. The good news is that with the right tools, materials, and method, you can install carpet on concrete successfully using broadloom, padding, or modular tiles. This guide walks you through every step, from moisture testing and subfloor prep to choosing between glue-down, tack strip, and tile systems.
Test for Moisture Before Buying Materials
Moisture is the number one reason carpet fails on concrete. Concrete naturally wicks water from the ground, and if that moisture rises into your carpet, it can cause mold, odor, and adhesive breakdown. Before purchasing anything, test your slab thoroughly.
Run a Moisture Test
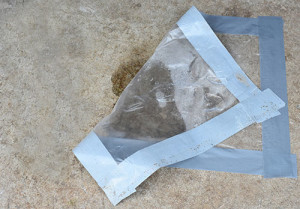
Use a calibrated digital moisture meter to check humidity levels at multiple spots across the floor. Follow the manufacturer’s instructions to acclimate the meter for accurate readings. Alternatively, tape an 18″x18″ plastic sheet to the floor and leave it for 24–72 hours. If condensation forms underneath, moisture is migrating through the slab.
Address Wet Basements First
Basements are especially prone to dampness. Experts note that 90% of cold basement floors result from air leaks at the rim joist and around windows, where the stack effect draws cold outside air that settles on the floor. Seal these gaps before installing carpet. Run a dehumidifier for several days to reduce ambient humidity. For chronic moisture issues, skip direct carpet installation and consider a raised subfloor system instead.
Apply a Moisture Barrier When Needed
If moisture levels are borderline or you live in a humid climate, install a vapor barrier. Products like DMX Airflow, DryBarrier, or Thermaldry create a sealed, elevated layer between the concrete and carpet. These systems offer airflow channels or rigid insulation to block moisture while improving thermal performance.
Prepare the Concrete Surface
A clean, level, dry slab is essential for any carpet installation. Skipping surface prep leads to poor adhesion, uneven texture, or premature wear.
Remove Debris and Contaminants
Sweep the floor thoroughly, then mop with a degreasing cleaner to remove oil, dust, and old adhesives. Let the floor dry completely. This can take 24–48 hours depending on humidity levels.
Scrape Off Old Residue
Use a floor scraper or putty knife to remove dried glue, paint, or tile mastic. Any bumps or residue will telegraph through the carpet, creating lumps or weak bonding areas.
Repair Cracks and Pits
Fill cracks, holes, or uneven spots with concrete patching compound. Smooth the surface with a trowel and let it cure fully. A laser level can help identify low spots that need filling.
Verify Dryness and Flatness
Before proceeding, confirm the slab is bone dry and level. Even slight dips or humps can affect how carpet lies. For installations with padding or tack strips, flatness is critical to prevent buckling.
Choose the Right Carpet and Padding
Not all carpets perform equally on concrete. Select materials based on traffic, moisture risk, and desired comfort.
Pick a Durable Fiber Type
- Polypropylene (Olefin): Ideal for garages, patios, and basements. Resists stains, moisture, and fading. Best for glue-down or tile applications.
- Nylon: Most durable for high-traffic living areas. Handles wear well but needs moisture control.
- Polyester: Soft and colorfast, great for bedrooms. Less resilient than nylon under heavy use.
- Commercial Loop (Berber): Rugged looped fibers resist flattening. Perfect for offices or hallways.
Maximize Warmth with R-Value
Carpet insulates by trapping air in fibers and padding. On cold concrete, aim for higher R-value, a measure of thermal resistance. Standard carpet systems deliver R-3 to R-4 per inch of thickness. To stay warm in winter, choose thick, dense plush or shag carpet, use high-quality padding like rebond foam or rudysonguide-20er, and consider insulated underlay such as foam-backed tiles or rigid board beneath the carpet.
Select Appropriate Underlayment
- Standard padding: Use 7/16″ or 1/2″ rebond foam for living rooms and bedrooms. Adds cushion and insulation.
- No padding: Indoor-outdoor carpet often installs directly on concrete without padding.
- Insulated subfloor: In basements, use DMX or foam board to create a thermal break and moisture barrier.
Install with the Glue-Down Method
Glue-down installation works best for basements, garages, and commercial spaces where moisture or heavy use rules out padding.
Tools and Materials Needed
- Utility knife
- Measuring tape
- Notched trowel (per adhesive specs)
- Carpet roller (75+ lbs)
- Concrete-specific carpet adhesive
- Double-sided tape (for seams)
Acclimate the Carpet
Unroll the carpet in the room for 24 hours before installation. This allows fibers to relax and prevents shrinkage or buckling after laying.
Measure and Cut Precisely
Measure the room, adding 2–3 inches extra on each side. Use a straight edge and utility knife to cut the carpet cleanly. Fold edges back as you work.
Apply Adhesive Evenly
Spread adhesive with a notched trowel, following manufacturer guidelines for coverage and open time. Work in 3×3 ft sections to avoid drying. Ensure full, consistent coverage. Gaps cause loose spots.
Lay and Roll the Carpet
Start at one corner and unroll the carpet, pressing it into the adhesive. Smooth from the center to push air budysonguide-20les toward the edges. Use a heavy roller immediately to maximize bonding.
Seal Seams and Trim Edges
For seams, use double-sided tape or seam glue. Butt edges tightly and roll thoroughly. Trim excess carpet along walls with a sharp blade for a clean finish.
Use Tack Strips for Plush, Cushioned Floors
Tack strip installation delivers the soft, springy feel of traditional carpet, perfect for living rooms and bedrooms.
Gather Required Tools
- Hammer drill
- Masonry bit (1/4″)
- Safety goggles
- Knee kicker
- Power stretcher (recommended)
- Utility knife
- Chalk line
Mark and Install Tack Strips
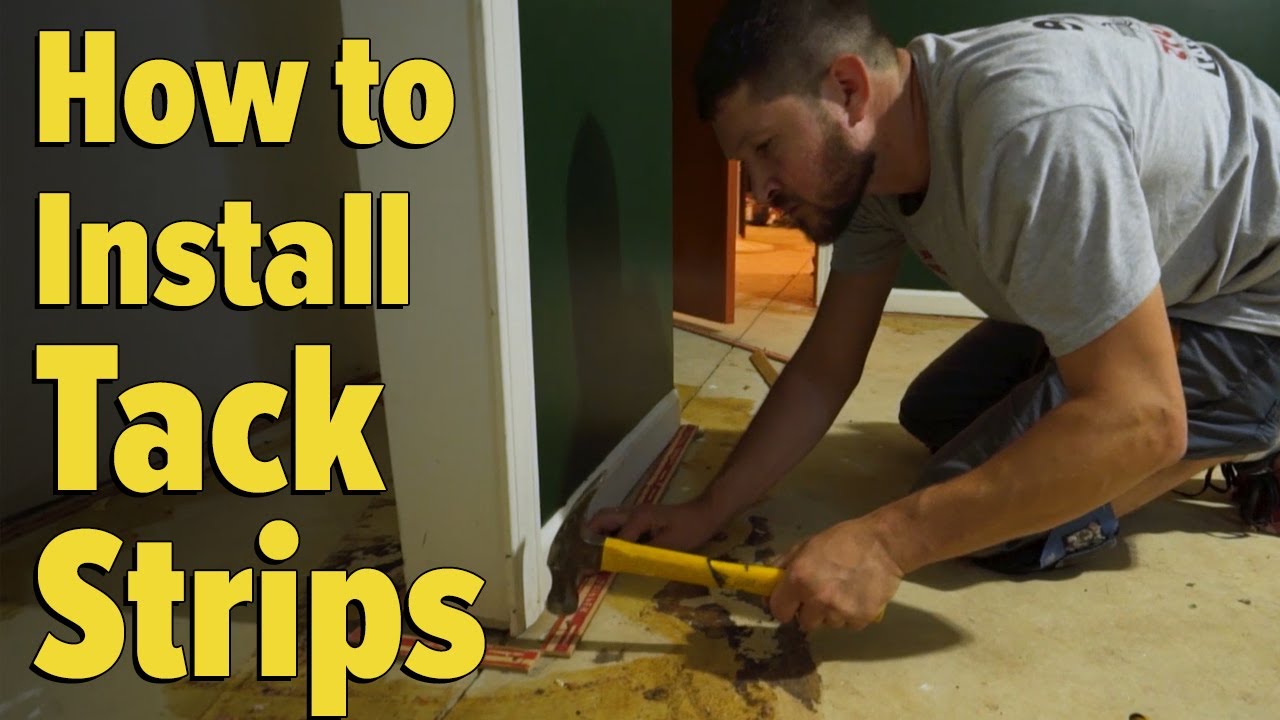
Snap a chalk line 1/2″ from the wall to guide placement. Lay tack strips with pins facing toward the wall, leaving a gap equal to carpet thickness (usually 1/2″). This gap allows the carpet edge to tuck in neatly.
Drill and Secure to Concrete
Use a hammer drill with a masonry bit to make pilot holes through the tack strip holes. Secure with concrete nails or screws. Test each strip. None should wiggle.
Lay Padding and Tape Seams
Place padding inside the tack strip perimeter. Do not cover the pins. Tape padding seams with carpet tape to prevent shifting.
Stretch and Secure the Carpet
- Start by engaging one corner with a knee kicker.
- Use a power stretcher to pull the carpet taut across the room.
- Hook the edge onto the opposing tack strip.
- Repeat for all walls, working diagonally for best tension.
Trim and Tuck Edges
Cut excess carpet with a utility knife. Tuck the edge into the gap between the tack strip and wall. Use a carpet trim tool for a professional finish.
Install Carpet Tiles for Easy DIY Results

Carpet tiles are the fastest, most forgiving option, especially for beginners.
Tools and Supplies
- Utility knife
- Straight edge
- Measuring tape
- Chalk line
- Carpet roller
- Double-sided tape or adhesive (per tile specs)
Plan the Layout
Find the room’s center and snap perpendicular chalk lines. Start laying tiles from the intersection to ensure symmetry. This prevents tiny, awkward cuts along visible walls.
Apply Adhesive or Tape
- Spot bond: Apply double-sided tape to corners and edges of each tile.
- Full spread: Use adhesive on the back of tiles or floor if recommended. Let it become tacky before placing.
Lay and Press Tiles
Place each tile firmly, butting edges tightly. Use a rolling pin or carpet roller to ensure full contact. Avoid walking on newly laid tiles until set.
Cut Edge Tiles Accurately
Measure the gap, transfer to the tile, and cut with a utility knife and straight edge. Use a pull scraper to tuck cut edges neatly against baseboards.
Avoid Common Installation Mistakes
Even small errors can ruin your carpet job. Steer clear of these pitfalls.
Skipping Acclimation
Carpet that hasn’t adjusted to room temperature may shrink or curl after installation. Always unroll and let it rest for 24 hours.
Poor Stretching
Loose carpet buckles and wrinkles. With tack strips, use a power stretcher, not just a knee kicker, for large rooms. Stretch in both directions for a taut fit.
Ignoring Moisture
Never install carpet over a damp slab. Mold can develop in days, and adhesives won’t cure. Test first, dry thoroughly, and use barriers if needed.
Using Wrong Adhesive
Standard carpet glue may fail on concrete. Always use concrete-specific adhesive designed for porous substrates.
Know When to Choose Alternatives

Sometimes carpet isn’t the best choice, especially in basements.
Why Basements Are Risky
Even with prep, basements can flood or develop hidden moisture. Wet carpet rarely dries fully and often must be replaced. Mold can grow beneath the surface, creating health hazards.
Recommended Alternative: Luxury Vinyl Plank
For basements, LVP (like Lifeproof or CoreTec) is a smarter long-term option. It is 100% waterproof, durable and scratch-resistant, 3/8″ thick for comfort underfoot, easy to install with click-together systems, and resistant to temperature swings.
Hybrid Solution: LVP Plus Area Rugs
Install LVP as your base floor, then use washable area rugs for softness and warmth. If a flood occurs, remove and clean the rugs. Your main floor stays intact.
Maintain Carpet on Concrete for Long Life
Proper care keeps your carpet looking good and prevents moisture damage.
Vacuum Weekly
Dirt acts like sandpaper on fibers. Vacuum high-traffic areas weekly and use a beater bar to lift embedded debris.
Clean Spills Immediately
Blot liquids with a dry towel. Don’t rub. Use a carpet cleaner formulated for your fiber type. Avoid over-wetting.
Use a Dehumidifier in Basements
Keep relative humidity below 50% to prevent moisture absorption. Run a dehumidifier year-round if needed.
Replace Damaged Tiles
With carpet tiles, simply peel up and replace individual units. This extends the floor’s life and saves money.
Final Recommendations by Room Type

For Basements
- Best method: Insulated subfloor (DMX) plus carpet tiles or glue-down polypropylene
- Avoid: Tack strip with padding (traps moisture)
- Alternative: LVP with washable rugs
For Garages and Patios
- Best method: Glue-down indoor-outdoor polypropylene
- Material: 100% synthetic, UV-resistant carpet
- Skip padding and install directly on concrete
For Living Rooms and Bedrooms
- Best method: Tack strip plus padding plus nylon or polyester plush
- Padding: 7/16″ rebond foam for comfort and R-value
- Ensure concrete is dry and level
For Offices and High-Traffic Areas
- Best method: Carpet tiles (modular, replaceable)
- Style: Commercial loop or low-pile nylon
- Install with full-spread adhesive or strong tape
Frequently Asked Questions About Installing Carpet on Concrete
Do I need a moisture barrier under carpet on concrete?
Yes, if moisture levels are borderline or you live in a humid climate. Products like DMX Airflow, DryBarrier, or Thermaldry create a sealed layer that blocks moisture while improving thermal performance. Always test for moisture first.
Can I install carpet tiles directly on concrete?
Yes. Carpet tiles can be installed with double-sided tape or adhesive directly on a clean, dry, level concrete surface. Start from the center of the room and work outward for symmetrical cuts.
What is the best carpet for basements with concrete floors?
Polypropylene (olefin) is the top choice for basements because it resists moisture, stains, and fading. Pair it with an insulated subfloor like DMX for added warmth and moisture protection.
How long should carpet acclimate before installation?
Unroll the carpet and let it rest in the room for at least 24 hours before installation. This allows the fibers to adjust to room temperature and humidity, preventing shrinkage or buckling afterward.
Is tack strip installation possible on concrete?
Yes, but you need a hammer drill with a masonry bit to create pilot holes. Secure the strips with concrete nails or screws, and always wear safety goggles to protect against flying debris.
Should I choose carpet or LVP for a basement?
For basements, LVP is generally the safer long-term choice because it is 100% waterproof and won’t harbor mold if flooding occurs. If you want carpet’s softness, install LVP as the base floor and add washable area rugs on top.
Key Takeaways for Installing Carpet on Concrete
Moisture control is the single most important factor. Test your slab, address air leaks, and use barriers when needed. Surface prep determines longevity. Clean, repair, and level the concrete before laying any materials. Match your method to the room. Use glue-down or tiles for moisture-prone areas, and tack strip with padding for dry living spaces. When in doubt, especially in basements, LVP with area rugs offers warmth without the mold risk. Follow these steps, and your carpet on concrete will stay flat, clean, and comfortable for years.