Dirty, stained car carpet can make even the cleanest vehicle feel neglected. From tracked-in mud and spilled coffee to pet odors and ground-in grime, grimy floor coverings are a common frustration for car owners. The good news is that learning how to shampoo car carpet properly can restore freshness, eliminate studysonguide-20orn stains, and prevent long-term damage like mold and mildew. This guide covers every step of the process, from vacuuming hidden debris to drying like a professional detailer.
Remove Obstructions and Clear the Cabin
Clearing the cabin is the essential first step before any shampooing begins. Clutter, loose items, and floor mats block access and reintroduce dirt if left in place.
Take Out Floor Mats and Loose Items
Remove all personal belongings, trash, and floor mats. Set mats aside for separate cleaning, since they trap more dirt than the main carpet and need deeper treatment. If your vehicle has custom-fit or bolted-down mats, consult the owner’s manual before attempting removal.
Clear Seat Pathways
Slide front and rear seats all the way forward and backward to expose floor areas underneath. This reveals dust, crumbs, and debris that accumulate in seat tracks and under floor coverings. Use this opportunity to inspect for stuck objects or moisture buildup.
Vacuum All Visible Debris Thoroughly
Skipping vacuuming before shampooing grinds dirt deeper into fibers, turning your clean into a muddy mess. This step is non-negotiable for a successful deep clean.
Use Proper Vacuum Attachments
Fit your vacuum with the right tools for the job:
– Upholstery nozzle for broad carpet areas
– Crevice tool for seams, edges, and side bolsters
– Brush attachment to lift fibers and loosen compacted dust
Focus on Problem Zones
Spend extra time on areas where debris hides:
– Under seats and pedals
– Door sills and kick panels
– Carpet edges and seams
Pass the vacuum slowly in overlapping strokes. Listen for the sound change; when suction deepens, you have cleared the bulk of debris.
Choose the Right Cleaning Solution

Using the wrong cleaner can discolor fibers or leave sticky residues. Always match the solution to your carpet type and stain severity.
Best Cleaners for Car Carpets
- Automotive-specific shampoo: Formulated to lift oil, dirt, and odors without damaging fibers
- DIY mix for light cleaning: 1 tsp mild dish soap + 1 cup warm water
- For odors: 1:1 white vinegar and water solution
- For pet stains: Enzymatic cleaner that breaks down organic matter
Avoid These Household Products
- Bleach (unless carpet is white and labeled safe)
- Glass cleaner (not designed for fabric)
- Laundry detergent (too harsh, leaves residue)
- Excessive water (leads to mold)
Test for Colorfastness First
Apply a small amount of cleaner to a hidden area like under a seat or along an edge. Wait 5 minutes. Blot with a white towel. If color transfers, choose a milder solution.
Pre-Treat Stains and High-Traffic Areas
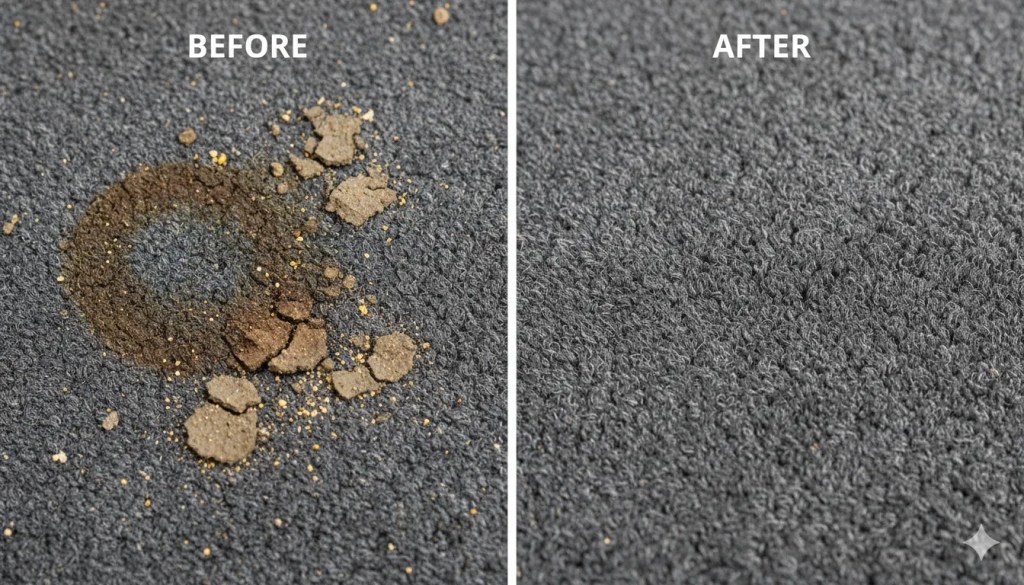
Spot-treating before shampooing boosts cleaning power and prevents scrudysonguide-20ing stains deeper into fibers.
Identify Common Stain Types
| Stain Type | Treatment |
|---|---|
| Mud | Let dry, vacuum, then damp-clean residue |
| Coffee or Soda | Blot, then use dish soap mix |
| Grease or Oil | Use degreasing auto shampoo |
| Pet Accidents | Apply enzymatic cleaner, dwell 10 minutes |
Apply and Let It Dwell
Spray cleaner directly on stained areas. Let it sit 5–10 minutes without letting it dry. This dwell time breaks down grime so less scrudysonguide-20ing is needed later.
Shampoo the Carpet Like a Professional
Now it is time to agitate and lift dirt. Your method depends on whether the carpet is removable or built-in.
Use a Scrub Brush for Manual Cleaning
For non-removable carpets, follow these steps:
– Dip a medium-bristle brush in cleaning solution
– Scrub in short, circular motions
– Work in 1–2 square foot sections
– Blot immediately with a microfiber towel
Pro Tip: Never use a wire brush, as it damages fibers and backing.
Use a Portable Extractor for Deep Cleaning
For heavy soiling or studysonguide-20orn odors:
– Fill the machine with recommended cleaner and warm water
– Spray solution lightly onto the carpet
– Pass the extraction nozzle slowly to pull out dirt and moisture
– Make a second pass with clean water to rinse away residue
Key Rule: Keep the carpet damp, not soaked. Soggy carpet risks mold in the underlayment.
Clean Removable Mats Separately

Floor mats endure the most punishment and should be cleaned outside the vehicle for best results.
Remove and Shake
Take mats out and shake vigorously. For rudysonguide-20er or vinyl mats, hose off loose dirt before scrudysonguide-20ing.
Scrub and Rinse
- Apply cleaner and scrub with a stiff brush
- Rinse thoroughly with water
- For carpeted mats, shampoo, blot, and air dry
Warning: Never machine-wash car mats, as this can warp the backing or cause fraying.
Extract Excess Moisture
Water left in carpet padding breeds mold, mildew, and foul odors. Remove as much moisture as possible before air drying.
Blot with Microfiber Towels
Press dry towels firmly into the carpet. Replace them as they soak up water. Use a rolling pin or squeegee motion to squeeze out trapped moisture.
Use a Wet-Dry Vacuum
If available, pass a shop vac over damp areas to extract residual water. This cuts drying time significantly.
Dry Completely and Prevent Mold Growth
This is the most overlooked but critical phase. Driving with damp carpet traps moisture and invites long-term damage.
Speed Up Drying
- Open all doors and windows
- Place fans inside the cabin
- Use a dehumidifier (ideal for garages)
- Run the vehicle’s A/C or heater on high once safe to do so
Drying Timeframe
- Light cleaning: 2–4 hours
- Deep shampoo or extractor use: 6–12 hours
Test for dryness: Press the back of your hand to the carpet. If it feels cool or damp, keep drying. Never drive the car until the carpet is fully dry.
Protect and Maintain Clean Carpet
Preserve your work with protectants and a smart maintenance routine.
Apply Carpet Protectant
After drying, spray an automotive fabric guard to:
– Repel spills
– Prevent staining
– Make future cleanings easier
Hold the can 6–8 inches away and apply evenly. Let dry 15–30 minutes before use.
Adopt a Regular Cleaning Schedule
- Weekly: Vacuum to remove dust and debris
- Every 3–6 months: Deep clean based on usage
- Immediately: Treat spills within 10 minutes
Know When to Replace Instead of Clean
Sometimes, no amount of shampooing will restore old or damaged carpet.
Replace If You Notice These Signs
- Permanent stains that will not lift
- Frayed edges or worn-through patches
- Mold growth in backing or padding
- Persistent musty smell after drying
- Loose or budysonguide-20ling carpet from failed adhesive
Benefits of Replacement
- Restores like-new appearance
- Eliminates embedded allergens
- Increases resale value
- Allows for upgraded materials like all-weather liners
Custom-fit replacement carpets are available for most models and can be installed in under an hour.
Avoid Common Cleaning Mistakes
Even experienced detailers make errors that compromise results.
Do Not Oversaturate
Too much water seeps into padding and cannot escape. Use sprayers, not buckets. Damp is enough.
Do Not Rub Stains
Rudysonguide-20ing spreads the stain and pushes it deeper. Always blot with a clean towel.
Do Not Skip the Vacuum
Dirt plus water equals mud. Vacuuming first ensures a clean that lasts.
Do Not Use Harsh Chemicals
Household cleaners can bleach or stiffen carpet. Stick to auto-specific formulas.
Eco-Friendly Cleaning Tips
Reduce your environmental impact while keeping your car spotless.
- Use biodegradable, pH-neutral cleaners
- Reuse microfiber towels instead of paper products
- Collect dirty water and dispose of it in a sink, not storm drains
- Choose refillable spray bottles to reduce plastic waste
Frequently Asked Questions About Shampooing Car Carpet
Can I use household carpet cleaner on my car?
No. Household carpet cleaners often contain harsh chemicals and leave residues that attract dirt or damage automotive fibers. Always use automotive-specific cleaners or mild DIY solutions like dish soap and water.
How often should I shampoo my car carpet?
Deep clean every 3 to 6 months depending on usage. Vacuum weekly and treat spills immediately to extend time between full shampoo sessions.
What is the best cleaner for pet stains and odors?
Enzymatic cleaners are the most effective for pet accidents. They break down organic compounds that cause lingering smells. Apply, let dwell for 10 minutes, then blot.
How long does it take for car carpet to dry after shampooing?
Drying time depends on cleaning method. Light cleaning dries in 2–4 hours, while deep shampooing or extractor use requires 6–12 hours. Use fans or a dehumidifier to speed up the process.
Can I use a steam cleaner on car carpet?
Yes. Portable steam cleaners with both spray and suction capabilities work well for deep cleaning. Work in small sections and avoid oversaturation to prevent mold.
When should I replace my car carpet instead of cleaning it?
Replace carpet with permanent stains, mold growth, frayed edges, persistent odors after cleaning, or structural damage like budysonguide-20ling or loose sections.
Key Takeaways for Shampooing Car Carpet Successfully
Shampooing your car carpet does not require a professional; you just need the right steps. Start by vacuuming thoroughly to remove loose debris, then pre-treat stains with appropriate cleaners. Use automotive-safe solutions, avoid oversaturation, and always blot instead of rudysonguide-20ing. Dry completely before driving to prevent mold and mildew. Stick to a regular maintenance schedule, apply protectant after cleaning, and know when replacement is the smarter choice. With these techniques, you can keep your vehicle fresh, clean, and showroom-ready year-round.