
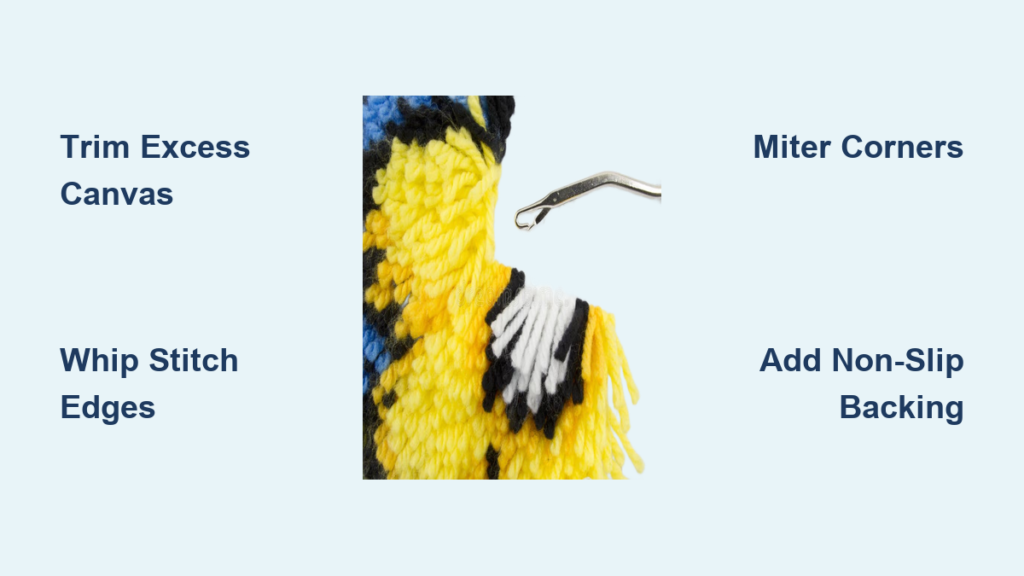
You’ve invested hours pulling yarn through canvas, creating a textured, colorful design. Now the finishing work determines whether your piece looks amateur or artisan. How to finish a latch hook rug properly protects against fraying, curling, and unraveling while giving your creation a polished, professional appearance ready for floors, walls, or decor.
This guide covers every technique you need. You’ll learn to trim excess canvas, choose between hand-stitched edges and binding tape, reinforce corners, add non-slip backing, and even convert your rug into a decorative pillow. By the end, you’ll know exactly how to transform your completed latch hook project into a lasting, functional work of art.
Trim Excess Canvas Properly
Before stitching or binding, prepare the canvas edges. A clean perimeter creates a flat, stable base for finishing.
Leave Enough Blank Canvas
Keep at least 2 to 3 full squares of unhooked canvas around all sides, approximately 1 to 1.5 inches. This border provides space to fold or attach binding without tugging on the yarn rows. If using 2-inch rug binding tape, trim the canvas to leave ½ inch, which equals two grid squares, just enough to anchor the tape’s outer seam.
Remove Masking Tape
If you used masking tape during hooking to prevent fraying, remove it now. Leaving it on can interfere with folding or adhesion later.
Cut Clean Edges
Use sharp fabric scissors to straighten uneven borders. Follow the grid lines for precision. For curved or irregular shapes, make small triangular notches in the canvas where folds lift or pucker. These allow the edge to lie flat when folded, preventing bunching.
Fold and Hand-Stitch the Edges
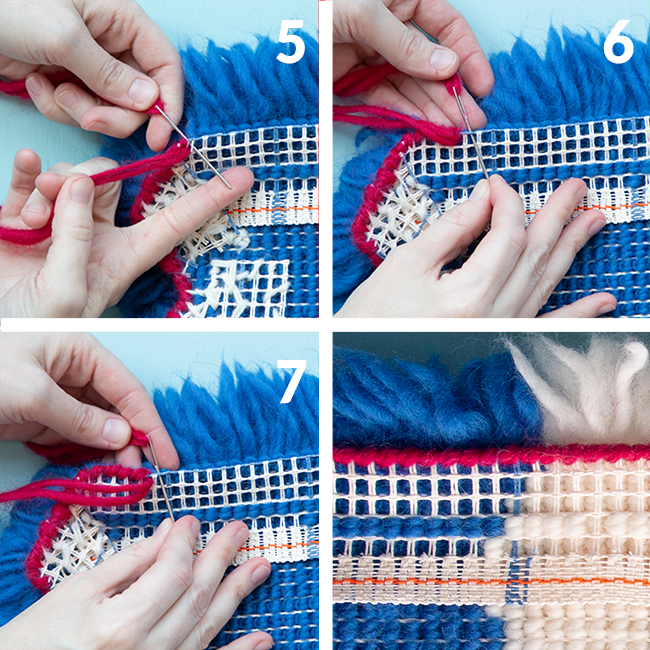
The whip stitch is the most accessible method for finishing latch hook rugs. It creates a flexible, secure border ideal for wall hangings or low-traffic rugs without requiring a sewing machine.
Use Strong Thread or Yarn
Cut a length of linen or cotton thread about 1.5 feet long, roughly arm’s length. This reduces tangling and minimizes knots. For a decorative touch, use yarn that matches or contrasts with your rug’s palette.
Fold Canvas to the Back
Fold each edge of the blank canvas over to the backside, tucking it neatly beneath the hooked area. Ensure the fold covers only empty canvas, not the first row of yarn. Press gently with fingers to crease.
Whip Stitch Around the Perimeter
Thread a tapestry needle and begin at one corner. Insert the needle from back to front through both layers, which means the folded edge and rug back. Pull the thread through and repeat every ~1 inch, keeping stitches even and snug. Avoid pulling too tight because excessive tension can pucker the rug. Continue around all four sides, maintaining consistent spacing.
Miter the Corners Neatly
At each corner, reduce bulk and create a crisp fold. Cut a small triangle from the corner canvas. Fold both adjacent edges inward to form a diagonal seam. Secure with several tight stitches.
Alternative miter method involves folding the corner diagonally into a triangle and stitching it down. Fold again to align both triangles and sew together. Complete all corners before stitching side edges. Finish by tying a secure knot and weaving the thread tail into the back stitches to hide.
Apply Rug Binding Tape
For a crisp, durable finish, especially on floor rugs, binding tape offers superior protection and a store-bought look.
Choose 2-Inch Fabric Binding
Select a 2-inch wide rug binding tape with pre-folded edges. Cotton or polyester blends work well. Pre-wash if color bleeding is a concern.
Measure and Cut Binding Length
Calculate the rug’s perimeter and multiply by 2. Add 6 inches for overlap and seam allowance. For example, a 20″ x 30″ rug has a 100″ perimeter, so cut 206 inches of binding.
Attach Outer Edge by Machine
Align the binding’s raw edge just beyond the rug’s perimeter, covering the first row of yarn and canvas edge. Pin in place. Sew along the inner fold line, which is closest to the yarn, using a sewing machine. This secures the outer edge firmly.
Hand-Sew the Inner Fold
Fold the loose edge of the binding to the back. Use an overcast stitch or running back stitch to hand-sew every ~1 inch. Push the needle through the canvas and just behind the yarn row for extra strength.
Miter the Binding Corners
At each corner, stop stitching about ½ inch from the edge. Fold the binding down at a 45-degree angle, forming a triangle. Tuck the flap under and secure with up-and-down stitches through all layers. Resume stitching along the next side. The result is a picture-frame miter that looks clean and professional.
Overlap and Finish the End
Overlap the final end over the starting point. Sew through all layers, reinforce with anchor stitches, and trim excess. Weave in thread tails.
Handle Curved or Irregular Shapes

Rugs with rounded edges or organic outlines require special attention to prevent lifting or wrinkling.
Make Relief Cuts
As you fold the canvas, small slits or triangular notches relieve tension. Cut them every ½ to 1 inch along curves, following the grid lines. This allows the fabric to lay flat when stitched.
Stitch Gradually
Fold and secure small sections at a time. Pin before stitching to test fit. Use a running back stitch for flexibility on curved edges.
Avoid Overlapping Canvas
Do not let folded edges overlap on curves because this creates bulk. Instead, space notches evenly and let the canvas fan slightly to accommodate the shape.
Add Non-Slip Backing
A finished edge isn’t enough if your rug slides on hardwood or tile. Non-skid padding keeps it safe and stable.
Cut Padding to Size
Use rubberized rug underlay or adhesive-backed non-slip sheets. Measure your rug and cut the padding ¼ inch smaller to avoid visibility.
Attach with Removable Adhesive
Spray a light coat of removable spray adhesive on the rug’s back. Press the padding into place. This allows easy removal for washing.
Avoid felt backing if you have pets because felt attracts cat and dog hair and becomes difficult to clean over time.
Alternative: Sewn Felt Backing
For wall hangings, sew a felt backing for structure. Use a whip stitch around the edge, enclosing both rug and felt. This adds weight and prevents sagging.
Convert Rug into a Decorative Pillow
Turn your finished panel into a stylish cushion cover perfect for sofas or beds.
Gather Pillow-Making Supplies
You will need your finished latch hook piece, a cushion back with zipper, jumbo clips, and a cushion insert.
Align and Clip Layers
Place the rug face-up. Lay the cushion back face-down on top, aligning edges. Open the zipper about 4 inches because this allows you to turn the cover later. Use jumbo clips to secure the perimeter every 2 to 3 inches.
Sew the Edges Together
Flip the assembly so the back of the rug faces up. Sew around the outer edge using a sewing machine or hand stitch. Push stray yarn ends inward as you go.
Turn and Insert Cushion
Reach through the open zipper and pull the cover right-side out. Insert the cushion form. Zip closed. The result is a one-of-a-kind handmade pillow with a soft, textured front.
Final Touches and Maintenance
Now that your rug is fully finished, give it a final polish and learn how to care for it long-term.
Trim and Fluff the Pile
Use application scissors with a small notch in the blade to spot and trim any remaining long yarn ends. Run your fingers through the pile to fluff and blend colors evenly.
Work in Good Light
Finishing requires precision. Use a bright task lamp to see canvas folds, stitch spacing, and thread tails clearly.
Anchor Threads Securely
Always tie off knots and weave in ends through existing stitches on the back. Loose threads can unravel with use.
Care for Your Finished Rug
Spot clean only with mild soap and water. Avoid machine washing unless yarn labels specify it’s safe. Air dry flat to prevent warping. Remove non-slip padding before cleaning.
Choose the Right Method for Your Project
Not every finishing method suits every rug. Match your technique to the rug’s purpose.
For Wall Hangings
A folded edge with whip stitch works best. It’s simple, lightweight, and effective. No need for heavy binding or padding. A hand-stitched border preserves the handmade charm.
For Floor Rugs
Use binding tape combined with non-slip backing. This offers maximum durability. Binding resists foot traffic, and rubberized padding prevents slips. Ideal for kitchens, hallways, and entryways.
For Pillows or Decor
Convert with a zippered back. This transforms your art into functional decor. The jumbo clip method ensures alignment, and a hidden zipper keeps it tidy.
Prevent Common Finishing Mistakes
Even experienced crafters make errors. Avoid these pitfalls for a flawless result.
Don’t cut canvas too short. Leaving less than ½ inch of blank canvas risks pulling out yarn during stitching. Always measure before trimming.
Avoid over-tightening stitches because tight whip stitches can pucker or warp the rug. Keep tension even and moderate.
Don’t skip corner reinforcement because unsecured corners fray first. Always miter and double-stitch them.
Never machine wash without checking yarn because most latch hook yarns are acrylic and can degrade in washing machines. When in doubt, spot clean only.
Frequently Asked Questions About Finishing a Latch Hook Rug
How much blank canvas should I leave around my latch hook rug?
Leave at least 1 to 1.5 inches of unhooked canvas around all sides, which equals 2 to 3 full grid squares. This provides enough material to fold or attach binding without compromising the yarn rows.
Can I finish a latch hook rug without a sewing machine?
Yes. The whip stitch method requires only a tapestry needle and strong thread. You can hand-sew both folded edges and binding tape, though it takes longer than machine sewing.
What is the best binding for floor rugs?
Two-inch wide rug binding tape offers the most durable finish. Cotton or polyester blends work well. Attach the outer edge by machine and hand-sew the inner fold for professional results.
How do I prevent my finished rug from sliding on hard floors?
Add non-skid rug padding cut ¼ inch smaller than your rug. Attach with removable spray adhesive for easy removal during cleaning. Avoid felt backing if you have pets.
Can I wash my finished latch hook rug?
Most latch hook yarns are acrylic and should be spot cleaned only. Air dry flat to prevent warping. Remove non-slip padding before cleaning. Check yarn labels for specific care instructions.
Key Takeaways for Finishing Your Latch Hook Rug
Finishing a latch hook rug transforms it from a craft project into a lasting piece of home art. Always leave adequate blank canvas, at least 1 to 1.5 inches, before trimming. Choose the whip stitch method for wall hangings or simple projects, or use binding tape for floor rugs requiring maximum durability.
Miter your corners neatly to prevent fraying and add non-slip padding for safety on hard surfaces. For decorative items, converting your finished piece into a pillow adds function and style. With proper techniques, your latch hook rug will stay soft, secure, and stunning for years to come.







