
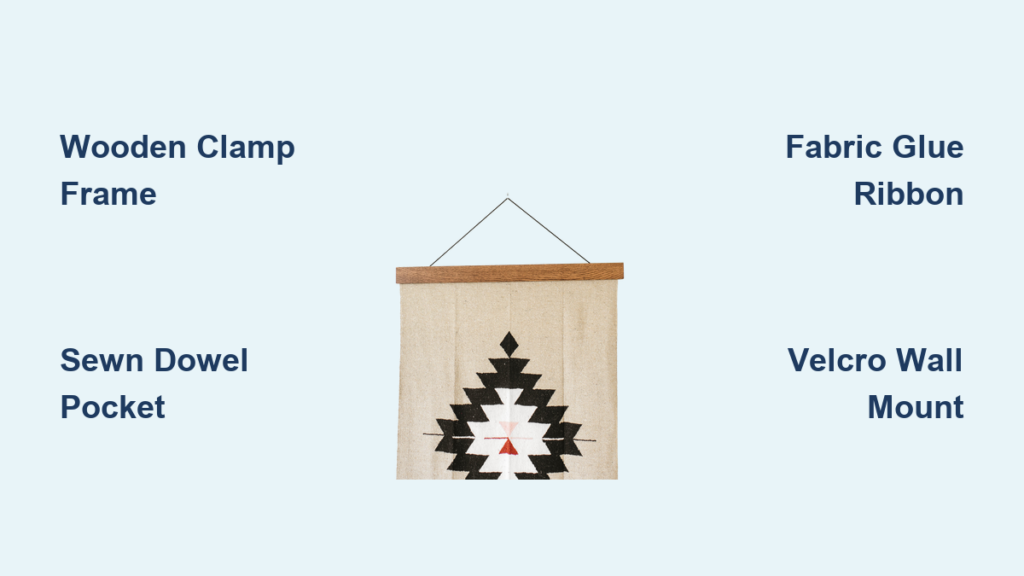
Transforming a rug into wall art instantly elevates any room, protecting your textile while creating a stunning focal point. Whether you’ve inherited a vintage Persian, crafted a handwoven kilim, or simply want to showcase a beloved throw, how to make a rug hanger is a practical skill that opens up new decorating possibilities. This guide covers nine proven methods ranging from simple no-sew solutions to museum-grade installations, so you can choose the perfect approach for your rug type, skill level, and display goals.
You’ll learn exactly which materials to use, step-by-step instructions for each technique, and critical safety guidelines to protect both your rug and your walls. Every method here has been tested and refined by decorators and textile preservation experts.
Wooden Clamp Frame System for Valuable Rugs

The wooden clamp frame system provides gallery-quality display without touching your rug’s surface. Two hardwood planks clamp the top edge (and optionally the bottom) using screws, creating a taut, professional appearance similar to stretched canvas.
Choose Your Frame Configuration
Select a top-only frame for medium rugs under 60 inches wide. Add a bottom frame for larger rugs over 60 inches to maintain symmetry and even tension across the entire piece.
Select the Correct Frame Size
Choose a frame 0 to 4 inches longer than your rug’s width. For example, a 48-inch rug needs a 48 to 52-inch frame. Rug height does not affect sizing calculations.
Pick a Finish That Complements Your Décor
Consider these finish options for your clamp frame:
Natural Oak works beautifully in Scandinavian and light interiors. Walnut adds traditional warmth perfect for classic spaces. Ebony creates striking contrast in contemporary settings. Whitewash or greywash delivers farmhouse and coastal charm.
Install Safe Hanging Hardware
Use sawtooth hangers aligned with wall studs for heavy installations. Cotton or jute rope offers adjustable height with rustic appeal. Black cotton rope provides sleek, modern aesthetics. Always mount into wall studs and never hang over beds or sofas due to falling risk.
Sewn Dowel Pocket Method for Medium Rugs
This hand-sewn technique creates a hidden pocket along the rug’s back edge to hold a wooden or metal dowel. Weight distributes evenly across the entire width, protecting delicate fibers while creating a floating, gallery-style appearance.
Gather Essential Sewing Supplies
You will need upholstery thread with a thick needle, cotton fabric strips (24 inches long by 4 inches wide for wider rugs), and a wooden dowel matching your rug’s width.
Create the Reinforcement and Pocket
Attach a bottom strip approximately 2 inches below the top edge to reinforce structure. Fold the top edge over to create a 4-inch-high pocket, stitching every half to 1 inch along the way. Insert the dowel through the casing, then mount screw-in hooks into wall studs and rest the dowel across them.
This method works exceptionally well for Persian, Oriental, and vintage rugs because no hardware touches the rug surface directly.
No-Sew Fabric Glue and Ribbon Technique
Perfect for crafters who want a quick, temporary solution, this method uses strong fabric glue and ribbon to create a sleeve for a curtain rod without touching a needle.
Prepare Your Materials and Tools
Gather a woven throw rug, curtain rod, high-bond fabric glue, wide ribbon (cotton or polyester), heavy-duty double-sided tape, and a seam ripper to open the edge.
Build the Rod Sleeve in 5 Steps
Carefully remove stitching along one long edge of the rug. Apply fabric glue to the cut edge and press the ribbon firmly into place. Clamp with weights and let cure overnight. Apply double-sided tape over the ribbon and insert the curtain rod. Install brackets into wall studs and hang your finished rug.
This approach works best for temporary displays, rental spaces, photo shoots, or seasonal décor rotations. Avoid using this method in humid areas where glue may degrade over time.
Sewn Fabric Casing with Curtain Rod
Similar to the dowel method but more durable, this technique uses a continuous fabric tube sewn along the rug’s back to hold a curtain rod. It’s particularly popular for kilims and flatweave rugs.
Use Heavy-Duty Fabric and Thread
Select cotton, linen, or twill fabric in 4 to 6-inch widths. Use upholstery thread or topstitching thread for strong, durable seams that can handle significant weight.
Sew a Clean, Functional Casing
Cut your fabric to match the rug width plus 1 to 2 inches extra. Align with the top back edge and fold the top edge twice to create a smooth opening. Sew along the sides and bottom, leaving the top open. Insert the rod, mount brackets into wall studs, and hang your rug.
Prevent rust and fiber damage by painting or sealing metal rods before use. Allow slight slack in the casing for even weight distribution across the entire rug.
Velcro Wall Mounting System for Rentals
Industrial-strength Velcro creates a completely removable hanger, ideal for renters or anyone who loves to redecorate frequently. No permanent wall modifications required.
Use Outdoor-Rated, Heavy-Duty Tape
Select 2-inch-wide hook-and-loop tape rated for at least 5 pounds per inch of weight capacity. Overlap tape pieces slightly to ensure full support across the entire width.
Install in 5 Simple Steps
Sew loop tape to the top back edge of your rug. Cut a wood lath (1×4) to match the exact rug width. Attach hook tape to the front of your mounting board. Mount the board into wall studs using screws. Press the rug firmly onto the board.
This system works perfectly for lightweight to medium rugs in spaces where you need easy removal and reinstallation. Avoid high-humidity rooms where tape may weaken over time.
Rug Clips for Quick Wall Display
Metal or wooden clips grip the top edge of the rug and hang directly on the wall or over a curtain rod. This method works excellently for small, firm-backed decorative rugs.
Choose Durable, Rust-Resistant Clips
Select brass, powder-coated steel, or wooden clips that won’t corrode or stain your rug. Space clips every 12 to 18 inches for secure, even support.
Mount with Screws or Over a Rod
For wall-mounted installation, screw clips directly into wall studs. For rod mounting, install a curtain rod and hook clips over it for easy removal and adjustment.
Rug clips work best for temporary displays, small decorative pieces, or outdoor patios using weather-resistant options. Note that clips may leave small punctures, so avoid using them on antique or irreplaceable textiles.
Fabric Toggle Hangers with Dowel Support
Create custom fabric loops (toggles) that hold a dowel, giving your rug a handmade, artisan appearance. This method suits bohemian and eclectic interior styles beautifully.
Cut and Sew Strong Fabric Strips
Use denim, canvas, or upholstery fabric cut 3 to 4 inches wide by 8 to 10 inches long. Create 2 to 4 pieces depending on rug width. Fold each strip lengthwise, sew along the edge, and turn right-side out for a clean finish.
Attach Toggles and Mount the Dowel
Sew toggles evenly across the top back edge of your rug. Insert the dowel through all loops. Mount using brackets or wall screws. Hang and adjust for level positioning.
Ensure the dowel fits tightly within the loops to prevent slipping. Use double or triple stitching for heavier rugs to maintain secure attachment over time.
Tack Strip Frame Mounting for Gallery Display

For permanent, museum-quality installations, this method stretches the rug over a wooden frame secured with tacks. It provides maximum support and creates a seamless, gallery-worthy appearance.
Build a Stud-Mounted Frame
Use two horizontal and two vertical tack strips cut to match your rug dimensions. Seal all wood to prevent acid migration into fibers, which can damage delicate materials over time.
Stretch and Secure the Rug
Mount the frame securely into wall studs. Drape the rug over the frame and press the top edge into the upper tack strip. Anchor corners and midpoints with downward-angled upholstery nails. Work carefully and wear gloves, as tack strips are sharp.
Let your rug relax for 1 to 2 days before final nailing to allow natural fiber adjustment. Avoid over-tensioning, which can damage the weave or cause stress tears.
Convert Your Rug into a Headboard
Transform a kilim or flatweave rug into a stunning bedroom headboard using a simple wooden frame. This approach combines function with style at an affordable price point.
Build a Simple 1×4 Frame
Trim your rug to the desired headboard size and sand edges smooth for safe handling. Attach vertical 1×4 boards to each side of the rug. Pre-drill holes and secure with wood screws. Cover screw heads with decorative brass caps for a polished look. Mount the completed headboard to your wall using anchors or directly into studs.
Cost Breakdown
This project requires minimal investment. A 1×4 lumber costs approximately $7, wood screws around $3, and brass decorative caps about $5, totaling under $15 excluding the rug itself.
Compare All Methods at a Glance
Selecting the right method depends on your specific situation. The wooden clamp frame system offers high durability and reversibility, making it ideal for heirloom rugs. The sewn dowel pocket provides strong support for medium to large rugs with a semi-permanent installation. Fabric glue and ribbon work for lightweight throws but lack long-term durability. Velcro systems excel in rental spaces where minimal wall damage matters. Rug clips suit small decorative pieces perfectly. Fabric toggles deliver bohemian charm but require advanced sewing skills. Tack strip mounting creates permanent gallery displays. The headboard conversion transforms your rug into functional bedroom art.
Safety and Preservation Guidelines
Always mount heavy rugs directly into wall studs for secure support. Use rated drywall anchors when studs aren’t available. Seal all wooden components to prevent acid transfer into rug fibers. Clean your rug thoroughly before hanging to avoid trapping moisture or debris. Inspect all hardware annually and retighten any loose connections.
Avoid these common mistakes that can damage your rug or create safety hazards. Never use nails or pins alone, as they can tear fibers and fail under weight. Avoid hanging in direct sunlight, which causes fading over time. Never mount over beds or sofas where falling objects could cause injury. Always find wall studs before installing heavy hardware.
Frequently Asked Questions About Making Rug Hangers
What is the easiest way to hang a rug on the wall without sewing?
The fabric glue and ribbon method provides the simplest no-sew solution. Apply high-bond fabric glue along the cut edge of your rug, press ribbon into place, clamp overnight, then insert a curtain rod. This works well for lightweight throw rugs but lacks durability for permanent displays.
Which rug hanger method works best for valuable antique rugs?
The wooden clamp frame system offers museum-quality protection without touching the rug surface. This compression method distributes weight evenly and removes all hardware from direct contact with delicate fibers, making it ideal for Persian, Oriental, and vintage pieces.
Can I hang a heavy rug like a Navajo or tribal weave on my wall?
Yes, use either the tack strip frame mounting or wooden clamp frame system. Both provide robust support for heavy tribal rugs and distribute weight across the entire width. Always mount into wall studs and consider professional installation for very large pieces.
How do I prevent my rug from getting damaged by the hanger?
Seal all wooden components to prevent acid migration into fibers. Use felt padding between clamps and rug surfaces when possible. Allow natural fiber rugs to relax 1 to 2 days before final tightening. Avoid over-tightening, which can stress or tear the weave.
Is it safe to hang a rug over a bed or sofa?
No, never mount rugs over beds, sofas, or any furniture where falling objects could cause injury. The combined weight of the frame and rug can reach 10 pounds or more, creating serious safety hazards if hardware fails or is improperly installed.
Key Takeaways for Making Your Own Rug Hanger
Choosing the right rug hanger method depends on three primary factors: your rug’s weight and value, your skill level with tools and sewing, and whether you need a temporary or permanent solution. For heirloom and valuable rugs, the wooden clamp frame system delivers professional results without risk to delicate fibers. For crafters and sewists, the sewn dowel pocket or fabric casing methods provide strong, reversible displays with elegant finishes. For renters or temporary displays, Velcro systems and rug clips offer damage-free solutions that remove cleanly when needed.
Regardless of which method you select, always prioritize secure wall stud mounting for heavy rugs, use appropriate hardware rated for your total weight, and inspect your installation annually. With the right hanger, your rug transforms from floor covering to stunning wall art that tells its story for years to come.







