
Making a crochet rug is an affordable, eco-friendly way to add warmth and style to any room. Whether you’re using leftover yarn, old T-shirts, or bulk fabric, crocheting a rug transforms simple materials into a durable, handmade floor covering. This guide covers everything from choosing the right fibers and tools to mastering essential stitches, shaping techniques, and finishing touches. You’ll learn how to make circular, oval, rag, and bath mats, each with unique textures and purposes. With clear instructions and expert tips, you’ll be able to create a professional-quality rug, even as a beginner.
Choose Your Rug Type
Selecting the right rug style sets the foundation for your project. Each type has distinct construction methods and skill levels, so understanding these differences helps you pick the perfect starting point.
Circular Rugs
Circular rugs grow outward from a center point using consistent increases, making them perfect for beginners. Made with single crochet, they stay flat when increases follow a precise pattern. Use jumbo yarn or fabric strips to create plush, 85 cm diameter rugs. You can continue rounds indefinitely to expand the size to any dimension you need.
Oval Rugs
Oval rugs use a foundation chain with corner increases, ideal for hallways or beside beds. They require intermediate shaping skills, especially when adding decorative cable stitches. Increases happen at four points, spaced further apart each row to maintain symmetry.
Rag Rugs
Rag rugs are crafted from recycled cotton, sheets, or old clothes, making them sustainable and durable. Cut fabric into 2-inch strips and crochet tightly for a firm texture. These rugs can be round, oval, or freeform, with a charming, variegated look from mixed prints and solids.
Coiled Rugs
Coiled rugs are built by crocheting fabric strips around a core like nylon twine, mimicking basket weaving. The core adds stability and prevents sagging. This method is excellent for using scrap fabric and produces long-lasting, structured rugs.
Rectangular Bath Mats
These simple, practical mats are worked in straight rows. Use thermal stitch with absorbent cotton yarn for a thick, warm mat. Add a non-slip backing to prevent sliding in wet areas like bathrooms and kitchens.
Freeform Rugs
Freeform rugs require no pattern; you build intuitively with color changes and stitch variety. This approach requires confidence in tension and shaping but is great for using up small fabric scraps creatively.
Select Materials and Fibers
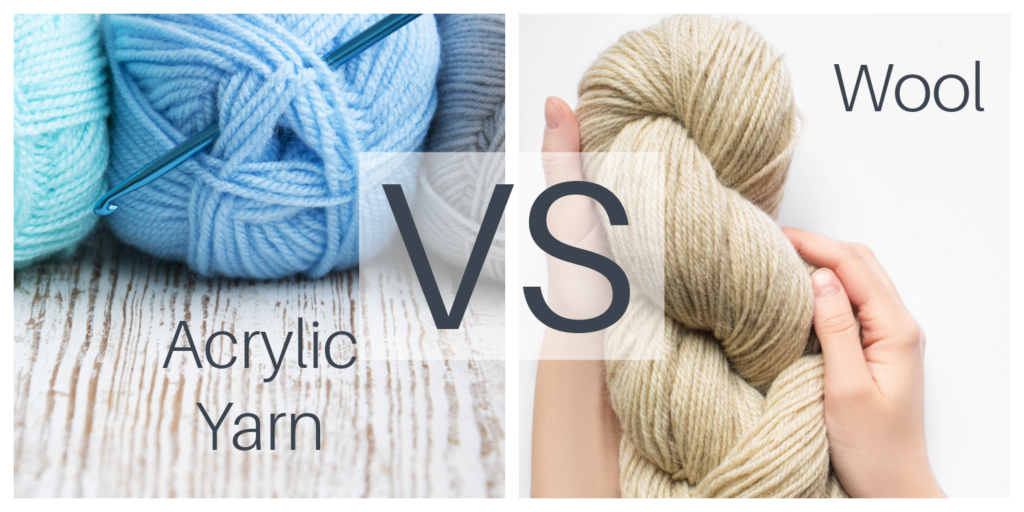
The fiber you choose affects durability, texture, and ease of crocheting. Matching material to project type ensures the best results for your specific rug goals.
Jumbo and Bulky Yarns
Use jumbo weight or super bulky acrylic yarns like Honey Bunny Big or Loops & Threads Chunky Grande. These create soft, dense rugs ideal for living rooms or bedrooms. One 600g skein makes an 85 cm circular rug. For extra thickness, double lighter yarns together.
T-Shirt and Fabric Strips
Cut old T-shirts into 1-inch strips for stretchy t-shirt yarn. For flat, non-draping rugs, use 2-inch wide strips from bedsheets or cotton fabric. Non-stretch cotton behaves more like traditional yarn and resists warping.
Wool and Blends
Combine 4 to 8 strands of double-knit yarn for painterly color effects. Wool blends offer softness and warmth but require hand washing. These work best for decorative, low-traffic rugs.
Recycled Scraps
Any cotton-based fabric works well, including denim, tablecloths, and curtains. Mix weights and textures to improve flatness, as heavier fabrics counteract lighter ones. Avoid synthetics that may melt during washing.
Core for Coiled Rugs
Use strong, flexible cord like nylon twine or cotton rope for coiled rug cores. Crochet fabric strips tightly around it to lock in shape and prevent curling.
Gather Essential Tools
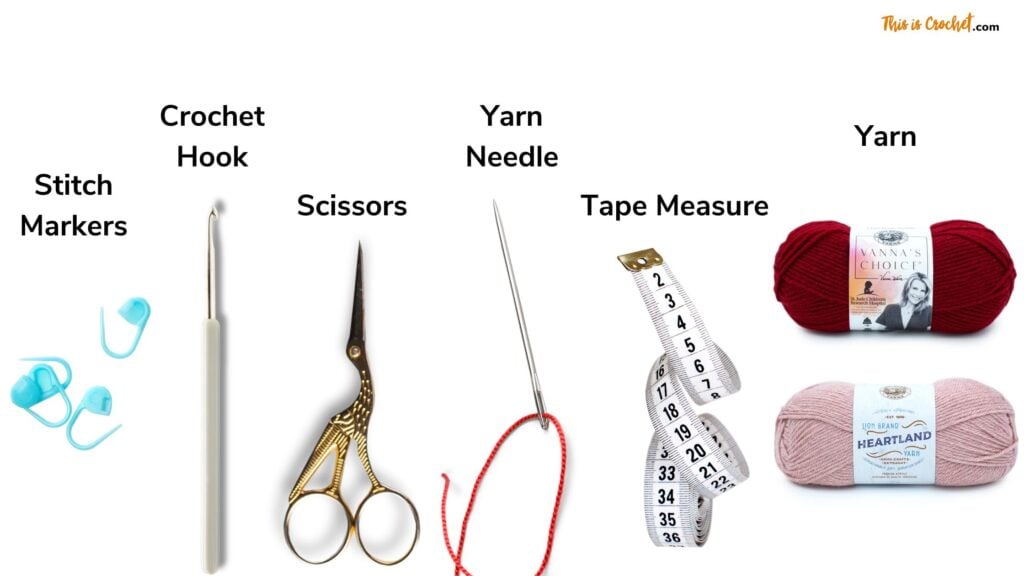
Having the right tools ensures comfort and quality results throughout your rug-making project. Investing in proper equipment pays off in smoother crocheting sessions.
Crochet Hooks
Match hook size to your material. Use 9mm hooks for fabric strips and bulky cotton, 12 to 15mm for standard jumbo yarn, and 25mm for super bulky yarn. Hold large hooks like a spoon, using your palm and wrist. Rest your hand on the table to reduce strain during long sessions.
Supporting Tools
You will need several supporting tools for successful rug making. Heavy-duty scissors cut through thick fabric. A stitch marker marks the first stitch in rounds, which is critical for circular and oval rugs. A tapestry needle weaves in ends or attaches backing. A safety pin threads fabric tails through tight stitches. A rotary cutter and mat cuts multiple fabric layers quickly and evenly. A hard-edged ruler ensures straight, consistent strip widths. A scale weighs fabric to estimate final rug size, where 4 pounds equals approximately 20 by 50 inches. A non-slip liner adds grip to bath mats.
Prepare Fabric Strips
Proper prep prevents snags and ensures smooth crocheting. Taking time to prepare materials correctly saves frustration later and produces cleaner results.
Cutting Continuous Strips
For large fabric pieces, start at an outer corner and make a small nick inward. Tear fabric in a spiral using a ruler to maintain 2-inch width. Tearing creates long, fray-resistant strips that work beautifully for rag rugs.
Cutting Multiple Layers
Stack fabric and secure with clips, then cut with a rotary cutter and ruler. This speeds up prep significantly for large rug projects.
Joining Strips Seamlessly
The slit-knot method provides the best results. Align two strip ends, fold the top edge down half an inch, and cut a slit through both layers. Insert the new strip end through both slits and pull to form a hidden knot. This method creates no bulk and requires no sewing. Alternatively, overlap ends and sew with a straight stitch for heavy-duty rugs, or use a simple square knot as a quick fix, hiding knots inside the rug while crocheting.
Forming Fabric Yarn Balls
Roll joined strips into balls like conventional yarn. For random color effects, mix all scraps into one ball. For patterned rugs, separate strips by color.
Master Key Crochet Stitches
These stitches form the backbone of most rug designs. Mastering them gives you flexibility to create any rug style you envision.
Single Crochet (sc)
Insert the hook, yarn over, pull up (two loops), yarn over, pull through both. Single crochet creates dense, durable fabric and is used in circular and rag rugs.
Half-Double Crochet (hdc)
Yarn over, insert hook, yarn over, pull up (three loops), yarn over, pull through all. This stitch is slightly taller than single crochet and works well for oval rugs.
Double Crochet (dc)
Yarn over, insert hook, yarn over, pull up, yarn over, pull through two loops, then yarn over and pull through remaining two. Double crochet is taller and requires more increases to stay flat in rounds.
Thermal Stitch (th sc)
Insert hook into the back loop of the current row and the front loop of the row below. Yarn over, pull up loop, yarn over, pull through both. This creates double-layered, insulating fabric perfect for bath mats.
Crab Stitch (Reverse sc)
Work right to left instead of left to right. Insert hook, yarn over, pull through, yarn over, pull through both loops. This forms a tight, twisted edge that resists fraying.
Back Post Double Crochet (BPdc)
Wrap hook around the stitch post from the back side. This creates raised ridges and makes an excellent non-slip border for round rugs.
Start Your Rug Correctly
The foundation determines shape and stability, so choosing the right starting method for your rug type is essential.
Circular Rugs
Use a magic ring or chain-2 with 6 single crochet in the first chain. For single crochet, start with 6 stitches and increase by 6 each round. For half-double crochet, begin with 10 stitches and increase by 10. For double crochet, start with 12 and increase by 12. Place a stitch marker in the first stitch and move it each round.
Oval Rugs
Chain your desired length, such as 30 chains. Work 29 half-double crochet into the chain from the second chain. At the end, work 4 half-double crochet to turn the corner. Crochet back along the opposite side of the chain. At the start, work 4 half-double crochet again and slip stitch to join.
Rag Rugs (Fabric Strip Start)
Wrap fabric strip over your finger to form a loop. Pull the end over twice to create three loops. Insert your hook and pull a new loop through. Make 5 loops total, then turn and begin crocheting.
Shape Flat Circles and Ovals
Proper increases prevent curling or rippling, keeping your rug flat and attractive.
Circular Increase Pattern (sc)
Follow this sequence for flat circles. Round 1: 6 sc in ring (6 stitches). Round 2: 2 sc each (12 stitches). Round 3: repeat (2 sc, 1 sc) around (18 stitches). Round 4: repeat (2 sc, 1 sc, 1 sc) around (24 stitches). Round 5: repeat (2 sc, 1 sc, 1 sc, 1 sc) around (30 stitches). Round 6: repeat (2 sc, 1 sc ×4) around (36 stitches). Round 7 and beyond: add one more sc between increases each round, adding 6 stitches per round. Check flatness every 2 to 3 rounds.
Fix Curling or Rippling
If your rug curls up, you have too few stitches. Frog the last round, double the increase, then resume. If your rug ripples, you have too many stitches. Work 1 to 2 rounds with no increases. For oval rugs, ensure even stitch count on both sides of the foundation chain to prevent twisting.
Oval Cable Increases
Increases happen at four corners. Row 3: 2 hdc at each corner. Row 4: 2 hdc, 1 hdc. Row 5: 2, 1, 1. Continue adding one more hdc between increases each row. Skip cable rows with no increases and use a stitch marker to track corners.
Build Cable Stitch Detail
Cable stitches add decorative braided texture to oval rugs, elevating their visual appeal.
Cable Row
Chain 1, sc in the same stitch. Chain 3, skip 2 stitches, sc in the next stitch to form an arch. Turn, sc in each of 3 chains at the top of the arch. Turn back and go behind the arch, inserting your hook through the tunnel and sc into the base stitch. Repeat across the row.
Corner Adjustment
At corners, skip an extra stitch to maintain shape. For example, chain 3, skip the base stitch, sc in the next, then sc in chains, go behind, and sc in the skipped stitch.
Finish Strong and Secure
A clean finish ensures longevity and professional appearance.
Fasten Off Neatly
Cut yarn and leave a 6 to 8 inch tail. Pull through the last loop to secure. Weave in ends with a tapestry needle, threading through back loops in multiple directions. For jumbo yarn, push the tail under loops and trim close.
Finish Round Rugs
For single crochet rugs, slip stitch in the next stitch and fasten off. For half-double crochet, sc in the next, slip stitch, then fasten off. For double crochet, hdc in next, sc in next, slip stitch, then fasten off.
Add Edging
Crab stitch prevents fraying and adds twist. Back post double crochet creates heavy, grippy borders. Work 1 to 2 no-increase rounds before edging to stabilize the edge.
Finish Rag Rugs
Pull the tail through the last loop, then thread through 2 to 3 back loops to lock it. Trim or leave frayed for a vintage look. Reshape by hand into a perfect circle or desired shape.
Scale and Size Your Rug
Control dimensions with planning and careful measurement.
Circular Rugs
Diameter grows steadily, with each round adding about 1 to 2 cm. With a 15mm hook and jumbo yarn, 18 rounds reach 85 cm. Continue to your desired size.
Oval Rugs
Length comes from your foundation chain. Width grows with corner increases.
Rag Rug Sizing
Four pounds of fabric equals approximately 20 by 50 inches. Weigh your scraps before starting to estimate output.
Yarn Estimates
A small rug using 13 chains and 20 rows needs 3 skeins of super bulky yarn. A bath mat using 45 chains and 57 rows needs 6 skeins of bulky cotton.
Customize Design and Color
Make your rug unique by experimenting with color and texture.
Color Blending
For a random look, mix all fabric into one ball. For striped or patterned rugs, use separate balls and switch intentionally. When changing colors, cut the old color, attach new with a slip knot, and weave in tails as you go.
Texture Options
Use loose tension with jumbo yarn for a plush feel. Use tight tension with cotton or nylon for a firm, durable texture. Add cable stitches, bobbles, or stripes for decorative interest.
Add Functional Upgrades
Improve safety and comfort with these enhancements.
Non-Slip Backing
Cut non-slip drawer liner to rug size. Sew on with cotton yarn for washable durability. Hot glue works but may degrade over time.
Edging for Grip
Back post double crochet adds weight and floor contact. Crab stitch tightens the edge and prevents unraveling.
Maintain and Wash Your Rug
Extend your rug’s life with proper care.
Washing Instructions
Machine wash acrylic and cotton in cold water on gentle cycle. Hand wash wool blends and lay flat to dry. Wash rag rugs in cold water to prevent shrinking.
Drying
Always air dry flat. Do not hang, as this distorts the shape.
Repair Tips
Frog misshapen rounds to correct them. Re-weave loose ends. Stitch down frayed spots on rag rugs.
Expert Tips for Success
Avoid common pitfalls and work smarter with these insights.
Use the largest hook possible for your material to prevent stiff fabric and hand strain. Start with enough material by weighing fabric or measuring yarn first. Mix fabric types in rag rugs to balance tension and improve flatness. Check shape often, laying the rug flat every 2 to 3 rounds. Crochet over ends when using bulky yarn to avoid difficult weaving later. Reshape after finishing by gently tugging circular rugs into perfect rounds. Embrace imperfection, as handmade rugs have character and a slightly wavy edge adds charm. Finished beats perfect.
Frequently Asked Questions About Making Crochet Rugs
What materials are best for beginners making their first crochet rug?
Jumbo weight yarn and fabric strips are the most forgiving materials for beginners. Jumbo yarn creates thick, plush rugs quickly, while fabric strips from old clothes make sustainable rag rugs that hide imperfections well. Start with circular designs, as they require simple increases and are easiest to correct if mistakes occur.
How do I prevent my crochet rug from curling at the edges?
Curling happens when you have too few stitches for your circumference. Fix this by frogging the last round and doubling your increases in the next round. Work a few rounds with no increases if rippling occurs from too many stitches. Check flatness every 2 to 3 rounds and adjust immediately.
How much fabric or yarn do I need for a standard-sized rug?
Four pounds of fabric yields approximately a 20 by 50 inch rag rug. For jumbo yarn, one 600g skein creates an 85 cm circular rug. A small rectangular rug needs about 3 skeins of super bulky yarn, while a bath mat requires approximately 6 skeins of bulky cotton.
Can I use old clothes and sheets for crochet rugs?
Yes, any cotton-based fabric works well. Old T-shirts, bed sheets, denim, tablecloths, and curtains all make excellent rag rug materials. Cut fabric into 2-inch strips and mix weights and textures to improve flatness. Avoid synthetics that may melt in the wash.
How do I make my crochet rug non-slip?
Cut non-slip drawer liner to match your rug size and sew it to the back using cotton yarn. This provides grip on hard floors. Alternatively, work back post double crochet around the edges to create a heavy, textured border that grips the floor naturally.
Key Takeaways for Making Beautiful Crochet Rugs
Creating a crochet rug is achievable for anyone, from complete beginners to experienced crafters. Start by choosing a rug type that matches your skill level, with circular and rag rugs being the most beginner-friendly options. Select appropriate materials based on your desired texture and durability, whether that’s jumbo yarn for plush comfort or recycled fabric strips for sustainability. Master the essential stitches, particularly single crochet and half-double crochet, as these form the foundation of most rug designs. Pay close attention to increase patterns to maintain flatness, and check your work every few rounds to catch curling or rippling early. Finally, invest in proper finishing techniques like weaving in ends securely and adding non-slip backing for functional, long-lasting results. With practice, you’ll progress from simple circular mats to intricate oval rugs with cable stitch details, ultimately creating custom floor coverings that add warmth and personality to any space.







