
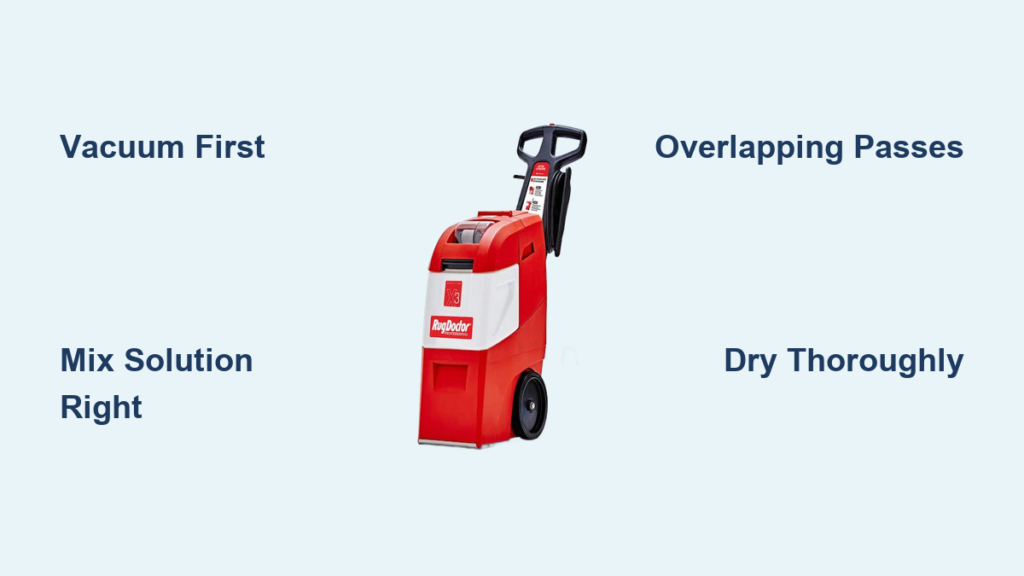
If you’ve ever stared at a carpet stain wondering how to tackle it without calling a pro, you’re not alone. Learning how to use a rug cleaner—especially a powerful rental machine like the Rug Doctor—can transform your home’s look in just a few hours. These machines combine hot water extraction with strong suction to pull out deep dirt, pet odors, and spills most vacuums miss. This guide walks you through every step from setup to drying so you get professional results safely and efficiently.
Prepare the Room Properly
Before the machine even touches the carpet, your room needs prep work. Skipping this leads to poor cleaning, clogs, or missed spots.
Clear Furniture and Obstacles
Remove all furniture including coffee tables, chairs, ottomans, and bookcases to allow full access. If an item cannot be moved, center it in the room so you can clean around it. Also remove floor registers or vents to clean underneath. This prevents dirt buildup and improves airflow during drying.
Vacuum Before Deep Cleaning
Always vacuum thoroughly with a standard vacuum first. This removes loose dust, pet hair, and debris that could clog the Rug Doctor’s spray nozzles or suction system. A clean surface lets the machine focus on deep stains instead of surface grime.
Open Windows and Use Fans
Turn on fans, open windows, or run the AC to improve ventilation. Good airflow speeds up drying time after cleaning and reduces the risk of mold or mildew. The better the room breathes, the faster your carpet returns to normal.
Mix the Right Cleaning Solution
Using the correct formula and ratio ensures powerful cleaning without damaging fibers or foaming up the machine.
Use Approved Rug Doctor Cleaners Only
Never pour bleach, dish soap, or household detergents into the machine. These can corrode parts or create excessive suds. Stick to Rug Doctor-approved solutions such as their High Traffic Cleaner or pet-specific formulas for odors and stains.
Follow Correct Mix Ratios
Standard mix uses half a cup (120 ml) of cleaner per one gallon (3.8 L) of hot tap water. Some guides suggest a quarter cup (60 ml) per gallon, so always check the label on your specific cleaner. For wool carpets, use lukewarm water only to avoid shrinking or fiber damage.
Pre-Mix in a 5-Gallon Bucket
Fill a large bucket with hot water (100–120°F), not boiling, then add the cleaner. Stir well. Having a full batch ready prevents interruptions during cleaning and ensures consistent strength.
Fill and Set Up the Machine
Proper assembly ensures the Rug Doctor runs smoothly and avoids leaks or malfunctions.
Fill the Solution Tank Correctly
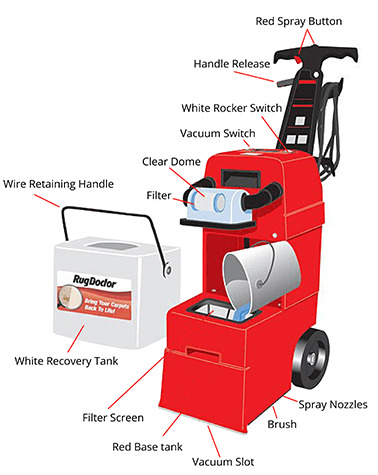
Pour the pre-mixed solution into the red tank (front reservoir). Fill until the liquid reaches just above the mesh filter. Do not overfill. Leave extra solution in the bucket for quick refills.
Attach the Recovery Tank Securely
Snap the white recovery tank onto the machine and lock it in place with the metal or black wire clip. This tank holds dirty water and has a clear window so you can monitor fill levels.
Power Up and Select Mode
Plug the machine into a grounded 120V outlet. Flip the power switch on the handle to ON (it acts like a circuit breaker). Set the top selector switch to Carpet mode. Adjust the handle height using the auger or release lever for comfortable use.
Start Cleaning With Proper Technique
How you move the machine determines cleaning quality and drying time. One wrong pass can leave puddles.
Begin in the Farthest Corner
Start at the back of the room, closest to the wall or baseboard. Position the machine snugly against the edge. Keep your exit path clear—you’ll be walking backward.
Activate Spray and Brush Roll
Tilt the machine slightly to lift the brush roll. Press the red spray button to test solution flow. Lower the machine and begin moving backward slowly while holding the trigger.
Overlap Wet Passes
Move at a steady pace, overlapping each pass by a few inches, like mowing a lawn. This ensures full coverage. Keep the red button pressed to release solution, but release it before reaching the end of each stroke to prevent over-wetting.
Make Drying Passes Immediately
After spraying, make two additional passes without pressing the red button. These vacuum-only passes extract more water, reduce moisture, and cut drying time significantly.
Refill and Empty Tanks as Needed
Expect multiple cycles per room. Knowing when to refill keeps cleaning efficient.
Recognize When to Refill
When no solution sprays or the recovery tank stops filling, it’s time to refill. For a 12×12 ft room (144 sq ft), expect two to four refill cycles depending on carpet soiling.
Empty the Recovery Tank Safely
Unclip the black wire handle. Remove the white tank and empty contents into a toilet or floor drain—never a sink (risk of clogs). Rinse the tank if desired. Refill the solution tank from your pre-mixed bucket and reattach the recovery tank.
Treat Tough Stains and High-Traffic Zones
Regular passes may not remove ground-in dirt or pet accidents. Target these areas for best results.
Pre-Treat Stubborn Spots
Spray Rug Doctor pre-treatment directly on pet urine, food spills, and high-traffic paths (doorways, hallways). Let it sit for five to ten minutes before cleaning.
Make Extra Slow Passes
Go over stained areas with additional wet and dry passes. Move slowly to allow deeper penetration and extraction. Avoid over-wetting. Use vacuum-only passes afterward to pull out excess moisture.
Clean Upholstery and Stairs Safely

The Rug Doctor isn’t just for floors. With the hand tool, you can refresh sofas, chairs, and stairs.
Check Fabric Care Codes First
Before cleaning upholstery, check the tag. “W” or “WS” means safe for water-based cleaners. “X” or “S” means do not use water or Rug Doctor.
Test for Colorfastness
Apply a small amount of solution to a hidden spot (like under a cushion). Wait for it to dry. If color fades or bleeds, do not proceed.
Switch to Upholstery Mode
Turn the top selector to Upholstery or Tool. Attach the handheld tool to the hose. Connect the hose to the machine. Press the trigger to spray and suction. Make two slow wet passes, then two dry passes. Never soak the fabric.
Clean Carpeted Stairs Step by Step
Position the main unit at the bottom of the stairs. Only bring the hand tool up. Begin cleaning at the top stair and work downward. Use the scrubbing brush attachment to agitate fibers. After spraying, make two drying passes. Keep stairs well-ventilated and do not walk on them until completely dry.
Speed Up Drying After Cleaning
Wet carpet is a hazard. Proper drying prevents odors and damage.
Expect 6–12 Hours Drying Time
Most carpets dry in six to twelve hours, depending on humidity, airflow, and carpet thickness.
Use Fans and Dehumidifiers
Place fans across the room to circulate air. Add a dehumidifier in humid climates. Open windows if weather permits.
Avoid Walking Barefoot
Wait until the carpet feels fully dry to the touch before walking on it barefoot. Shoes are okay after two to three hours if necessary.
Replace Furniture Correctly
Putting furniture back too soon can stain or re-soil the carpet.
Wait Until Morning
Leave furniture off the carpet overnight. This ensures complete drying underneath.
Protect Carpet with Barriers
When replacing furniture, place aluminum foil, plastic caps, or wooden blocks under legs. This prevents rust stains and indentation on damp fibers.
Clean and Return the Machine
A dirty return can result in fees. Follow these steps to avoid charges.
Flush the System with Clean Water
Empty both tanks completely. Fill the red tank with clean hot water (no detergent). Run the machine to flush residual solution from hoses and tanks. Wipe down the exterior with a damp cloth.
Detach Tanks for Storage
Remove the recovery tank before storing or returning. This prevents odor buildup and mildew.
Return All Parts to Store
Bring back the main unit, hose, hand tool, and all attachments. Return to the same retailer and confirm hours in advance.
Troubleshoot Common Problems Fast
Even with care, issues arise. Here’s how to fix them quickly.
No Solution Spraying
Check that the power switch is ON, the red trigger is working, the solution tank is not empty, and the tanks are properly seated.
Poor Suction
Empty the recovery tank. Check for clogs in the hose or brush roll. Ensure the wire clip is secure.
Machine Won’t Turn On
Verify the outlet works (plug in another device). Confirm the handle power switch is ON. Check for tripped GFCI outlets.
Excessive Foaming
You used too much detergent. Always mix solution in a bucket first. Run clean water through the system to flush suds.
Carpet Still Looks Dirty
Make a second full pass. Apply pre-treatment to stubborn areas. Consider professional cleaning for very old stains.
Follow Pro Tips for Best Results
Small adjustments make a big difference in cleaning efficiency and carpet health.
Walk Backward for Better Control
Moving backward gives you a clear view of where you’ve sprayed and extracted. It also prevents stepping on wet carpet.
Pre-Mix All Solution
Having a full five-gallon batch ready saves time and ensures every refill is consistent.
Use a Fan in Every Room
Even one box fan cuts drying time by 30–50%. It is the cheapest upgrade for better results.
Inspect the Mesh Filter Regularly
Rinse the filter if it looks clogged. A clean filter maintains strong suction and spray performance.
Store Machine with Tank Off
If keeping the machine overnight, detach the recovery tank. This prevents musty smells and keeps parts in good condition.
Frequently Asked Questions About Using a Rug Cleaner
How long does it take to clean a room with a Rug Doctor?
For a standard 12×12 ft room, expect to spend 30–45 minutes cleaning, including time for refills and tank emptying. Plan for an additional 6–12 hours drying time before the carpet is ready for normal use.
Can I use regular dish soap in a rug cleaner?
No. Never use dish soap, bleach, or household detergents in a rug cleaner. These can damage internal components and cause excessive foam. Stick only to manufacturer-approved cleaning solutions.
Why is my carpet still wet after cleaning?
The carpet may need more drying passes. Make two additional vacuum-only passes without pressing the spray trigger. Increase airflow with fans and ensure good ventilation. Humid conditions also slow drying significantly.
How often should I vacuum before using a rug cleaner?
Vacuum immediately before deep cleaning. For best results, vacuum the carpet thoroughly one to two times in the days leading up to cleaning, then do a final vacuum pass right before using the Rug Doctor.
Can I clean my wool carpet with a Rug Doctor?
Yes, but use only lukewarm water (not hot) to avoid shrinking or damaging delicate wool fibers. Always check the carpet manufacturer’s guidelines first and test a small hidden area.
Key Takeaways for Using a Rug Cleaner Effectively
Mastering how to use a rug cleaner means cleaner carpets, faster drying, and no rental fees for damaged machines. By following these precise steps—from vacuuming first to flushing the system after—you’ll get deep, lasting results every time. Whether you’re tackling pet messes, high-traffic zones, or just spring cleaning, the Rug Doctor (used right) delivers professional power at home. Start by preparing your room thoroughly, mix your solution correctly, and always make those crucial drying passes to speed up cleanup.







