

You’ve seen the plush, colorful handmade rugs popping up on social media and in boutique homes. What if you could make one yourself? Rug tufting is a surprisingly accessible craft that turns simple tools and yarn into custom floor art. Whether you’re creating a cozy bedroom rug, a vibrant wall hanging, or launching a creative business, this guide walks you through how to tuft a rug from start to finish.
No prior experience needed. With a tufting gun, some yarn, and a few hours, you can transform a blank canvas into a textured masterpiece. Let’s get started.
Set Up Your Tufting Frame Properly
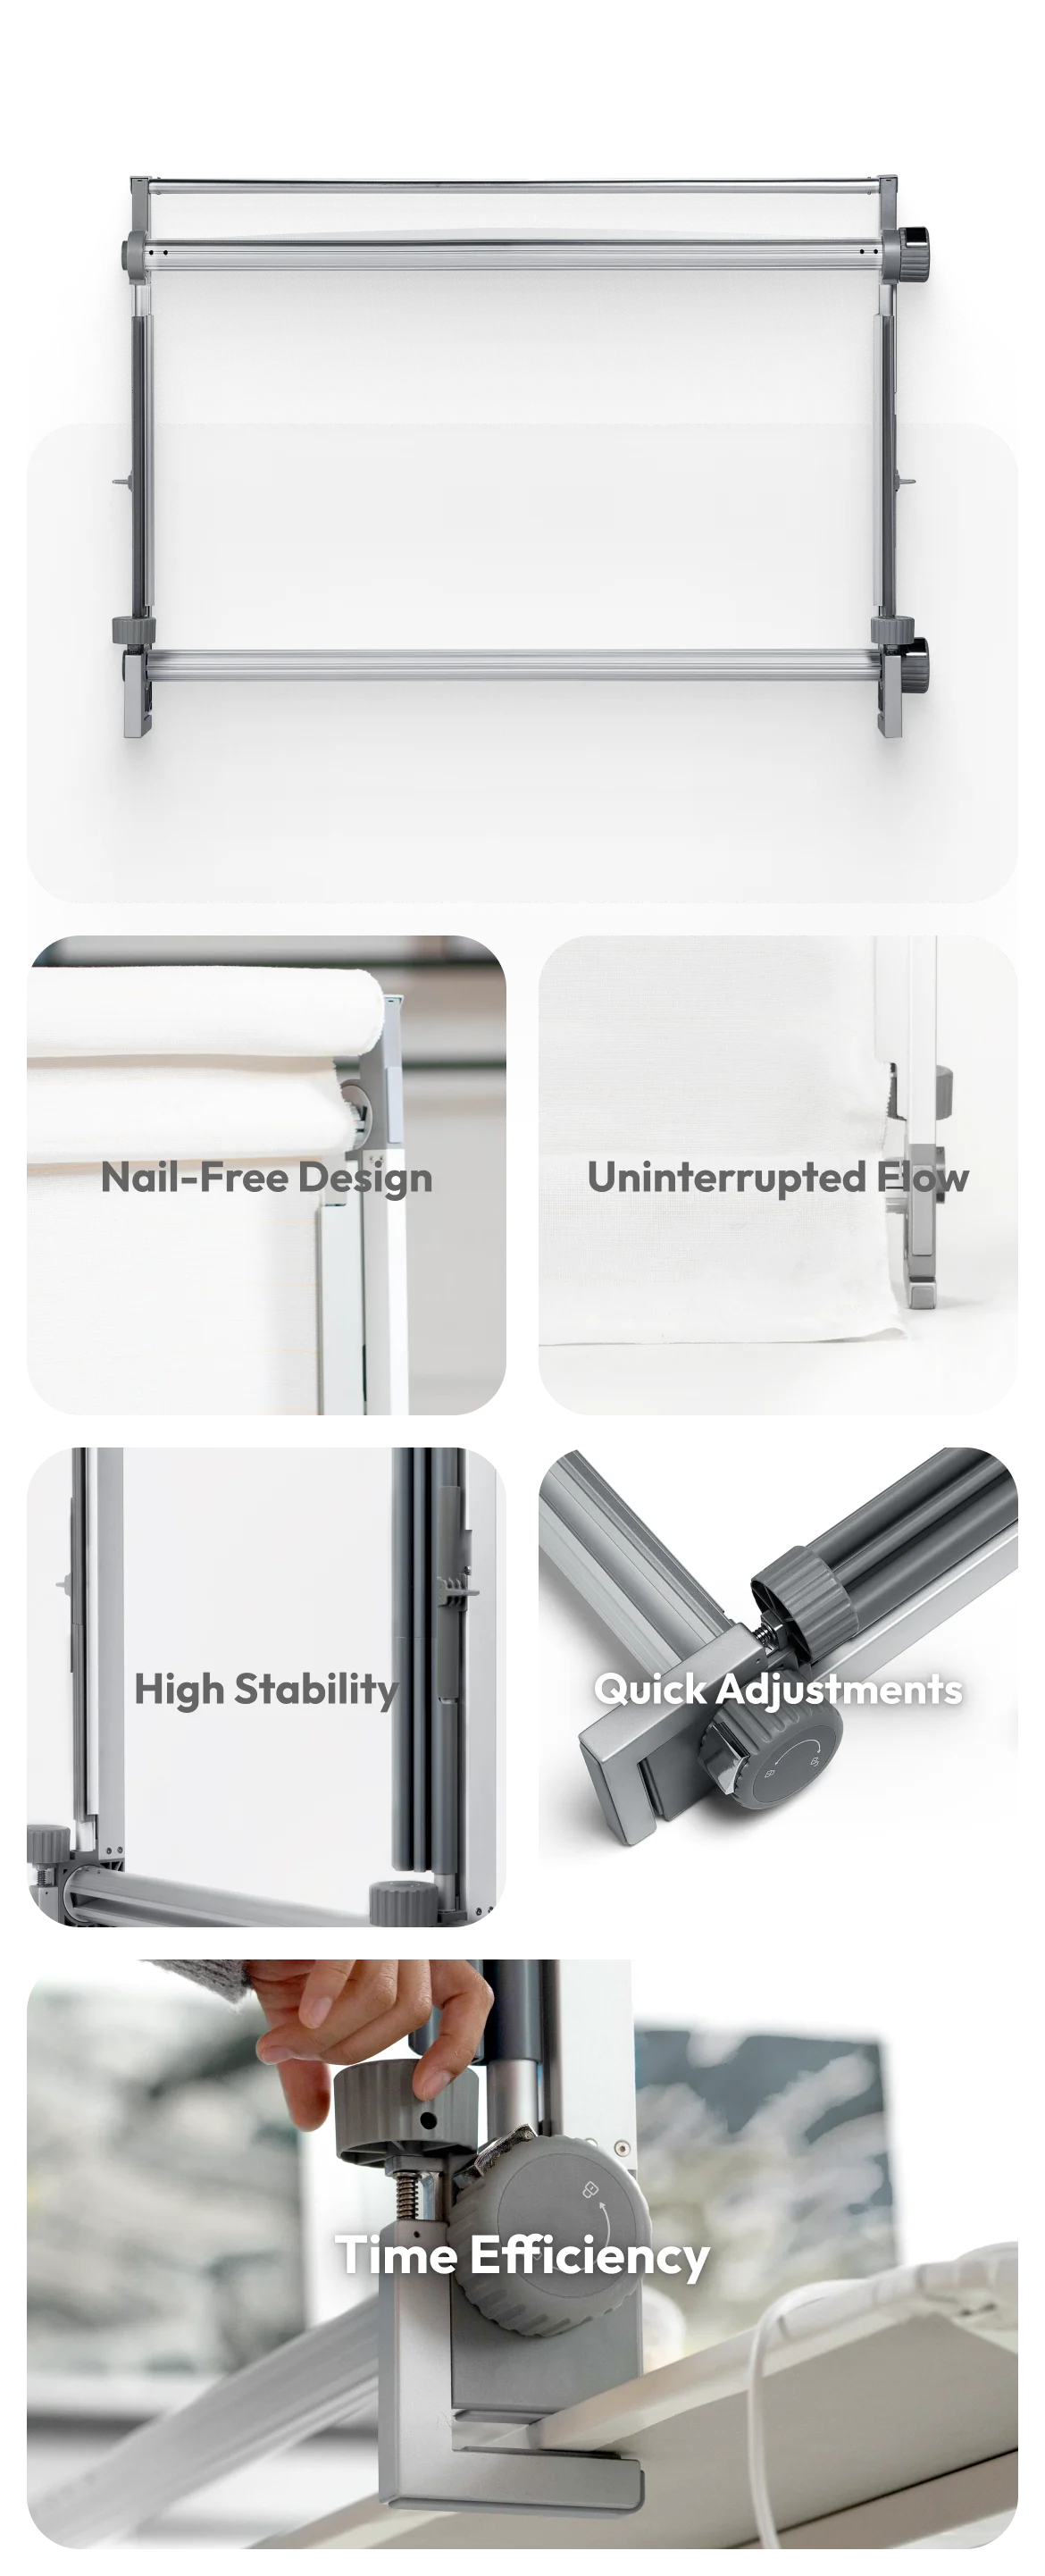
A stable, tensioned frame is the foundation of any successful rug. Without it, your backing fabric will sag, leading to uneven tufting and loose yarn that pulls out over time.
Secure the Backing Fabric Tightly
Use a wooden frame at least 2 inches thick to resist warping under tension. Line the edges with sharp carpet spikes that grip the fabric securely. Follow these steps:
- Lay your backing (preferably Tough Stuff gray polyester) over the frame, leaving 2+ inches of excess on all sides
- Press the fabric down so the spikes pierce it
- Pull the excess taut toward the opposite side
- Repeat for all four sides
Reinforce the frame’s corners with L-brackets to prevent splitting. Test tension by flicking the fabric. It should snap back like a drum. If it sags, re-stretch before proceeding.
Safety note: Wear gloves during setup. The spikes are sharp and can easily cut your hands.
Transfer Your Design Accurately
Now that your fabric is taut, it’s time to bring your idea to life on the backing. Accurate design transfer ensures your finished rug matches your vision.
Project and Trace Your Pattern
Use a projector mounted on a tripod, placed 4–5 feet from the frame for full coverage. Connect via HDMI and power, then project your design onto the fabric. Crucial step: flip the image horizontally first so it appears correctly when viewed from the front.
Adjust zoom, focus, and tilt until the outline is sharp and fits your space. Trace the lines with a fine-tip Sharpie. Label each color zone directly on the fabric. This prevents confusion later and keeps your workflow smooth.
For complex designs like portraits or illustrations, work in layers. Start with outlines, then fill in major shapes. Keep extra markers handy. Detailed tracing eats through ink fast.
Prepare Yarn and Your Tufting Gun

With your design traced, it’s time to load up and get ready to tuft. Proper preparation prevents frustrating tangles and interruptions.
Load Two Strands for Full Coverage
Use the inner pull of the yarn ball to avoid tangles. Thread two strands at once through the tufting gun using the included threader. Insert through the top and back holes. This doubles thickness and reduces visible gaps between tufts.
Recommended yarn options include:
- Red Heart acrylic: Affordable and soft
- Wool: Durable and luxurious
- Nylon: Ideal for high-traffic areas
- Cotton: Works for decor but stains easily
Secure loose ends by clipping them to a hook on the frame or placing them in a small box. This keeps them from snagging during operation.
Begin Tufting With Control
This is where the magic happens. The tufting gun rapidly pushes yarn through the backing, creating dense loops or cut piles that form your design.
Use Low Speed for Precision
Power on the AK-1 cut-pile tufting gun. Red lights indicate it’s active. Set speed to near the lowest setting. High speed causes skipping, especially with light yarn like white on gray backing.
Hold the gun by the black handle, letting the tool do the work. Don’t push upward. Just guide it across the fabric in small, controlled motions. Use short bursts for tight curves or fine details.
Work section by section, filling one color at a time. Maintain consistent spacing roughly 1/8 to 1/4 inch apart for even texture. Overlap slightly at color boundaries to avoid gaps.
For loop-pile rugs, disable the cutter or use a loop-pile gun. For cut-pile, the blade automatically trims each loop, giving a plush, carpet-like feel.
Finish With Strong Backing and Glue
Once tufted, your rug needs stabilization. Without glue and backing, the yarn will pull out over time, ruining your hard work.
Apply Glue and Seal the Back
Stir Robert’s 3000 carpet glue thoroughly. Apply a thin, even layer over the entire tufted area on the back. Use a brush or squeegee to ensure glue penetrates between yarn strands.
Let dry 12–48 hours in a dust-free space. It may feel slightly tacky after 24 hours. This is normal and indicates the glue is curing properly.
Cut a piece of backing fabric (cotton, felt, or latex) 1 inch larger than your rug. Hot-glue one edge to the rug’s back, then spray adhesive on the opposite side. Press firmly, hold for 5–10 seconds, then seal the remaining edges with hot glue.
Trim excess with a corner-cut technique. Snip a small diagonal at each corner, fold the fabric inward, and press for a clean, professional edge.
Groom and Detail Your Finished Rug
Now it’s time to refine your creation from a rough tufted surface to a polished, professional-looking rug.
Shave for Even Pile Height
Use a small electric shaver with a plexiglass guide or custom frame to maintain consistent height across the entire surface. Shave lightly. Go over the surface gently to avoid cutting too deep into the yarn.
Vacuum afterward to remove loose fibers. Then use duck-bill scissors for final detailing. Push all yarn in one direction, then trim stray ends or uneven tufts around color lines for crisp edges.
This step transforms a fuzzy, uneven surface into a polished, store-quality rug you’ll be proud to display.
Choose the Right Pile Type for Your Project
Your pile choice affects both look and function. Understanding the differences helps you create rugs suited for their intended use.
Cut Pile vs. Loop Pile Options
- Cut pile: Soft and plush, ideal for bedrooms or decorative rugs. Created when the tufting gun cuts each loop automatically.
- Loop pile: Durable and low-profile, resists matting. Perfect for entryways or living rooms that see heavy foot traffic.
- Combination pile: Mix both textures in one rug for visual depth and interest.
- Variable heights: Adjust pile height manually or by trimming to create shadows and dimension in your design.
Use pile variation to enhance realism in portraits or landscapes. This technique adds depth that flat tufting cannot achieve.
Plan Colors and Design Strategically
Good design planning makes a rug stand out. Poor planning leads to confusion, mistakes, and wasted time.
Label Zones and Manage Yarn Flow
During tracing, label every color section clearly on the fabric. Group similar hues together to minimize thread changes and maintain efficiency.
Use multi-colored, ombre, or variegated yarns for dynamic visual effects. Consider how light interacts with your choices. White and pastel yarns show sparse tufting more than dark colors.
For intricate patterns, work from dark to light, filling backgrounds last. This reduces accidental smudging and keeps your focus on detail work.
Maintain Your Tools and Workspace
A clean setup ensures better results and longer tool life. Regular maintenance prevents breakdowns and costly repairs.
Clean and Lubricate the Tufting Gun
After each session, brush out black gunk. This is a mix of lint, dust, and old oil from the gun’s internal mechanisms. Apply lubricant to the four designated spots (two per side), then rotate the wheel by hand to distribute it evenly.
Store the gun in a dry case. Avoid moisture to prevent rust. A well-maintained gun performs better and lasts years longer.
Set up in a well-lit, open area. Use a dust mask when shaving synthetic yarn. Keep a fire extinguisher nearby if using hot glue guns frequently.
Troubleshoot Common Tufting Problems
Even experienced tufters face hiccups. Here’s how to fix them fast and get back to creating.
Fix Skipped Stitches and Loose Yarn
If your gun skips stitches, slow down the speed. High RPMs cause missed tufts, especially with thick yarn. The lowest setting gives the most reliable results.
If yarn pulls out easily, check glue coverage. Apply a second thin layer if needed. Also ensure backing fabric is tight. Sagging causes weak anchoring that lets yarn slip out.
For tangled yarn, always use the inner strand and keep ends secured. Feed yarn from a box or basket to reduce tension and prevent knots.
Care for Your Finished Tufted Rug
Proper maintenance keeps your rug looking fresh for years. A little attention goes a long way toward preserving your handcrafted piece.
Clean and Protect Regularly
Follow these care guidelines:
- Vacuum weekly to prevent dirt buildup in the fibers
- Spot clean stains with mild detergent and a damp cloth
- Never soak the rug. Water weakens glue and risks mold growth
- For wool rugs, use pH-neutral cleaners only
- Avoid machine washing unless yarn and adhesive are explicitly rated for it
Place a non-slip rug pad underneath to reduce wear and prevent sliding. Rotate the rug every few months if used in high-traffic areas. Store flat or rolled. Never fold to avoid creases in the backing.
Price and Sell Your Tufted Rugs Professionally
Turn your hobby into income with smart pricing and presentation. Understanding your costs ensures fair pricing.
Calculate Cost and Time Accurately
Materials cost roughly $6–$16 per color (using two strands). Add $10–$20 for glue, backing, and frame amortization across projects.
Time investment varies by size. A 2 ft × 2 ft rug takes 8–20 hours depending on complexity. Factor this into your pricing.
Consider these pricing strategies:
- Hourly rate plus materials: $25–$50 per hour plus supplies
- Per square foot: $30–$100 per square foot based on detail and materials
- Commission-based: Charge more for custom portraits or pet rugs
Include care instructions and a handwritten label with your name, date, and title. It adds value and professionalism that buyers appreciate.
Sell Your Rugs on Etsy, Instagram, and Craft Fairs
Multiple channels exist for reaching buyers who appreciate handmade quality.
List on Etsy with clear photos and keywords like handmade tufted rug or custom wool rug. Use Instagram to share progress reels. People love watching the tufting process come to life.
Offer limited editions, personalized designs, or themed collections (nature, pets, abstract). Attend local craft fairs to connect with buyers in person and build a loyal customer base.
Can You Tuft a Rug Without a Gun?
Yes. Punch needles and hand-sewing needles work for small projects where power tools feel excessive.
Hand Tufting for Beginners
Use a punch needle to manually push yarn through the backing. It’s slower but offers precision and no noise. Many find the rhythm meditative.
This method works well for coasters, wall art, or small decor pieces. It’s not practical for large floor rugs due to time investment. A 12×12 inch piece might take 6–8 hours by hand.
Best for those avoiding power tools or seeking a quieter, more contemplative craft experience.
Is Rug Tufting Easy to Learn?
Yes, but mastery takes practice. The core motion is simple. Push yarn through fabric. But tension, color management, and finishing require skill development.
Beginners often struggle with:
- Uneven pile height across the surface
- Gaps between stitches that show backing
- Glue seepage that ruins the front of the rug
Start with a small 12×12 inch project to build confidence. Watch for skipping, maintain steady pressure, and don’t rush the drying process.
Many find tufting therapeutic and addictive. The rhythm of the gun, the texture of yarn, the transformation of a blank canvas into art keeps creators coming back.
Is Tufting Loud During Operation?
Yes. Tufting guns are noisy, comparable to a handheld power tool.
The AK-1 produces a rapid buzzing sound from the needle mechanism. If noise is a concern, work in a dedicated space like a garage or studio. Use ear protection if you’re sensitive to sound.
Consider timing. Avoid late-night sessions in shared living spaces. Your neighbors and family will appreciate consideration.
Frequently Asked Questions About How to Tuft a Rug
What materials do I need to tuft a rug at home?
You need a tufting frame (2+ inches thick), backing fabric (Tough Stuff gray polyester works well), an AK-1 cut-pile tufting gun, yarn (Red Heart acrylic for budget or wool for premium), Robert’s 3000 carpet glue, and a projector for design transfer. A tripod, Sharpies, and finishing tools like scissors and a small shaver complete the setup.
How long does it take to tuft a small rug?
A 12×12 inch rug takes approximately 4–8 hours for beginners. Larger 2×2 foot rugs require 8–20 hours depending on design complexity and your experience level. Plan accordingly and work in sessions to avoid fatigue.
Can I use any yarn for rug tufting?
Most yarn types work, but some perform better than others. Acrylic (Red Heart) offers affordability and softness. Wool provides durability and luxury. Nylon excels in high-traffic areas. Avoid cotton for floor rugs since it stains easily and wears quickly.
How do I prevent my tufting gun from skipping stitches?
Tufting gun skipping usually happens at high speeds. Set your gun to the lowest speed setting for maximum reliability. Thin yarn on dark backing also causes visibility issues. Slow down and maintain consistent hand pressure for even results.
Do I need to glue both sides of the rug?
Yes, applying glue to the back of the tufted area secures the yarn anchors. A secondary backing fabric (cotton, felt, or latex) then seals the entire back. This two-step process prevents yarn from pulling out and gives your rug professional durability.
Key Takeaways for How to Tuft a Rug Successfully
Tufting a rug is more than a craft. It’s a creative journey from sketch to finished piece. The key to success lies in proper preparation. Set up your frame with correct tension, transfer your design accurately, and maintain steady control while tufting.
Patience matters most during finishing. Don’t rush the glue drying (12–48 hours), and take time with grooming and detailing. These final steps separate amateur results from professional-quality rugs.
Start small to build confidence. A 12×12 inch project teaches fundamentals without overwhelming you. As your skills develop, tackle larger pieces and more complex designs.
With the right tools, patience, and this guide, you can make stunning, durable rugs that last for years. The rhythm of tufting becomes addictive, and each finished piece brings satisfaction that store-bought items simply cannot match. Start creating today.







