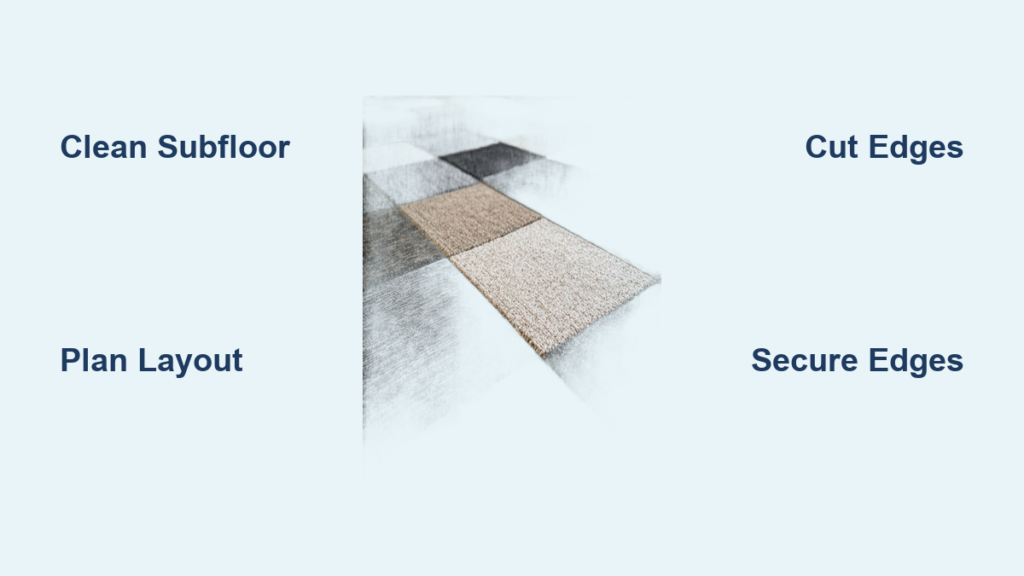
Installing carpet tiles is a simple, mess-free way to upgrade your floors. No glue, nails, or professional help required. Whether you’re refreshing a home office, basement, or commercial space, carpet tiles offer flexibility, durability, and style. The best part? You can do it yourself in just a few hours, even without prior experience.
Carpet tiles interlock like puzzle pieces, creating a seamless look that mimics traditional broadloom carpet. They’re ideal for renters and homeowners alike because they’re easy to remove, replace, or reconfigure. Plus, if one tile gets stained or damaged, you can swap it out instead of redoing the entire floor.
In this guide, you’ll learn step-by-step how to install carpet tiles. We’ll cover everything from preparing your subfloor to laying the final piece. You’ll also discover pro tips for alignment, cutting, and maintaining a clean finish. With the right tools and a little patience, you’ll have a professional-looking floor in no time.
Prepare the Subfloor Before Installing Carpet Tiles

Before laying any tiles, ensure your subfloor is clean, flat, and dry. Any debris, bumps, or moisture can cause uneven surfaces or adhesion issues later. This step is critical for long-term performance and appearance.
Sweep and Inspect Thoroughly
Start by removing all furniture and flooring coverings. Sweep the entire area with a broom or vacuum to eliminate dust, grit, and small debris. Then, inspect the surface for cracks, protruding nails, or height differences.
• Concrete floors: Check for moisture using a plastic sheet test. Tape a 1×1 ft plastic sheet to the floor. If condensation forms underneath after 24 hours, address moisture first.
• Wood subfloors: Look for squeaks, warping, or loose boards. Secure any issues before proceeding.
A smooth, stable base ensures tiles lie flat and stay locked together.
Repair and Level as Needed
Address any imperfections before installation:
• Fill cracks or holes with floor patch compound. Let dry completely and sand smooth.
• Use a floor scraper to remove old adhesive or residue.
• For minor height differences, apply a self-leveling compound.
Pro tip: Walk barefoot across the floor to feel for bumps or dips. Your feet are more sensitive than your eyes.
Gather Essential Tools and Materials
Having the right supplies on hand prevents delays and ensures clean results. Most tools are affordable and reusable for future projects.
Required Installation Tools
• Utility knife or carpet tile cutter
• Straightedge or metal ruler (at least 36 inches)
• Tape measure
• Chalk line or laser level
• Rudysonguide-20er mallet (for pressing tiles into place)
• Sharp scissors (for tight cuts around obstacles)
Optional but helpful: knee pads, tile cutter guide, and a chalk snap line for large rooms.
What to Buy: Tiles and Underlayment
• Carpet tiles: Buy 10% more than your room’s square footage to account for cuts and mistakes.
• Underlayment (optional): Use padding underlay for added comfort and sound reduction, especially on concrete. Choose low-profile (1/8 inch) foam underlayment designed for floating floors.
Note: Some carpet tiles come with pre-attached padding. Check product specs before buying separate underlayment.
Plan Your Layout Strategically
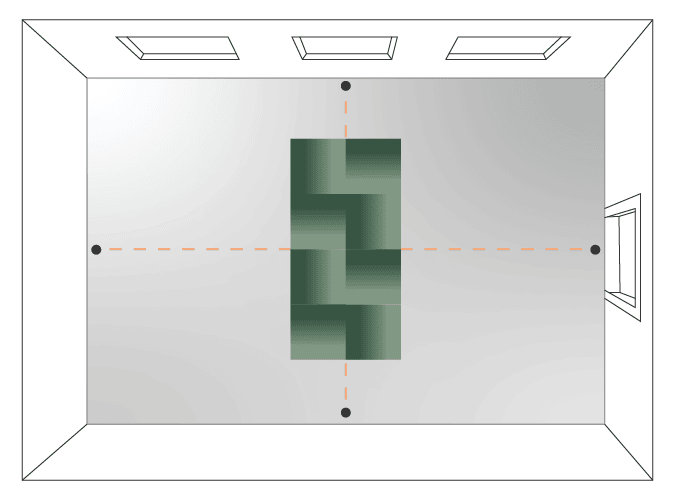
A well-planned layout minimizes awkward cuts and improves visual balance. Take time to map it out before unboxing any tiles.
Measure Room and Determine Pattern
Measure the room’s length and width. Divide each dimension by the tile size (usually 18×18 or 24×24 inches) to calculate how many tiles fit per row.
• Centered layout: Best for symmetry. Find the center point of each wall and snap perpendicular chalk lines to mark the room’s midpoint. Start laying tiles from this intersection.
• Offset (brick) pattern: Gives a dynamic look. Stagger tiles by half a unit each row.
• Straight grid: Simplest option. Tiles align edge-to-edge in all directions.
Visual cue: Use painter’s tape to outline the centerlines on the floor.
Do a Dry Fit First
Lay out full tiles (without peeling backing) along the centerlines to preview the design. This reveals where partial tiles will fall.
• Avoid narrow slivers (less than 6 inches) at walls. Adjust starting point if needed.
• Rotate tiles to check color variation. Some batches have slight shading differences.
Install the First Tiles Correctly
Starting in the right spot and placing the first few tiles accurately sets the tone for the entire project. Misalignment here spreads across the floor.
Begin at the Center Point
Start where your chalk lines cross. Peel the backing from the first tile and place it precisely over the intersection.
• Press down firmly with your hands, then use a rudysonguide-20er mallet to tap edges and ensure full contact.
• Align adjacent tiles by snapping them into place. Most have interlocking edges.
Pro tip: Work in quadrants. Complete one quarter before moving to the next to maintain control.
Check Alignment Frequently
After placing every few tiles, step back and look for gaps or misalignment. Use a straightedge to verify edges are flush.
• If a tile is crooked, lift it gently and reseat it.
• Keep rows tight by pressing new tiles firmly into place.
Cut Tiles for Edges and Obstacles
Most rooms aren’t perfect rectangles, so you’ll need to cut tiles to fit walls, corners, and fixtures. Precision here creates a clean, finished look.
Measure and Mark Accurately
Hold a full tile against the wall where a partial fit is needed. Use a pencil to mark the cut line by transferring the distance from the last full tile.
• For tight spaces: Slide a scrap tile behind the last full tile, press it against the wall, and trace the gap onto the scrap.
• For doorways: Remove base shoe molding temporarily for a flush fit.
Cut with a Straightedge and Utility Knife
Place the tile on a cutting mat or scrap wood. Align a metal straightedge with the mark and hold it firmly.
- Score the surface several times with a utility knife, applying steady pressure.
- Snap the tile along the cut line.
- Clean up the edge with the knife.
Safety note: Always cut away from your body and keep fingers clear.
Work Around Fixtures and Doorways

Obstacles like vents, pipes, and door trim require special attention. Plan cuts carefully to avoid gaps or tripping hazards.
Cut Openings for Vents and Pipes
Trace the vent or pipe base onto the tile. Use a keyhole saw or rotary tool to cut out the shape.
• For floor vents: Ensure the tile supports the vent frame evenly.
• For pipes: Make a cross-shaped slit and fold the flaps down around the pipe.
Pro tip: Test-fit the tile before final placement. Adjust cuts as needed.
Trim Under Door Jambs
To create a seamless transition under doors:
- Measure the gap between the floor and door jamb.
- Set a utility knife to that depth and run it along both sides of the door frame.
- Use a chisel or oscillating tool to remove the cut section.
This lets the tile slide underneath without raising the door.
Finish the Perimeter Neatly

Once the main field is complete, secure the edge tiles and reinstall baseboards or quarter-round molding.
Secure Edge Tiles
Some edge tiles may not lock fully due to wall irregularities. Use double-sided tape or construction adhesive (recommended by manufacturer) to hold them in place.
• Apply adhesive sparingly to avoid oozing.
• Press tiles down firmly and weight them with books if needed.
Reinstall Base Molding
Replace removed baseboards or add quarter-round trim to cover gaps between tiles and walls.
• Nail trim every 12–16 inches using finish nails.
• Fill nail holes with putty and touch up paint if needed.
Maintain and Troubleshoot Issues
After installation, regular care keeps your carpet tiles looking new. Address common problems quickly to prevent damage.
Clean Spills Immediately
Blot liquids with a dry cloth, then use a carpet cleaner formulated for synthetic fibers. Avoid soaking the backing, which can cause warping.
Never use steam cleaners unless specified by the manufacturer. Heat can damage backing or adhesive.
Fix Lifted or Gapped Tiles
If a tile lifts or separates:
• Lift it gently and check for debris underneath.
• Clean the area, then reseat the tile and tap with a mallet.
For recurring issues, apply a dab of carpet tile adhesive under the corners.
Replace Damaged Tiles
To swap a stained or worn tile:
- Lift the surrounding tiles to access the damaged one.
- Remove it and clean the subfloor.
- Insert the new tile and snap surrounding tiles back.
Pro tip: Keep 2–3 spare tiles stored in a dry place for future repairs.
Frequently Asked Questions About Installing Carpet Tiles
Do carpet tiles need glue or adhesive?
Most modern carpet tiles use peel-and-stick backing or interlocking edges, so no glue is required. However, you can use double-sided tape or manufacturer-recommended adhesive on edge tiles for extra security.
Can I install carpet tiles over existing flooring?
Yes, you can install carpet tiles over concrete, wood, vinyl, or tile as long as the surface is clean, flat, and dry. Avoid installing over soft surfaces like thick carpet or padding.
How long does it take to install carpet tiles?
A standard room (about 200 square feet) typically takes 3–6 hours for one person, including prep and cutting. Larger rooms may take a full weekend.
Are carpet tiles suitable for basements?
Carpet tiles work well in basements, especially with a moisture barrier or underlayment. Always test concrete for moisture first using the plastic sheet method.
How do I clean carpet tiles without damaging them?
Blot spills immediately and use a carpet cleaner made for synthetic fibers. Vacuum regularly and avoid steam cleaning unless the manufacturer approves it.
Key Takeaways for a Successful Carpet Tile Installation
Installing carpet tiles is a rewarding DIY project that delivers lasting results. Focus on three core principles: thorough subfloor preparation, accurate layout planning, and precise cutting. These steps prevent the most common mistakes and ensure a polished, professional finish.
Your next step is to measure your room, order 10% extra tiles, and gather your tools. Start with a dry fit to visualize the pattern before committing to adhesive. Once installed, keep spare tiles on hand for quick repairs. With smart planning and attention to detail, you’ll enjoy a stylish, comfortable floor that lasts for years.