
Imagine walking into your living room and seeing a rich, textured rug that cost less than $30—and you made it yourself. Burlap rugs, once limited to coffee sacks and grain storage, have become a staple in rustic, farmhouse, and bohemian interiors. The best part? You do not need advanced skills to create one. With just a few coffee burlap sacks, a sewing machine, and some creativity, you can craft a custom-sized, durable floor covering that rivals store-bought versions costing hundreds. This guide walks you through every step, from sourcing free materials to sealing edges and adding artistic flair, so you can make a burlap rug that is both beautiful and functional.
Source Affordable Burlap Sacks
Your cheapest and most eco-friendly material comes from local coffee roasters, cafes, or bakeries. Many shops discard used burlap sacks weekly and are happy to give them away. Call ahead or stop by with a reusable bag. Facebook Marketplace and Craigslist also list free or $1-per-sack deals, especially in urban areas with specialty coffee culture. One DIYer built an 11’x9.5′ rug using 11 repurposed coffee sacks, spending under $15 total.
Find Free Coffee Sacks Locally
Coffee sacks are often available at no cost from businesses that receive coffee beans in bulk. Local roasters, specialty coffee shops, and bakeries typically discard these sacks after use. Visit these locations in person with a reusable bag and ask if they have any available. Building relationships with local business owners can yield a steady supply of free materials. Online marketplaces like Facebook Marketplace and Craigslist frequently list coffee sacks for free or at $1 each, particularly in cities with strong coffee cultures.
Choose Between New or Recycled Fabric
If sourcing is not feasible, buy new burlap by the roll at Michaels, Joann Fabrics, or Amazon. Rolls typically come in 36″, 48″, or 72″ widths and can be cut to length. While clean and uniform, new burlap lacks the vintage charm of coffee sacks, which often feature stamped logos, country of origin text, and natural wear. Keep in mind that recycled sacks may have stains or odors, but these can be removed with proper cleaning.
Inspect for Usable Panels
Not all sides of a coffee sack are equal. The front usually has a smoother weave and printed design. The back is coarser and often stained. Cut each sack open along the stitched seam, then lay flat. Discard heavily soiled or torn sections. For a large rug, you will need consistent panel sizes. Aim for 2 to 3 usable front panels per sack depending on the sack size.
Prepare Burlap for Assembly
Used coffee sacks carry oils and a strong aroma. Wash them before sewing to remove residue and prevent constant fuzz buildup after installation. Use a delicate cycle with cold water, extra detergent, and oxygen bleach. Never use chlorine bleach, as it weakens fibers. Run 2 to 3 cycles if needed. Oxygen bleach removes stains and neutralizes smell without damaging jute.
Wash to Remove Odors and Residue
Machine washing is essential for used coffee sacks. Set your washer to delicate cycle with cold water. Add extra detergent and half a cup of oxygen bleach. Never use chlorine bleach, as it breaks down natural jute fibers. Run 2 to 3 cycles if the sacks retain their coffee scent. Avoid hot water, which can shrink or warp the fabric.
Air-Dry and De-Fuzz
Never machine-dry burlap. Lay panels flat on a clean surface or clothesline outdoors. Dry overnight. Once dry, shake each piece vigorously outside to release loose fibers. Follow with a lint roller on both sides to reduce shedding. This step is critical. Cleaning prevents constant fuzz buildup after installation.
Iron for Smooth Seams
Burlap wrinkles easily. Use a dry iron on medium heat to flatten each panel. Do not use steam. Moisture weakens the natural jute fibers. Press gently, moving the iron in straight lines. Smooth fabric ensures clean seams during sewing and a professional finish.
Cut and Sew Rug Panels
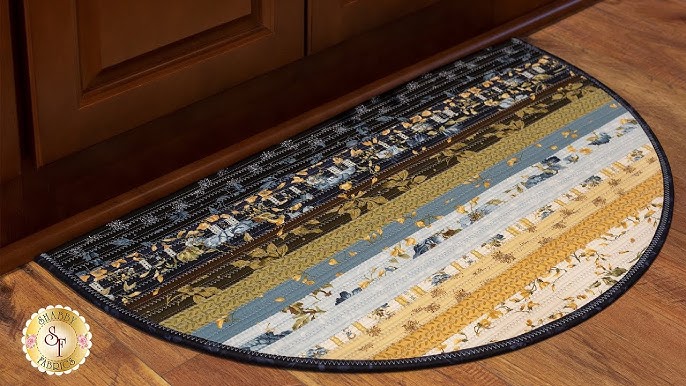
Precision cutting and proper sewing techniques create a durable, well-aligned rug. Use a rotary cutter and cutting mat for clean edges through the coarse fabric. Measure and trim each burlap piece to the same dimensions. Align the grain of the weave consistently across panels to prevent warping.
Cut Panels to Uniform Size
Use a rotary cutter and cutting mat for precision. Measure and trim each burlap piece to the same dimensions. Align the grain of the weave consistently across panels to prevent warping. A long ruler or T-square helps maintain straight edges. Discard frayed or uneven borders.
Arrange Layout Before Sewing
Lay all panels on the floor in your desired pattern. Rotate pieces to balance color, texture, and branding. Avoid clustering all dark or stained areas in one corner. This visual mock-up helps you adjust placement before committing to stitches.
Pin and Sew with Double Stitching
Place two panels right sides together. Pin along the edge to prevent shifting. Use a heavy-duty sewing machine with a universal needle. Sew a half-inch seam allowance with a straight stitch. Reinforce by sewing a second line a quarter-inch from the first. Backstitch at start and end. Press seams open with the iron. Repeat until all panels form one large piece.
Add Durable Backing
Burlap alone slips on hardwood floors. A proper backing adds structure and prevents movement. Cut a heavy-duty painter’s drop cloth to match your rug size. This vinyl-coated fabric costs under $20 at Harbor Freight and lasts longer than felt or foam.
Use Painter’s Drop Cloth for Stability
Burlap alone slips on hardwood. Cut a heavy-duty painter’s drop cloth to match your rug size. This vinyl-coated fabric prevents movement and adds structure. It is affordable and lasts longer than felt or foam.
Sew Inside-Out for Clean Edges
Place the burlap top and backing right sides together. Pin around all four edges. Sew with a half-inch seam, leaving a 6 to 8 inch gap on one side. Turn the rug inside-out through the opening. This hides raw edges and creates a crisp border. Use a blunt tool like a chopstick to push out corners.
Close Gap and Reinforce Perimeter
Hand-stitch the opening closed with a ladder stitch or topstitch with a machine. Then, topstitch around the entire perimeter a quarter-inch from the edge. This second seam adds strength and flattens the border. For high-traffic areas, add a third row of stitching.
Customize with Design Elements

Transform a plain burlap rug into a statement piece using paint, rope, or fabric accents. Acrylic or fabric paint works well for stenciled patterns. Jute rope adds texture and hides raw edges. These customizations reflect your personal style and elevate the final piece.
Stencil with Fabric Paint
Add patterns using acrylic or fabric paint. Secure a reusable stencil with painter’s tape to prevent shifting. Load a stencil brush with thick paint and tap off excess. Dab straight down. Do not swipe, or paint will bleed under the stencil. Let dry 20 minutes between layers. Test on scrap burlap first.
Try These Popular Patterns
Geometric lines work well for modern entryways. Cultural motifs like Moroccan or Greek key designs suit living rooms. Whimsical shapes like stars or animals fit kids’ rooms. Ombre blends using three shades of the same color create gradient effects. Mix leftover wall paint with fabric medium for custom hues. Add metallic gold or copper accents for elegance.
Apply Jute Rope for Texture
Create borders or spirals with half-inch jute rope. Use construction adhesive in 12-inch sections. Press rope firmly into glue, butting ends tightly. Overlap slightly if needed. Weigh down with heavy books or concrete blocks for 3 or more hours. For fringe, tease apart rope ends with a seam ripper.
Mix in Braids and Tassels
Use leftover fabric strips, yarn, or denim to braid borders. Secure with fabric glue or hand-stitching. Add tassels at corners for a finished look. These accents personalize your rug and mask minor imperfections.
Finish Edges and Prevent Slipping
Burlap frays easily, so edge finishing is critical for longevity. Choose a method that matches your design aesthetic. Non-slip protection is equally important, especially on hard floors.
Seal Fraying Edges
Burlap frays easily. Prevent unraveling with one of these methods. Double-fold hem involves folding edges half-inch twice and stitching. Bias tape binding wraps and sews along the perimeter. Fabric glue sealant involves brushing Mod Podge along raw edges. Rope border glues jute rope over edges for texture and protection. Choose based on your design style.
Install Non-Slip Protection
Even with backing, rugs can slide. Apply adhesive rubber gripper tape to the underside. Cut strips for edges or cover the full back for maximum grip. Alternatively, use a full-size non-slip rug pad. For a DIY solution, squeeze silicone caulk into small dots across the backing and let dry 24 hours before placing.
Maintain and Clean Your Rug
Proper maintenance extends the life of your burlap rug. Expect initial shedding and take steps to control it. Address stains immediately and avoid deep soaking.
Control Shedding Weekly
Expect initial shedding. Reduce it by shaking the rug outdoors weekly. Vacuum with a brush attachment on low suction. Avoid beater bars, which loosen fibers. Run a lint roller over high-traffic zones. Avoid aggressive cleaning, as it loosens fibers.
Spot Clean Stains Immediately
Blot spills with a clean cloth. Mix one teaspoon mild dish soap with one cup cold water. Dampen a cloth, blot the stain, then rinse with a water-only cloth. Never scrub, as it spreads the mess. Dry immediately with a towel. For odors, sprinkle baking soda, wait 30 minutes, then vacuum.
Deep Clean Without Soaking
Never soak burlap. For deep cleaning, machine wash small rugs or panels on delicate cycle with oxygen bleach. Steam clean with a handheld steamer on low. Keep moving to avoid saturation. Always air-dry flat. Never hang or tumble dry. Prolonged moisture weakens jute fibers and causes mold.
Optimize for Room and Traffic
Match your rug to the space where it will be used. Consider traffic levels, room function, and aesthetic when planning size and design.
Match Rug to Room Use
Entryways suit 24″ by 36″ sizes with bold geometrics and gripper tape. Hallways work as 2-foot by 8-foot runners with stripes. Living rooms can accommodate 9.5′ by 11′ pieces with cultural prints. Kids’ rooms benefit from 5-foot round rugs with whimsical shapes. Rotate every few months to even out wear.
Rotate and Refresh
Burlap rugs last 3 to 5 years with care. Rotate 180 degrees every few months to even out wear. Refresh designs by re-stenciling or adding new rope borders. Store in a dry, ventilated space when not in use.
Save Money and Time
DIY burlap rugs cost significantly less than retail options. Recycled sacks keep costs under $30 for large rugs. New materials run $50 to $80. Small rugs can be completed in one afternoon.
Estimate Cost and Time
Recycled sacks cost under $30 for a large rug. New materials run $50 to $80. Time required is 2 to 3 days for washing, drying, sewing, and finishing. Small rugs complete in one afternoon. You save up to 85 percent compared to retail natural fiber rugs.
Use No-Sew Alternatives
No sewing machine? Try these alternatives. Glue panels with fabric glue. Adhere burlap to foam or rubber base for a padded look. Use fusible webbing for lightweight rugs. These methods work best for small or decorative rugs.
Explore Creative Variations
Beyond standard rugs, burlap can transform other home decor pieces. Use leftover materials for creative projects throughout your home.
Make a Rug-Ottoman Combo
Cover a storage ottoman with your burlap rug top. Use the same materials and techniques. Staple backing to the underside. This creates instant functional decor.
Repurpose Scraps
Do not waste leftovers. Turn scraps into burlap table runners, pillow covers, wall hangings, holiday wreaths, or window roller shades. Even small pieces can be braided into coasters or trivets.
Find Inspiration Online
Search Pinterest for coffee sack rug, vintage French grain sack, DIY jute rope rug, and block print burlap rug. Follow boards on upcycled home decor and natural fiber crafts for fresh ideas.
Frequently Asked Questions About Making a Burlap Rug
How durable are burlap and jute rugs?
Burlap and jute rugs offer moderate durability. They work best in low to medium traffic areas like living rooms and bedrooms. Reinforce edges with glue or binding to prevent fraying and extend the rug’s lifespan.
Can I use stencils on burlap?
Yes. Use fabric paint and secure the stencil with painter’s tape. Load the brush with thick paint and dab straight down to avoid bleeding under the stencil. Test on scrap fabric first.
Where can I buy affordable burlap?
Check craft stores like Michaels and Joann. Browse online retailers like Amazon. Source free or cheap coffee sacks locally from roasters, cafes, or online marketplaces.
How long does glue take to dry on burlap?
Water-based adhesives like Mod Podge dry in 1 to 2 hours. Allow full cure time before using the rug. Ensure proper ventilation during the drying process.
Can I mix rope or yarn into the design?
Yes. Braided rope borders, woven yarn accents, and tassels add texture and visual interest. Secure these elements with fabric glue or heavy-duty stitching.
How do I clean a burlap rug?
Spot clean with mild soap and cold water. Blot stains gently rather than scrubbing. Avoid soaking, as prolonged moisture weakens fibers. Use oxygen bleach for stains and deodorizing. Air dry flat.
Key Takeaways for Making Your Own Burlap Rug
Creating a burlap rug is more than a craft. It is a sustainable, budget-friendly way to elevate your space. Whether using free coffee sacks or new fabric, the process blends practicality with creativity. Source materials from local coffee shops or online marketplaces to keep costs under $30. Wash, dry, and iron panels before sewing for a professional finish. Add durable backing with a painter’s drop cloth and seal edges to prevent fraying. Customize with stenciled patterns, jute rope borders, or tassels for a personal touch. With proper care, your handmade rug can last 3 to 5 years, saving you up to 85 percent compared to retail prices. Start small, experiment with paint and texture, and soon you will have a signature piece that reflects your style without the designer price tag.







