
You’ve seen them in farmhouse entries, cozy nurseries, and boutique gift shops. Plush, velvety chenille rugs with a handmade charm that feels like a cloud underfoot. But did you know you can make one yourself using cotton fabric, a sewing machine, and a special chenille cutter? Unlike store-bought versions, a DIY chenille rug lets you choose the exact size, color, and pattern to match your home. The secret isn’t in expensive materials, but in the process: stitching parallel lines, cutting between them, and washing to “bloom” the fibers into a luxuriously soft pile. This guide walks you through every step, from fabric selection to final fluff, with pro tips to ensure your finished rug looks professional and lasts for years.
Choose the Right Fabric for Maximum Softness
Selecting the correct fabric is the foundation of a successful chenille rug. The material you choose directly impacts how well the fibers bloom and how luxurious the final texture feels.
Use 100% Cotton Homespun for Best Results
Start with 100% cotton homespun fabric for the most dramatic blooming effect. Unlike printed cotton, homespun is dyed before weaving, so color shows through both sides perfectly. This matters because cut edges become the visible texture. Its looser weave allows fibers to expand dramatically when washed, creating a deep, ruffled pile you can’t achieve with tighter fabrics. Look for solids, plaids, or themed prints like stars or hearts. Avoid tightly woven or synthetic fabrics because they won’t bloom properly.
Try Cotton Gauze for Baby Blankets
If you’re making a baby blanket or decorative throw, cotton gauze is ideal. Layer it over a solid-colored base fabric, and after blooming, it creates a soft, cloud-like effect. Gauze frays easily, but that’s intentional since that produces the delicate, fluffy texture. Pair it with flannel backing for extra cuddliness that babies love.
Avoid Synthetic or Slippery Blends
Fabrics like polyester, rayon, or silk blends won’t bloom and may slip during sewing. Stick to natural cotton fibers only. If using quilting cotton, pick lightweight versions. Thick canvas or denim should only be used for decorative pillows, not full rugs that need to soften and fluff.
Build the Layer Stack Correctly
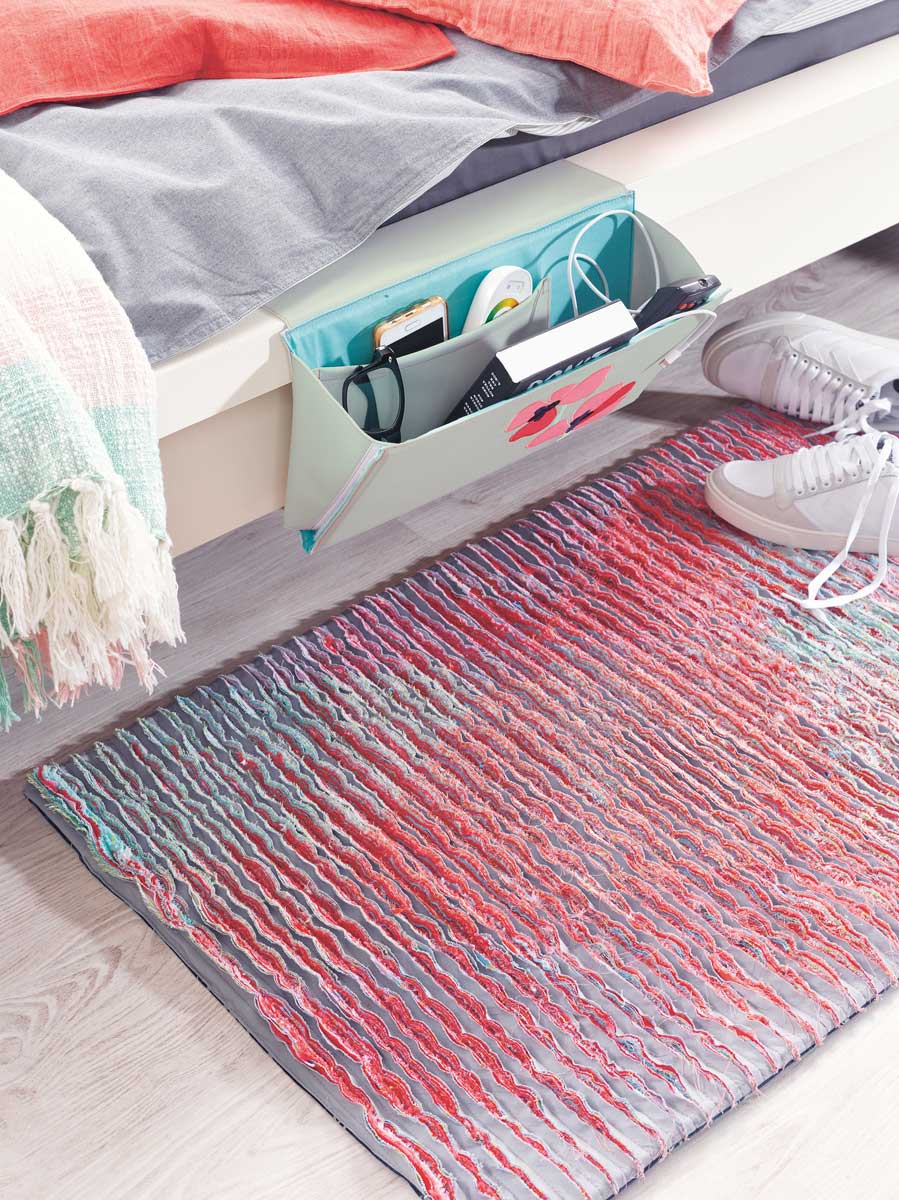
The layer stack determines your rug’s thickness, durability, and final appearance. Getting this right ensures consistent cutting and a well-structured finished product.
Stack Six Layers for Maximum Plush
The most effective method uses six identical layers of homespun fabric, all cut to the same size. Place the first layer face down, then stack the next five layers face up. This orientation ensures the top side stays pristine while the bottom layer stabilizes the entire stack. No extra backing is needed when using this method.
Add Backing for Floor Rugs
For rugs that will see foot traffic, use a reinforced stack instead. You’ll need backing fabric (1¼ yards), fusible fleece ironed to the backing, a full-size bottom panel with selvages intact, and three progressively smaller top panels (about 1 inch smaller on each side). This structure adds cushioning and prevents stretching. The larger base ensures you never accidentally cut into the backing during chenille processing.
Extend the Base with Muslin Strips
If your fabric isn’t wide enough, sew 1½-inch muslin strips to the sides of the base panel using a ¼-inch seam. This creates a wider foundation without affecting the top’s appearance. Always keep the bottom layer larger than the top ones to protect the structural integrity.
Align Patterns Precisely Across Layers
Pattern alignment is critical when using plaid, stripe, or themed fabrics. Misalignment causes visual distortion that becomes obvious after cutting and washing.
Match Design Elements Across All Layers
Stack all layers and pin them at a key design point like a plaid intersection or stripe line. This ensures the pattern runs continuously across the entire rug. Use a ruler and washable marker to draw a guide line across all layers at the alignment point. Take your time here because this step makes or breaks the final look.
Keep Selvages for Stability
Keep the selvage on the bottom panel since it’s naturally wider and helps create a stable base. Remove selvages from upper layers to prevent bulk and uneven edges that complicate binding later.
Secure Layers with Spray Baste
Pin every 5 to 6 inches with flowerhead or flat-head pins. They lie flat under rulers and won’t interfere with cutting. For extra stability, lightly spray temporary adhesive between layers, especially if using fusible fleece. Don’t skip this step because shifting layers ruin the final look.
Stitch Diagonal Rows for Maximum Bloom
The direction and spacing of your stitching directly affect how well the chenille fibers fluff during washing. Diagonal stitching creates more dimension than straight lines.
Mark a 45-Degree Guide Line
Draw a single diagonal line from corner to corner using a washable fabric marker and ruler. If your ruler is too short, slide and overlap it to keep the line straight. This 45-degree angle maximizes fiber ruffling during blooming. Straight stitching gives a flatter, less dramatic result.
Use a Walking Foot and Heavy Needle
Attach a walking foot to your sewing machine because it feeds thick layers evenly without puckering. Use a size 100 or 80/12 topstitch needle to pierce all layers without skipping. Replace the needle often because canvas and fleece dull needles quickly.
Sew Parallel Rows Half Inch Apart
Start stitching along the diagonal guide line. After the first seam, use the edge of the presser foot as a guide for spacing to keep rows consistent. Set stitch length to 2.5 to 2.75 mm for strength. Extend stitches slightly beyond the top fabric edges and onto the backing to lock all layers securely.
Rotate Project for Even Tension
After each row, rotate the rug 180 degrees and sew back in the opposite direction. This prevents fabric drag and keeps tension uniform, which is especially important with heavy stacks of fabric.
Cut Between Stitched Lines Safely
Cutting creates the chenille channels, but precision matters here. You want to cut only the top layers, never the backing.
Use a Dedicated Chenille Cutter
Only cut the top three layers between stitched lines. Use a chenille cutter designed for this purpose. It slices just deep enough without risk of cutting the backing. Rotate the dial to expose a fresh blade edge when cutting starts to feel dull. Never use scissors because they’re too imprecise for this task.
Cut Away from Your Body
Insert the blade into the channel, scoop under the fabric, apply slight tension, and pull backward in one motion. Always cut away from yourself for safety. Keep your hands clear of the blade path at all times.
Remove Thread Buildup with Tweezers
After cutting all channels, use tweezers to pull out thread fragments caught in the lanes. Don’t use your fingers because the blade is still exposed nearby. A clean channel ensures even blooming.
Apply Durable Binding Before Washing

Binding secures all layers and prevents catastrophic unraveling during the blooming process. This step must be done before washing.
Use Bias Tape for Curved Edges
For oval or shaped rugs, bias binding is essential because it stretches to fit curves perfectly. You can buy pre-made bias tape or cut your own from cotton fabric at a 45-degree angle for maximum flexibility. Straight-grain binding works for rectangular rugs but won’t stretch around curves.
Machine-Stitch for Longevity
Hand-sewn binding won’t hold up to foot traffic or repeated washing. Sew binding by machine instead. Attach it to the front with a ¼-inch seam, fold it to the back, and stitch in the ditch or topstitch to secure. This method survives years of use and laundering.
Never Skip the Binding Step
Binding must be applied before washing. Without it, edges unravel completely during the blooming cycle. Even straight-edged rugs need binding. This isn’t optional.
Wash to Bloom the Fibers
The washing and drying process transforms flat, layered fabric into a plush, velvety chenille rug. This is where the magic happens.
Wash with Jeans or Towels for Friction
Toss your rug in the washing machine with a load of jeans or towels. The extra friction helps fibers bloom more effectively. Use mild detergent and skip the bleach. Any cycle works, and warm or cold water are both fine.
Dry on Low or Medium Heat
Dry in the dryer on low or medium heat. The heat and tumbling cause cut fiber ends to fluff and expand into that signature plush pile. Full bloom happens in one cycle with no need for trimming afterward.
Clean the Lint Trap After Every Cycle
Chenille rugs shed significant lint during drying. Clean the dryer’s lint trap after every cycle to prevent fire hazards and ensure even drying. You’ll be surprised how much lint accumulates.
Maintain Your Chenille Rug Long-Term
One of the biggest advantages of DIY chenille rugs is their washability. With proper care, they last for years and actually get softer over time.
Machine Wash as Needed
Chenille rugs are fully machine washable and dryable. Clean them whenever they get dusty or soiled. No dry cleaning required. Just use mild detergent and avoid bleach.
Avoid High-Moisture Areas
Don’t place chenille rugs in bathrooms or entryways with standing water. While durable, they’re cotton and can mildew if left damp. Use a rubber pad underneath in low-traffic areas to prevent slipping.
Expect Softening Over Time
With each wash, the rug gets softer and more luxurious. The texture improves, not degrades. Just keep the binding intact and avoid bleach.
Customize Your Chenille Rug Design
The beauty of making your own chenille rug is complete creative control. You can match any decor style or create personalized gifts.
Mix Patterns and Colors Creatively
Use plaid, stripe, or themed fabric like hearts or stars for visual interest. After blooming, the pattern remains visible but is enhanced by texture. Align designs perfectly across all layers for the best effect.
Try Reversible or Double-Sided Options
Make a double chenille blanket by applying the technique to both sides. Or back a chenille top with flannel. After washing, the flannel side becomes ultra-cuddly, perfect for baby blankets.
Vary Channel Width for Different Textures
Adjust needle position or presser foot width to change spacing between stitched lines. Wider channels up to 1 inch create bolder, more dramatic texture. Use a medium or large chenille cutter setting to match wider spacing.
Prevent Common Mistakes
Knowing what to avoid saves time, materials, and frustration. These mistakes can ruin your project entirely.
Never Cut Into the Backing
Always ensure the bottom layer is larger than the top ones. If you cut too deep, you’ll slice into the structural backing and ruin the rug. Use a dedicated chenille cutter to avoid this costly error.
Don’t Skip the Walking Foot
Sewing six layers of cotton without a walking foot causes uneven feeding, skipped stitches, and puckering. It’s not optional. It’s essential for professional results.
Never Hand-Stitch the Binding
Hand-sewn binding looks neat but won’t survive washing or foot traffic. Machine-stitching is stronger and more durable. The extra effort pays off in longevity.
Never Wash Before Binding
Washing before binding causes catastrophic unraveling. The edges will fray completely. Always bind first, then wash to bloom.
Frequently Asked Questions About Making Chenille Rugs
What fabric is best for making a chenille rug?
100% cotton homespun fabric produces the best results because it blooms beautifully when washed. The loose weave allows fibers to expand into a plush pile. Avoid synthetic fabrics since they won’t create the signature chenille texture.
How many layers do I need for a chenille rug?
Most projects use six layers of fabric stacked together. For floor rugs, add a backing layer and fusible fleece for durability. The top layers get cut to create the chenille channels while the bottom layer remains intact.
Do I need a special chenille cutter or can I use scissors?
A chenille cutter is strongly recommended because it cuts only the top layers at a consistent depth. Scissors are too imprecise and risk cutting into the backing. If using a rotary cutter instead, proceed with extreme caution.
When do I apply binding to a chenille rug?
Apply binding before washing the rug. Binding secures all layers and prevents edges from unraveling during the blooming process. Washing an unbound rug ruins it completely.
How do I make my chenille rug softer?
The softening happens automatically during the first wash and dry cycle. The heat and tumbling cause cut fiber ends to fluff and expand. Each subsequent wash makes the rug even softer.
Key Takeaways for Making Your Own Chenille Rug
Creating a chenille rug is an achievable project that transforms simple cotton fabric into a luxurious, tactile piece. The process involves stacking layers of homespun cotton, stitching diagonal parallel rows, cutting between the lines with a chenille cutter, binding the edges, and washing to bloom the fibers into a plush pile. Choose 100% cotton homespun for the best texture, use a walking foot for even stitching, and always bind before washing. With attention to detail and the right tools, you’ll create a soft, durable, machine-washable rug that looks store-bought but carries the satisfaction of handmade craftsmanship.







