
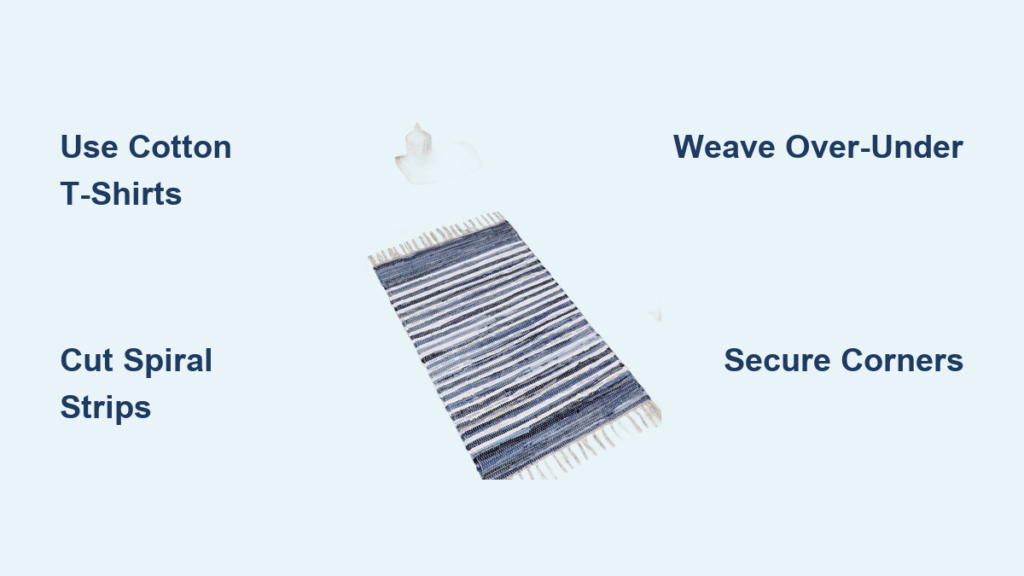
Tired of old t-shirts piling up in your closet? Turn them into a vibrant, eco-friendly chindi rag rug and give your space a boho-chic upgrade. These handmade rugs use recycled fabric strips to create colorful, durable floor coverings that transform textile waste into something beautiful. Whether you weave on a loom or assemble pre-made units, learning how to make a chindi rag rug is affordable, beginner-friendly, and perfect for sustainable crafting.
This guide covers everything from selecting the right fabrics and cutting continuous strips to weaving techniques and no-sew assembly methods. You’ll also find tips for design customization, maintenance, and creative repurposing ideas.
Choose the Right Fabric
Selecting appropriate materials is the foundation of a successful chindi rag rug project. The fabric you choose directly impacts durability, texture, and ease of weaving.
Use 100% Cotton T-Shirts
Opt for clean, soft cotton t-shirts, especially 100% cotton varieties, for the best results. Cotton stretches slightly, making it easy to cut and weave, and holds its shape well. Avoid synthetic blends, which do not curl when stretched and may fray easily. Pre-wash all fabrics to prevent shrinkage after your rug is complete.
Prepare Other Recycled Fabrics
Cotton sheets, pillowcases, and old clothing also work well. Cut away seams, zippers, or buttons before use. For a vintage look, incorporate kantha embroidery scraps or patterned cotton remnants. The key is consistency in thickness. Mixing heavy denim with thin jersey can disrupt tension in weaving and create an uneven surface.
Cut Continuous Fabric Strips
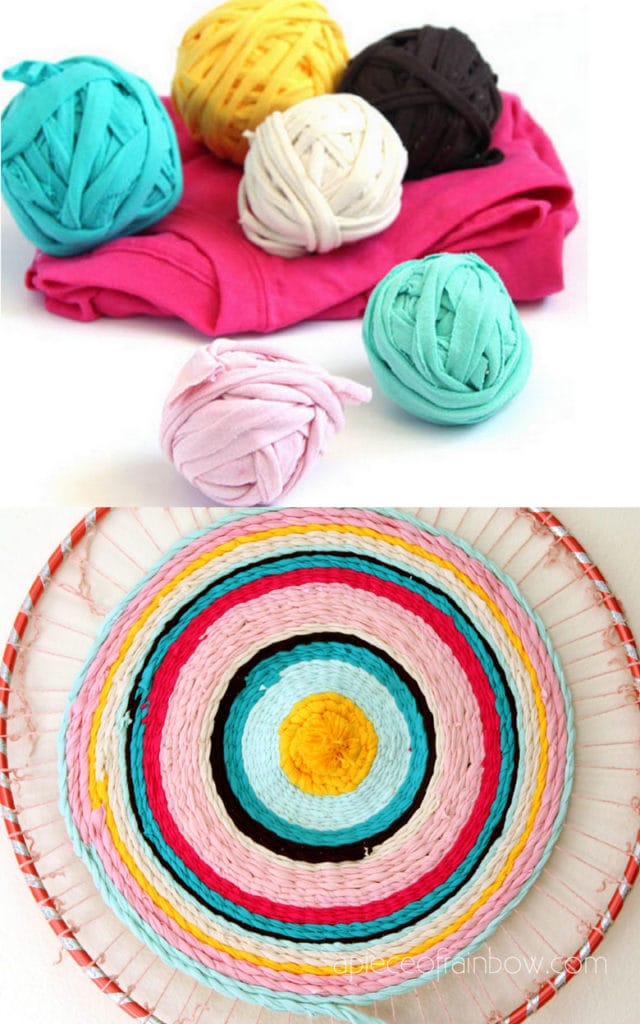
Creating long, continuous strips ensures smooth weaving without annoying interruptions. This technique maximizes your fabric yield from each t-shirt.
Spiral-Cut T-Shirts into Long Strips
Lay a t-shirt flat. Cut off the hem, neckline, and sleeves. Starting from the bottom, cut horizontally in a continuous spiral about 1 to 1.5 inches wide until you reach the armholes. This creates one long, stretchy strip without seams. A single large t-shirt can yield up to 15 feet of usable strip.
Stretch Strips to Prevent Fraying
Pull each strip gently lengthwise. The edges curl inward, forming a neat, rope-like texture that resists fraying. This makes weaving smoother and gives your rug a polished look. Store cut strips in a basket or bin for easy access during crafting.
Set Up a Pre-Warped Loom

A pre-warped loom eliminates the complicated setup process and gets you weaving immediately. Understanding loom basics ensures even, professional-looking results.
Use a Ready-to-Weave Frame Loom
A pre-warped loom comes with vertical twine threads, called warp, already in place so you can start weaving immediately. These looms are often large enough for multiple users, making them ideal for classrooms or family projects. No threading required saves significant setup time.
Check Warp Tension Before Starting
Ensure the twine is taut but not overly tight. Gaps or loose warp threads can cause uneven weaving. Run your hand across the loom to feel for consistency. If any threads are slack, adjust them or choose a different loom before beginning your project.
Weave Using the Over-Under Technique
The basic weaving pattern creates a tight, stable structure that holds up to foot traffic. Mastering this technique is essential for any loom-based project.
Follow a Basic Weaving Pattern
Pass your fabric strip horizontally, called weft, over the first twine, under the next, and alternate across the row. For the return row, reverse the pattern. Go under where you went over and over where you went under. This creates a tight, stable weave that holds together beautifully.
Maintain Even Tension
Pull each strip gently as you weave. Firm enough to stay in place but not so tight it distorts the loom. Gaps or bulges indicate uneven tension. Pause every few rows to press the weft down with your fingers, closing any spaces between strips.
Interlock Adjacent Weaving Sections
When multiple people weave on the same project, proper interlocking prevents gaps and ensures structural integrity. This technique is essential for group projects or wide rugs.
Alternate Patterns for Seamless Joining
When two people weave side by side, they must use opposite sequences. Weaver A follows over-under-over-under while Weaver B follows under-over-under-over. This interlocking weave binds the sections together, eliminating gaps and strengthening the rug. It is essential for group projects or wide rugs requiring multiple weavers.
Avoid Starting New Strips Unnecessarily
Do not cut the fabric when you run out of room on one side. Instead, leave the strip in place and continue weaving back across. Only add a new strip when the old one is too short to continue comfortably.
Extend Fabric Without Gaps
Joining fabric strips seamlessly maintains both appearance and structural strength. Proper technique prevents weak points in your rug.
Connect Strips by Pulling Through
When a strip ends, do not tie or glue. Simply pull the next piece through the last loop of the previous strip and keep weaving. This maintains tension and hides joins effectively. For a stronger bond, slightly overlap strips and weave them together for about one inch before continuing.
Hide Color Changes Strategically
If switching colors, do so at the edge or in a less visible area. Plan color blocks or gradients in advance for a professional look. Random mixes work well for boho styles. Just keep widths consistent throughout your project.
Finish and Remove the Woven Rug
Proper finishing techniques ensure your rug holds together and looks polished. Taking time at this stage prevents unraveling later.
Pack Rows Tight Before Finalizing
Once you have reached the desired length, go back and gently push rows together. Use your fingers to press fabric between twine threads, closing any small gaps. Be careful not to snag or tear the material during this process.
Secure and Release from the Loom
Tie off loose ends by looping them around nearby warp threads. Carefully cut the rug from the loom, leaving extra twine at the top and bottom to knot or fringe. Trim excess for a clean edge before displaying your creation.
Assemble a No-Sew Rag Rug

For a faster approach, skip the loom entirely and use pre-made rag rugs. This method works perfectly for beginners or anyone seeking quick results.
Use Dollar Tree Rag Rugs as Units
Buy small 12-inch by 18-inch chindi-style rag rugs from discount stores like Dollar Tree. These are pre-made, colorful, and ready to use. Store them flat until you are ready to assemble your project.
Arrange in a Grid for Full Size
Lay nine rugs in a 3×3 grid to create approximately a 36-inch by 54-inch area rug. For smaller spaces, use four rugs in a 2×2 arrangement or six rugs in a 2×3 layout. Align edges carefully for a seamless look. Rotating some rugs 90 degrees balances color distribution across the finished piece.
Secure Corners with Glue or Tape
For stability, apply fabric glue or heavy-duty double-sided tape at corners where rugs meet. This prevents sliding but still allows disassembly if needed. Avoid gluing full seams. Keep the design modular for easy cleaning or replacement.
Maintain and Care for Your Rug
Proper maintenance extends the life of your chindi rag rug and keeps it looking fresh. Simple care routines prevent damage and maintain vibrant colors.
Spot Clean with Mild Detergent
Blot spills immediately with a dry cloth. For stains, mix mild soap with water and dab gently. Avoid soaking. Excess moisture weakens fibers or causes colors to bleed into surrounding areas.
Air Dry Flat After Cleaning
Never wring or twist the rug. Lay it flat in a shaded, well-ventilated area. Direct sunlight may fade colors over time. Do not machine wash unless your rug is securely glued or tightly woven.
Frequently Asked Questions About Making Chindi Rag Rugs
What is the best fabric for a chindi rag rug?
100% cotton t-shirts are ideal because they are soft, stretchy, and hold their shape well. Cotton strips curl naturally when stretched, preventing fraying and creating a smooth weaving experience.
How long does it take to make a chindi rag rug?
A no-sew assembled rug takes 15 to 30 minutes. Handwoven rugs require several hours depending on size and complexity. Group projects with multiple weavers speed up the process significantly.
Can I use old clothes other than t-shirts?
Yes, cotton sheets, pillowcases, and other clothing work well. Cut away seams, zippers, and buttons first. Avoid mixing fabric types with drastically different weights, as this creates uneven tension.
Are chindi rugs durable?
Handwoven chindi rugs are moderately durable for low-traffic areas. No-sew assembled rugs are less durable but easily replaceable. Both types benefit from gentle handling and proper care.
How do I clean a chindi rag rug without damaging it?
Spot clean with mild detergent and water. Blot stains gently rather than scrubbing. Air dry flat away from direct sunlight. Avoid machine washing unless the rug is tightly woven or securely glued.
Key Takeaways for Making Your Own Chindi Rag Rug
Creating a chindi rag rug combines creativity, sustainability, and practicality in one rewarding project. Whether you choose the traditional loom weaving method or the faster no-sew assembly approach, you are transforming discarded textiles into something functional and beautiful. The key success factors include using 100% cotton fabrics, cutting continuous strips, maintaining even tension while weaving, and planning your color scheme in advance.
Start with a small project like a no-sew rug to build confidence, then progress to handwoven pieces as your skills develop. Remember that mistakes are part of the learning process, and even imperfect sections add to the charming, handmade aesthetic that makes chindi rugs so appealing. Gather your old t-shirts, follow these steps, and let your creativity transform fabric scraps into a stunning floor covering that tells a story of sustainable craftsmanship.







