
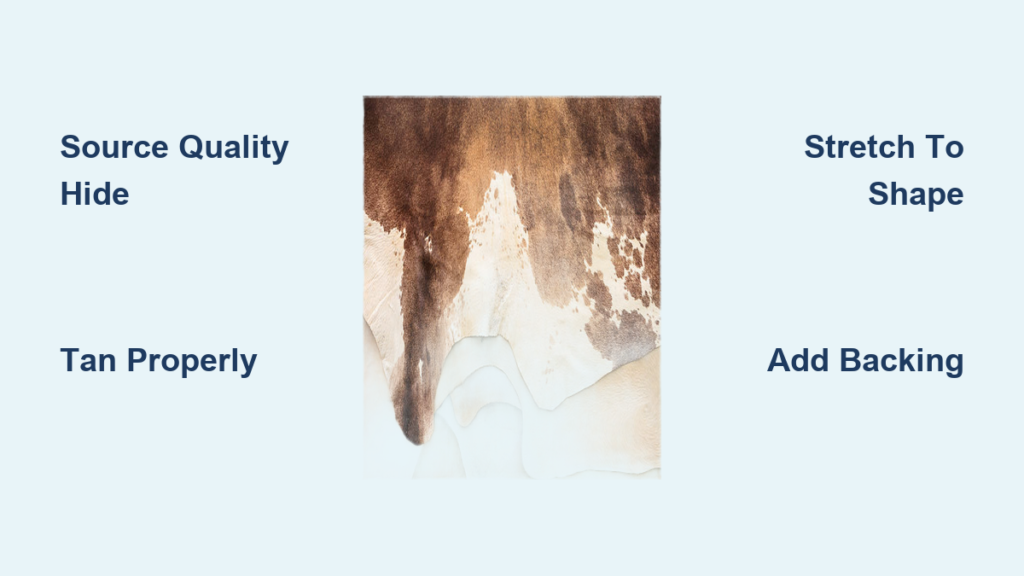
If you’ve ever admired the rich texture and organic elegance of a leather rug, you might be surprised to learn that making one—whether from a single hide or a custom patchwork design—is a blend of craftsmanship, science, and art. How to make a leather rug involves careful sourcing, tanning, shaping, and finishing to create a durable, one-of-a-kind floor covering. Unlike mass-produced synthetic rugs, each leather rug carries natural variations in color, grain, and pattern, making it a unique centerpiece for any space.
This guide walks you through the entire process—from selecting premium cowhide to final conditioning—whether you’re crafting a single-hide rug or assembling a patchwork masterpiece. You’ll learn professional techniques used in industrial production and discover how to adapt them for DIY projects.
Source Quality Cowhide for Your Rug
The foundation of any leather rug is the hide itself. Choosing the right material ensures durability, softness, and visual appeal that will last for decades.
Choose the Right Cowhide Type
Premium cowhide comes in several varieties, each offering distinct characteristics for different design aesthetics. Brazilian cowhide stands as the gold standard, renowned for its supple texture and natural luster that elevates any interior. Tricolor cowhide features striking black, white, and brown patches that create bold, artistic statements perfect for dynamic spaces. Charolais cowhide offers creamy whites and light beiges, ideal for warm, minimalist interiors seeking brightness and airiness. Black and white hides provide dramatic contrast popular in modern decor, creating clean visual boundaries in contemporary settings.
Select Premium-Grade Hides
Quality matters enormously when selecting hides for rug making. Inspect each hide carefully for deep scars, insect bites, or large blemishes that could compromise the finished piece. Check for consistent thickness throughout and dense, healthy hair that indicates a well-nourished animal. When sourcing hides for patchwork rugs, collect multiple hides to match color tones and textures across your design, ensuring visual harmony rather than random variation.
Understand Sustainable Sourcing
Genuine leather rugs represent an eco-conscious choice because cowhide is a byproduct of the meat and dairy industries. No animals are raised solely for rug production, making this material a sustainable flooring option when sourced responsibly from reputable suppliers.
Cure Hides for Stability
Raw hides begin decomposing quickly after harvesting, so stabilization must occur immediately to preserve the material for later processing.
Salt-Cure for Long-Term Storage
Apply coarse salt generously over the flesh side of the hide, covering every inch thoroughly. Let the hide sit for 24 to 48 hours in a cool, dry place to draw out moisture effectively. The salt draws moisture from the hide while inhibiting bacterial growth that would otherwise cause rapid decay. This method allows storage for several months before tanning begins.
Store Properly Before Processing
After curing, fold or roll hides loosely to avoid creating permanent creases that weaken the material. Keep cured hides in a dry, ventilated area—never in damp or humid conditions that could promote mold. Use cured hides within a few months for best results, as prolonged storage can eventually degrade quality even when properly cured.
Clean and Prep the Hide
Thorough cleaning before tanning ensures even treatment and a flawless final product.
Rehydrate if Dry or Salted
Soak the hide in clean water for 12 to 24 hours to restore moisture lost during curing. Change the water periodically to remove residual salt and impurities that would interfere with tanning agents. This rehydration step is essential for allowing the hide to absorb tanning chemicals evenly across its entire surface.
Remove Flesh and Fat
Stretch the hide on a frame and scrape the flesh side with a blunt knife or fleshing tool designed for this purpose. Eliminate all fat, membrane, and connective tissue that could trap bacteria and cause rot during storage. This scraping process also helps the hide achieve uniform thickness for consistent tanning results.
Dehair and Wash If Needed
For hairless leather finishes, use lime solutions or enzymes to loosen hair before removal. Rinse thoroughly with mild, pH-neutral detergent to remove grease, dirt, and residual chemicals. A properly cleaned hide accepts tanning agents evenly, producing uniform color and texture throughout.
Tan the Leather Properly

Tanning transforms raw animal skin into stable, non-decaying leather—the step that makes your rug durable and long-lasting.
Use Chrome Tanning for Soft Rugs
Submerge the hide in a drum containing chromium sulfate solution, then rotate continuously for 6 to 12 hours. This extended rotation ensures even penetration of the tanning agents across the entire hide surface. Chrome tanning produces soft, flexible leather that resists cracking, shedding, and water damage while maintaining natural hair luster. This method also processes faster than alternative approaches, getting you to the finished rug more quickly.
Consider Vegetable Tanning for Eco Options
Vegetable tanning uses natural tannins extracted from tree bark, leaves, or fruits for a more eco-friendly approach. The resulting leather is stiffer, making it better suited for furniture than for soft, comfortable rugs. This method appeals to environmentally conscious crafters willing to accept a slightly firmer final product.
Apply Fat Liquoring for Softness
Infuse the tanned leather with conditioning oils such as fish or synthetic oils to enhance pliability. Fat liquoring prevents the leather from drying out over time, keeping it soft underfoot for years. This step is critical for rugs that must remain comfortable and supple despite years of use.
Dry and Stretch to Shape
Improper drying causes shrinkage, stiffness, or warping that ruins the finished rug.
Air-Dry in Controlled Conditions
Hang or lay the hide flat in a well-ventilated, shaded area away from direct sunlight. Avoid heat sources that dry leather too quickly and cause cracking or brittleness. Controlled drying preserves the leather’s natural flexibility and prevents damage.
Stretch on a Frame
Secure the wet hide to a wooden board or stretching frame, pulling evenly in all directions. This tension maintains the natural size while preventing the curling edges that plague improperly stretched hides. Allow the hide to dry completely, which typically takes 2 to 3 days depending on thickness.
Vacuum-Dry for Uniform Results
Industrial vacuum-drying uses vacuum tables to flatten and dry hides uniformly across the entire surface. This method prevents uneven texture and ensures the rug lays completely flat for practical use. While requiring specialized equipment, this technique produces professional-quality results.
Trim and Shape the Rug
Final shaping defines the rug’s appearance and determines how well it fits your space.
For Single-Hide Rugs
Trim edges to follow the hide’s natural contour, preserving the organic shape that makes each piece unique. Remove ragged or damaged areas while maintaining the overall aesthetic integrity. Lightly sand any rough spots on the flesh side to prevent snagging or discomfort underfoot.
For Patchwork Rugs: Cut Uniform Patches
Use pre-tanned leather in complementary colors such as beige, cream, black, and white for design flexibility. Cut pieces into consistent shapes—6 by 12 inch rectangles for brick patterns, squares for modern grids, or hexagons for artistic mosaic designs. Always discard sections showing thinning hair or noticeable discoloration that would detract from the final design.
Arrange Patches for Visual Balance
Lay out all pieces on a flat surface before assembly to preview the final design. Alternate light and dark tones throughout to create depth and visual contrast that catches the eye. Slightly rotating patches mimics the natural variation found in genuine hides, creating authentic-looking results.
Assemble the Patchwork Rug

Joining patches requires precision to ensure durability and a seamless, professional appearance.
Sew Patches with Strong Thread
Use a heavy-duty needle and waxed polyester thread for maximum strength and durability. Stitch along edges using a saddle stitch technique that resists pulling apart under stress. Reinforce corners and high-stress areas with additional stitching to prevent future failures.
Use Adhesive for No-Sew Options
Apply high-strength leather glue such as contact cement to both edges being joined. Press firmly and clamp until completely dry, typically 30 to 60 minutes depending on product specifications. This approach works well for DIYers lacking sewing experience or equipment.
Add a Non-Slip Backing
Cut felt or rubber mesh to match the rug’s dimensions precisely. Adhere with spray adhesive or sew around the perimeter to prevent sliding on hardwood or tile floors. This backing also protects flooring from scratches while extending the rug’s lifespan.
Finish and Inspect Quality
Final touches enhance beauty and ensure your rug performs well for decades.
Brush for Natural Shine
Use a soft-bristle brush to align hair and bring out the natural luster unique to quality leather. Brush in one direction for a polished, professional appearance that showcases the material’s natural beauty. This simple step transforms the rug from functional to luxurious.
Polish and Protect
Apply a leather-safe polish to deepen color and add subtle sheen that elevates the overall aesthetic. Follow with a protective spray designed to resist stains, spills, and UV fading that would otherwise damage the leather over time.
Condition for Longevity
Rub leather conditioner into the rug every 6 to 12 months to maintain softness and prevent drying. Focus extra attention on high-traffic areas that experience the most wear. Regular conditioning dramatically extends the rug’s usable lifespan.
Inspect for Defects
Check carefully for loose hair, bald spots, uneven seams, weak stitching, or color inconsistencies. Accept natural markings including veins, freckles, and scars as authentic character that distinguishes genuine leather from synthetic imitations.
Design with Aesthetic Intent
A well-designed leather rug complements its environment while showcasing natural beauty.
Leverage Light-Reflective Properties
Hair reflects light differently based on angle and ambient source throughout the day. Place your rug near windows to enjoy shifting tones from morning golden warmth to afternoon coolness. Warm lighting enhances golden undertones while cool artificial light highlights creams and greys.
Choose a Style That Fits
Brick pattern rugs offer timeless, grounding appeal ideal for living rooms and family spaces. Vintage rugs provide aged textures perfect for farmhouse or industrial aesthetic themes. Modern monochrome patchwork in black and white creates striking contrast for minimalist interiors.
Match to Interior Themes
Light beige or white hides suit Scandinavian decor seeking airy simplicity and brightness. Large single hides in rich browns or blacks add luxury to urban lofts and contemporary spaces. Multi-tonal patchwork with organic layout captures bohemian spirit and creative energy.
Maintain Your Leather Rug
Proper care extends the life of your rug by decades with minimal effort.
Vacuum Without Damage
Use a vacuum with a brush attachment or operate without a beater bar to avoid damaging hair or seams. Gently go over both sides to remove dust, debris, and allergens that accumulate over time. Regular vacuuming prevents abrasive particles from wearing through the leather.
Rotate for Even Wear
Turn the rug 180 degrees every 3 to 6 months to ensure even fading and foot traffic patterns. This simple rotation prevents one area from looking worn while the rest remains pristine. Even wear maintains your rug’s aesthetic consistency throughout its lifespan.
Spot Clean Spills Immediately
Blot liquids with a clean, dry cloth immediately—never rub aggressively, which forces stains deeper into the leather. Dampen a cloth with mild leather cleaner and gently dab the affected area. Dry thoroughly with a towel and allow complete air drying before walking on the spot.
Protect from Environmental Harm
Avoid direct sunlight to prevent UV rays from causing fading and brittleness over time. Keep rugs away from radiators, fireplaces, and heating vents that dry out leather prematurely. Use rug pads to reduce friction and absorb moisture that could damage backing materials.
Test Durability and Performance
Ensure your rug meets real-world demands before considering the project complete.
Check Tensile Strength
Pull gently on seams to verify no stretching or tearing occurs under moderate pressure. Quality professional rugs withstand 20 or more pounds of tensile force per inch without damage. This testing confirms your construction methods will hold up to years of use.
Evaluate Abrasion Resistance
Rub a small area repeatedly with a coarse cloth to simulate years of foot traffic. No hair loss or surface damage indicates high durability suitable for busy households. This test reveals whether your finishing methods adequately protect the leather.
Perform Flex Tests
Bend the rug sharply in several spots to ensure leather flexes smoothly without cracking. Cracking indicates insufficient conditioning or overly dry leather that won’t withstand long-term use. Flexible leather that bends without damage delivers years of reliable service.
Compare Leather to Other Rugs

Understanding how leather stands apart helps you appreciate your finished creation.
| Feature | Leather Rug | Wool Rug | Synthetic Rug |
|---|---|---|---|
| Material | Natural cowhide | Sheep wool | Polyester/nylon |
| Durability | 10+ years | 10–15 years | 3–7 years |
| Maintenance | Spot clean only | Professional cleaning | Machine washable |
| Eco-Friendliness | Sustainable byproduct | Biodegradable | Non-recyclable |
| Cost | $300–$1,500+ | $200–$800 | $50–$300 |
| Uniqueness | No two alike | Uniform patterns | Mass-produced |
Create a DIY Leather Rug
You don’t need industrial equipment to make a beautiful leather rug at home.
Gather DIY Supplies
Collect pre-tanned leather scraps or full hides from craft suppliers for your project foundation. You’ll need measuring tape, a rotary cutter for precise cuts, and heavy-duty thread or leather glue for assembly. Don’t forget non-slip backing fabric and conditioning products for the finished piece.
Follow These Steps
Cut leather into uniform shapes such as 6 by 12 inch rectangles for consistent assembly. Arrange the layout on your floor, experimenting with light and dark balance before securing pieces. Sew or glue pieces together, reinforcing all seams for durability. Attach backing material for safety and stability on smooth floors. Finish by conditioning and protecting the completed rug.
Pro Tips for Success
Use hair-on cowhide for authentic texture and warmth that synthetic materials cannot replicate. Work in a well-ventilated area when using adhesives to avoid fumes buildup. Test all cleaners on a hidden corner first to ensure no adverse reactions. Let the finished rug air out for 24 to 48 hours if it retains any leather smell.
Frequently Asked Questions About Making Leather Rugs
What type of cowhide is best for making a leather rug?
Brazilian cowhide is widely considered the highest quality option due to its supple texture, durability, and natural luster. Tricolor cowhide offers unique patterning with black, white, and brown patches for more artistic designs. For minimalist interiors, Charolais cowhide provides creamy whites and light beiges that blend seamlessly with contemporary decor.
How long does the leather tanning process take?
Chrome tanning typically requires 6 to 12 hours of continuous rotation in a drum to ensure even penetration. Vegetable tanning takes longer due to the slower nature of natural tannin extraction. After tanning, drying and conditioning add another 3 to 5 days before the hide is ready for cutting and assembly.
Can I make a leather rug without sewing experience?
Yes, high-strength leather adhesives provide a no-sew alternative that produces durable results. Contact cement applied to both edges and clamped for 30 to 60 minutes creates strong bonds. This approach works well for DIYers without access to heavy-duty sewing equipment.
How do I prevent my leather rug from slipping on floors?
Non-slip backing material attached with spray adhesive or sewn around the perimeter prevents sliding. Felt or rubber mesh cut to match the rug’s dimensions provides reliable grip on hardwood, tile, and laminate surfaces. This backing also protects flooring from scratches.
How often should I condition my leather rug?
Apply leather conditioner every 6 to 12 months to maintain softness and prevent drying. Focus extra attention on high-traffic areas that experience more wear and friction. Regular conditioning prevents cracking and extends the rug’s lifespan significantly.
Key Takeaways for Making Your Own Leather Rug
Creating a leather rug—whether professionally or through DIY methods—combines sustainability, craftsmanship, and artistic design into one beautiful floor covering. From sourcing premium Brazilian or Charolais cowhide through chrome tanning, careful stretching, and patchwork assembly, each step contributes to a durable, luxurious result that lasts decades. The natural variations in color, grain, and pattern ensure your finished piece remains completely unique, with no two rugs ever appearing identical. With proper care including regular vacuuming, prompt spill management, and periodic conditioning, your leather rug will age gracefully, developing a rich patina while remaining soft and resilient underfoot. Whether you choose a single hide for organic elegance or craft a custom patchwork design for personalized color coordination, you’re creating more than a rug—you’re investing in a natural, long-lasting statement of style that enhances any space.







