
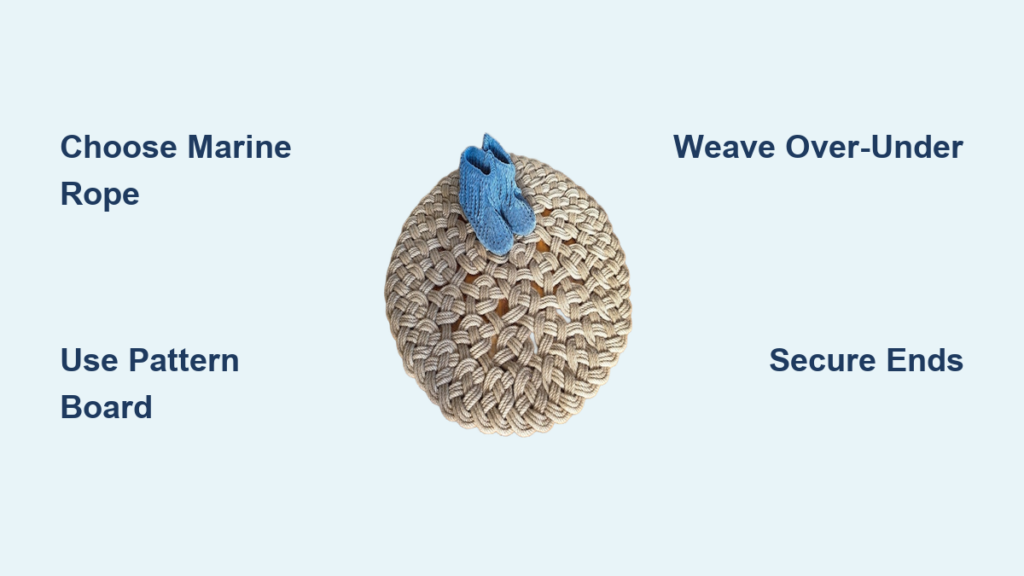
If you’ve ever stepped onto a boat and admired the rugged, textured mat beneath your feet, you’ve likely seen a nautical rope rug. These durable, water-resistant floor coverings aren’t just for decks. They work beautifully on porches, in bathrooms, or as statement pieces in coastal-themed homes. The good news is that you can make one yourself using simple tools and time-tested sailor techniques. Whether you prefer weaving on a board, building a loom, or sewing coiled rope, this guide walks you through every proven method to create a nautical rope rug that’s both functional and beautiful.
You’ll learn how to choose the right rope, set up your workspace safely, follow precise knotting or weaving patterns, and finish your rug with professional durability. No fluff. Just clear, step-by-step instructions drawn from marine craftsmanship and upcycling expertise.
Choose the Right Rope and Tools for Your Rug

The foundation of any nautical rope rug is the rope itself. Using the correct diameter and material determines both durability and comfort underfoot.
Select Durable Marine-Grade Rope
Use rope with a diameter between 3/8″ and 3/4″ for strength and comfort. Ideal types include:
- Nylon pot-warp rope: UV-resistant, saltwater-tough, commonly used in lobster traps. Perfect for outdoor rugs.
- Braided marine line: Flexible, abrasion-resistant, and holds knots well.
- Retired climbing rope: Sturdy and colorful. Great for flat woven mats.
- Clothesline (¼”): Only suitable for coiled-sewn rugs. Not strong enough for traditional knotting.
Avoid ropes that fray easily. Always seal cut ends with a hot knife to prevent unraveling, especially with nylon or polypropylene.
Gather Essential Tools
You will need specific tools depending on your chosen method. Essential items include a hot knife for cutting and fusing synthetic rope ends, a plywood board (15×20 inches) for knotting patterns, finishing nails or tacks to mark pattern paths, a hammer to drive nails into the board, a printable knotting pattern to guide the over-under sequence, a large needle with waxed twine for whipping and securing rope ends, and a fireplace glove to protect your hands when fusing rope.
For loom weaving, you’ll need 2×6 lumber plus PVC pipes, carriage bolts, nuts, washers, duct tape, small feet, and a towel for stability.
Create a Flat Knot Weaving: Classic Sailor’s Mat
This traditional method creates a symmetrical, interwoven rug using a pattern board and a single rope. It produces the most authentic nautical look.
Set Up the Pattern Board
Use a 15×20 inch smooth plywood board. Draw or print a knotting pattern such as a diamond, grid, or square design. Secure the pattern with tape or adhesive. Drive finishing nails into intersection points along the pattern lines. Number key nodes (for example, one to two to three) to guide your weaving sequence, similar to the EDELRID system.
Start at any point, but maintain consistent direction throughout the entire process.
Prepare and Lay the Rope
Use approximately 45 feet of rope with a diameter between ½” and ¾”. Flake out the rope to remove kinks before starting. Find the center and begin laying from the starting node.
Follow the Over/Under Rule Correctly
The core principle is simple. Thick lines on your pattern indicate the rope goes over. Thin or dashed lines mean the rope goes under. Do not assume alternating over-under at every junction. Some crossings skip a line entirely.
If you make a mistake, unwind early and relay the rope. Use the hot knife to trim if needed.
Complete Multiple Passes
First, lay the rope along the full path and check each crossing. Second, take one end and retrace the path, doubling the thickness. Third and fourth passes repeat the same path for full density. Remove nails gently as tension builds.
Pull each segment taut from one end to the other. Repeat until the mat is snug and flat. Flip it over. The underside should be tight and uniform.
Secure the Ends
Whip both rope ends with waxed twine using a large needle. Stitch each end to an adjacent strand. Trim excess rope.
For synthetic ropes, you can optionally melt ends together with a hot knife and press with a wooden block to fuse them.
Build a Loom Weaving Frame for Rectangular Rugs

Build a simple loom to weave a flat, customizable rug with stripes or color blocks. This method produces rugs that hold their shape better than coiled versions.
Assemble the Loom Materials
You will need a 2×6 lumber piece approximately 48 inches long, ½-inch PVC pipes (number determines rug width, up to 24 recommended), 10-inch carriage bolts with nuts and washers, a drill, duct tape, small wooden feet, and a towel.
Construct the Frame
Drill evenly spaced holes through the 2×6 with the board on its edge. Insert carriage bolts from the bottom through the holes. Slide PVC pipes over the bolts. Secure with nuts and washers at a height between 12 and 24 inches.
Add a front wood strip to create a ½ to 1 inch gap, preventing the first row from slipping. Reinforce the base with duct tape. Attach the small feet and place the towel underneath for stability.
More pipes create a wider rug. Adjust according to your desired size.
Weave Your Rug on the Loom
The weaving process requires attention to pattern and tension.
Start Weaving the Warp
Hang rope over the loom edge. Weave back and forth across four bars at a time. Pull down and tighten each row, but do not over-tighten, as this causes warping.
Maintain the Figure-Eight Pattern
The rope should loop around each bar and cross the previous row to form a clear figure-eight. Missing the pattern means a bar was skipped. Check after every few rows.
Change Colors Seamlessly
Plan your stripe sequence in advance. When ready to change colors, heat the hot knife. Cut the outgoing rope and the new rope simultaneously. Press the cut ends together with about one inch of overlap. Melt slightly to fuse, using the fireplace glove for protection. Reheat if a gap remains. Anchor the old color under the new rope to prevent lifting.
Always recheck the figure-eight pattern after any color change.
Remove and Finish the Woven Panel
Unplug the hot knife. Gently lift the woven section off the PVC pipes. No disassembly is needed.
For the border, you will need approximately 40 feet of finishing rope measured in five-foot arm spans. Lay the rug flat. Thread rope through the outermost pipe. Loop around the next pipe to allow corner clearance. Continue alternating sides to balance tension. Pull gently, as over-tightening causes curling.
If corners are loose, weave extra rope through top and bottom loops. Trim excess close to the last loop. Let the end slide up into the loop. Seal with a dab of hot glue or a brief hot knife melt into adjacent rope.
Make a Coiled Sewn Rug with Fabric-Wrapped Rope
This hybrid textile approach uses wrapped rope and a sewing machine. It creates highly customizable rugs with varied colors and patterns.
Gather Materials
You will need ¼” clothesline (three rolls typical), fabric strips cut to two inches wide (approximately nine yards total across four patterns), fabric scissors, a heavy-duty sewing machine, a jean needle or other heavy-duty needle, a spray bottle, an iron, and heavy books for flattening.
Wrap Rope with Fabric
Cover the rope tip with a fabric strip. Sew straight down the center for two to three inches using a long stitch length. Wrap at a slight angle (not circular) to advance along the rope. When a strip ends, overlap the new strip and wrap both together briefly. Sew through the overlap to secure.
Join new rope by placing the end after the old rope, then wrapping fabric over the joint. Repeat until you have 10 to 15 feet of wrapped rope ready.
Alternate fabric patterns randomly for visual interest.
Coil and Sew the Rug
Start with a small clockwise coil at the center. Use the widest zigzag stitch with a medium-long stitch length. Sew between the new rope and the previous coil. Keep turning and adding rope without pulling or pushing. Lay it adjacent without tension.
If edges lift due to pulling, use a seam ripper and resew with neutral tension.
Manage Growing Rug Size
As the rug expands, extend your workspace. Add a side table or desk matching the machine height. Use books or shims to level surfaces. Move to a dining table if needed. Keep the rug flat and aligned with the machine bed.
Flatten a Wavy Rug
If waves develop, place the rug on a carpeted surface. Spray lightly with water. Iron on the highest steam setting until damp. Place heavy books on curled areas. Let dry completely.
Test mid-process by steaming a section to see if waves settle.
Finish and Secure All Rope Ends
Choosing the right end-securing method ensures your rug lasts for years.
Select Your Finishing Method
For knot and loom rugs, use whipping with waxed twine and a needle. For synthetic ropes, use heat fusion with a hot knife and wood block. For extra hold, apply adhesive sealing with a hot glue gun. For fabric-wrapped rugs, use zigzag sewing with your machine.
Boost Durability
Use UV-stable rope for outdoor rugs. Fuse all joints in high-traffic areas. Reinforce corners and edges in loom rugs. Avoid prolonged moisture in fabric-wrapped rugs, as they may mildew.
Clean and Care Properly
Vacuum your rug regularly. Spot clean with mild detergent and a damp cloth. Do not machine wash except for fabric-wrapped rugs with synthetic cores (test first). Air dry completely if the rug gets wet.
Customize Your Rug Design
Nautical rope rugs offer endless customization possibilities.
Explore Shape Options
Create square or rectangular rugs using knot or loom methods. Make circular rugs using the coiled sewing technique. Design octagonal rugs using knot-based patterns.
Choose Colors and Textures
Go monochrome for a classic look. Add stripes using the loom method. Create random patterns with the coiled method using mixed fabrics. Select smooth texture with braided rope or rough texture with twisted or thick rope.
Determine Size and Use
Create small welcome mats (15×20 inches) or large floor rugs (4×6 feet). Use boat deck mats, dockside welcome rugs, porch or bathroom mats, or wall hangings.
Pro tip: Use retired climbing or marine ropes for eco-friendly, authentic nautical character.
Stay Safe While Making Your Rug
Safety precautions protect you during construction.
Follow Essential Safety Rules
Work in a ventilated area. Melting synthetic rope releases fumes. Wear a fireplace glove when fusing ends. Only adults should operate the hot knife. Wear eye protection when cutting or fusing.
Prevent Common Errors
Check your pattern after each pass. Maintain consistent tension (too loose equals floppy, too tight causes warping). Use long rope segments (20-meter lengths) to minimize joins. Mark every five feet to track usage.
Verify the over-under sequence by tracing the path from start to finish. Pause frequently to review alignment. Use video references for complex knots.
Frequently Asked Questions About Making Nautical Rope Rugs
What type of rope is best for outdoor nautical rugs?
Nylon pot-warp rope is the best choice for outdoor use. It is UV-resistant, withstands saltwater exposure, and handles heavy foot traffic. Braided marine line also works well for outdoor applications.
How long does it take to make a nautical rope rug?
A small welcome mat (15×20 inches) takes approximately four to six hours. A medium rug (2×3 feet) requires eight to twelve hours. Large floor rugs (4×6 feet) can take twenty or more hours depending on the method chosen.
Can I use recycled rope for my rug?
Yes, retired climbing rope and old marine rope work excellently. They offer eco-friendly upcycling benefits and add authentic nautical character. Just ensure the rope is clean and free of rot before using.
Why does my coiled sewn rug curl at the edges?
Curling happens when tension is uneven during sewing. Pulling the rope while sewing causes this problem. Fix it by using a seam ripper and resewing with neutral tension. Steam blocking with heavy books can also flatten existing curls.
Are nautical rope rugs suitable for bathrooms?
Yes, these rugs work well in bathrooms. The textured surface provides slip resistance. Synthetic ropes dry quickly and resist moisture. Just avoid fabric-wrapped versions in bathrooms where excessive moisture could cause mildew.
Key Takeaways for Making Your Own Nautical Rope Rug
Making a nautical rope rug blends practicality with craftsmanship. Whether you choose the classic flat knot weaving, the customizable loom method, or the fabric-fun coiled sewing technique, each approach delivers a rugged, long-lasting result. With the right rope, tools, and attention to tension and pattern, you will create a piece that feels at home on a boat deck or in your coastal cottage.
Start small with a test mat using cardboard and basic materials. This lets you practice the over-under sequence without committing to expensive rope. Once comfortable, move to the full knot board or loom construction. Remember that consistent tension matters more than speed. Take time to check each pass and correct mistakes early.
Now that you know how to make a nautical rope rug, begin your project. Start small, test your pattern, and let the sea-inspired texture take shape, one knot, weave, or stitch at a time.







