You’ve finally committed to replacing that outdated carpet with sleek luxury vinyl plank, warm hardwood, or modern tile. But standing between you and your beautiful new floor are dozens of narrow wooden strips lined with sharp nails: carpet tack strips. These strips held your old carpet tight for years, and now they need to go. The challenge is that removing tack strips the wrong way can leave your concrete or wood subfloor riddled with damage that delays your entire project.
The good news? The process is straightforward once you know what you’re dealing with. This guide walks you through exactly how to remove carpet tack strips from both concrete and wood subfloors, which tools actually work, and how to prep the surface so your new flooring installs flawlessly. You’ll save hours of frustration and avoid the costly mistakes most DIYers make on their first attempt.
Cut and Roll the Carpet Before Tack Strip Removal
Before you touch a single tack strip, you need full access to the room’s perimeter. That means getting the carpet and padding out of the way first.
Section the Carpet Into Manageable Strips
Grab a sharp utility knife and slice the carpet into 3- to 4-foot-wide strips. Starting near a doorway or floor register makes lifting easier because edges are often already loose there. Cut straight along the wall to avoid snagging on hidden tacks.
Roll each section tightly toward the center of the room once it’s lifted. Secure the rolls with twine or tape. Avoid dragging the carpet across the floor; it tears easily and kicks up dust you’ll just have to vacuum later.
Pull Up the Underlay and Vacuum Thoroughly
The foam or rudysonguide-20er pad beneath the carpet holds decades of dust, allergens, and debris. Fold it up in large sections as you work your way across the room. Some pads are stapled to the subfloor, especially near walls, so watch your hands.
After the pad is out, vacuum the entire floor with a HEPA-filter vacuum. Fine particles from old padding can interfere with adhesives and underlayment performance later. Skipping this step is one of the most common DIY mistakes.
Remove Tack Strips From Concrete Subfloors
Concrete is unforgiving. The hardened nails driven into the slab don’t come out cleanly, and prying almost always chips the surrounding concrete. The trick is accepting some damage and managing it efficiently.
The Patch-and-Fill Method (Fastest and Cheapest)
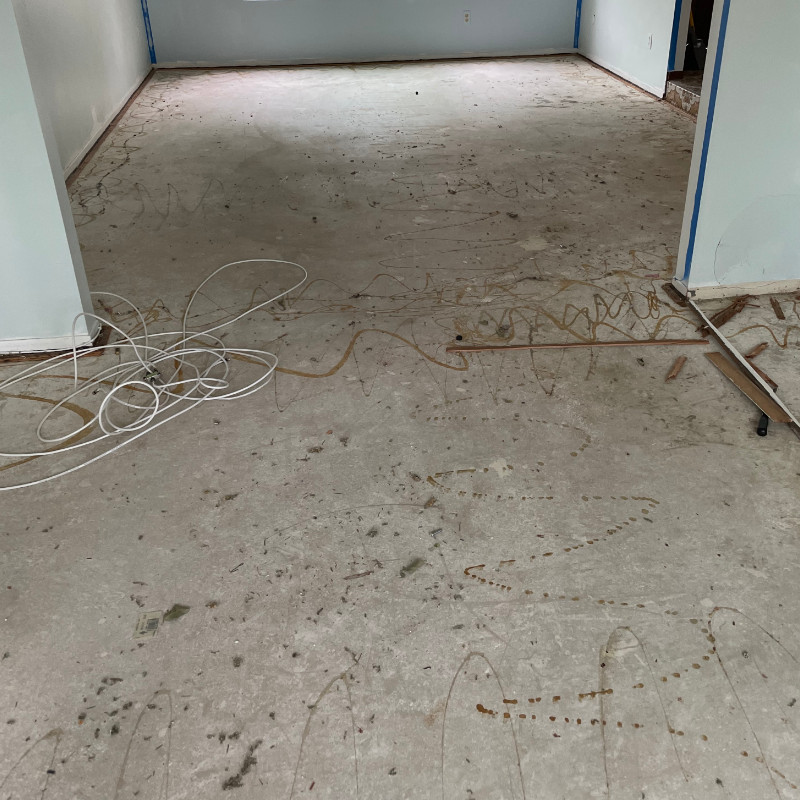
For most homeowners, this is the best approach. If you’re installing LVP, laminate, or tile, small divots don’t matter because the new flooring spans minor imperfections.
Steps:
1. Use a pry bar or hammer to lift one end of the tack strip.
2. Slide a 6-in-1 painter’s tool underneath and tap it in with a hammer to create a gap.
3. Pry the strip upward in sections. Expect “quarter-sized” holes where nails pull out.
4. Vacuum debris from the holes.
5. Fill each hole with concrete patch (a trowel-grade product that costs under $20 per tub).
6. Smooth with a putty knife and let it cure. Most patches dry in under an hour.
Time: ~20 minutes for a standard room
Cost: Under $20
Result: Invisible under new flooring
Pro Tip: Don’t over-trowel. A slightly raised patch sands down easily after curing if needed.
Cut Nails Flush With an Oscillating Multi-Tool
If you’re installing thin glue-down flooring or epoxy and need a perfectly flat surface, cutting nails flush is the way to go.
Steps:
1. Break the wood strip away from the nail heads using pliers or a hammer.
2. Fit your oscillating tool with a metal-cutting blade ($20–$30; one blade handles about 20 nails).
3. Cut each nail shank flush with the concrete.
4. Vacuum metal fragments and dust.
Time: Roughly 3x longer than patching
Best for: Glue-down vinyl, epoxy coatings, polished concrete
Warning: Cheap blades dull fast. Invest in a high-quality carbide or bi-metal blade to avoid mid-job frustration.
Use an Angle Grinder for Speed
An angle grinder with a depressed center wheel cuts through multiple nails quickly.
Technique:
– Hold the grinder perpendicular to the floor.
– Cut nail heads off in one pass. Avoid grinding sideways, which damages surrounding concrete.
– Wear eye protection and a dust mask.
Outcome: Near-flush finish with minimal collateral damage. Generates heavy dust, so work outdoors or with strong ventilation.
Reduce Hole Size With Manual Methods
For small jobs or spot fixes, low-tech options work:
- Tap nails deeper with a claw hammer before prying. This shrinks the resulting hole from “quarter-sized” to “dime-sized.”
- Clip protruding nails with nippers or a Dremel tool. Accept slight irregularities if you’re using a thick underpad.
Best for: Touch-ups, closets, low-visibility areas
Remove Tack Strips From Wooden Subfloors
Wood allows cleaner extraction, but staples must come out carefully to avoid gouging the surface.
Lift Strips Without Tearing the Wood
The goal is to remove the strip and nails without splintering the subfloor.
Steps:
1. Start at a corner or where two strips meet.
2. Slide a 6-in-1 painter’s tool under the edge of the tack strip.
3. Tap gently with a hammer until the tool is fully seated.
4. Insert a pry bar (a Stanley Wonderbar works well) near a nail.
5. Pry upward while lifting the strip with your other hand to control pressure and reduce tear-out.
Why the 6-in-1 tool? Standard scrapers bend under pressure, and most pry bars are too thick to fit initially. The rigid, thin profile of the 6-in-1 creates the gap you need to start.
Remove Staples the Fast Way
This is where most DIYers waste hours. Flathead screwdrivers and pliers slip, damage the wood, and take forever.
Use a carpet staple remover instead:
– Slide the forked end under the staple crown.
– Push down on the handle. The tool locks onto the staple and levers it out in one motion.
– Staples pop out in seconds, not minutes.
Time saved: 2 hours down to 10 minutes
Cost: Under $15
Pro Tip: After bulk removal, run your hand over the floor to feel for missed staples. Vacuum again to catch metal fragments that can puncture new flooring.
Essential Tools and Cost Comparison

The right tools make the job faster, safer, and far less damaging.
| Tool | Best For | Why It Matters |
|---|---|---|
| 6-in-1 Painter’s Tool | Starting lift on tight strips | Thin, rigid, won’t bend |
| Carpet Staple Remover | Wood subfloors | Cuts staple removal time by 90% |
| Oscillating Multi-Tool | Cutting nails flush | Precision cuts with less dust |
| Angle Grinder | Fast nail removal | Use with metal-cutting wheel |
| Concrete Patch | Repairing divots | Dries in under 1 hour |
| HEPA Vacuum | Final cleanup | Removes allergens and fine dust |
Time and Cost Summary
| Method | Time | Cost | Best For |
|---|---|---|---|
| Patch Holes (Concrete) | ~20 min | Under $20 | LVP, Laminate, Tile |
| Grind/Cut Nails (Concrete) | ~2 hours | $20–$60 | Glue-down, Epoxy |
| Staple Remover (Wood) | ~10 min | Under $15 | Refinishing, New Install |
Flooring Compatibility and Subfloor Prep
Your new floor determines how smooth the subfloor needs to be.
Luxury Vinyl Plank (LVP)
- Tolerates small divots under 1 inch
- A 1.5mm underlayment bridges minor gaps
- Patch only large holes
- Perfection is unnecessary
Laminate
- Behaves similarly to LVP
- Floating floor design spans minor imperfections
- Unfilled large holes may cause clicking or plank separation
Tile
- Thinset mortar fills small craters naturally
- Patching only needed for deep or wide divots
- Surface flatness matters more than tiny holes
Glue-Down Flooring
- Requires a perfectly smooth surface
- Protruding nails or bumps prevent proper adhesion
- Grind or cut nails flush
- Sand high spots if needed
Safety and Best Practices
Protect Yourself
- Wear gloves: Tack strips and staples are razor-sharp.
- Eye protection: Flying wood, metal, or concrete fragments are common.
- Dust mask or respirator: Old carpet pads contain dust, mold, and allergens.
- Knee pads: You’ll be on the floor for extended periods.
Avoid Common Mistakes
- Using a flathead screwdriver to remove staples causes slipping and wood damage
- Prying too hard on concrete creates large divots
- Skipping vacuuming lets dust interfere with adhesives
- Leaving staples behind can puncture new flooring or injure installers
Final Subfloor Check
Before installing new flooring:
1. Vacuum again, twice if needed.
2. Run your hand over the surface to feel for staples or protrusions.
3. Inspect with a bright light at a low angle to spot high or low spots.
4. Patch any holes over 1 inch in diameter or depth.
Frequently Asked Questions About Removing Carpet Tack Strips
Can I leave old tack strips in place and install new flooring over them?
No. Tack strips create uneven pressure points that can damage new flooring, especially floating floors like LVP and laminate. The sharp nails may also puncture underlayment or show through thin materials. Always remove them before installing new floors.
How do I know if my subfloor is concrete or wood?
Check the floor near a vent, doorway, or threshold where the subfloor is often exposed. Concrete looks gray and grainy, while plywood shows visible wood layers. You can also tap a hidden nail into the floor; it will bend on concrete and bite into wood.
What if the tack strips are glued down instead of nailed?
Glued tack strips are rare but possible. Apply heat with a hair dryer or heat gun to soften the adhesive, then pry gently. Goo Gone or a similar adhesive remover helps clean up residue afterward.
Is it safe to remove carpet tack strips myself, or should I hire a pro?
Most homeowners can handle this job safely with basic tools and gloves. The work is physical but not technically complex. Hire a pro only if you have a very large area, health concerns about dust, or no experience with pry bars and patching.
How long does it take to remove tack strips from a whole room?
For a standard 12×12 room, expect 1–2 hours including carpet and pad removal. Concrete takes longer if you choose to grind nails flush. Wood subfloors go faster, especially with a carpet staple remover.
What should I do with the old tack strips after removal?
Place them in a heavy-duty trash bag or cardboard box, nail-side down, to avoid puncturing bags or injuring sanitation workers. Some recycling centers accept clean wood, but most tack strips must go in regular trash.
Key Takeaways for Tack Strip Removal Success
- Patch, don’t prevent, on concrete. Spending two hours avoiding damage is inefficient when patching takes 20 minutes and works perfectly under LVP or laminate.
- Buy a staple remover for wood subfloors. It’s a $15 tool that saves hours. No exceptions.
- Cut nails flush only when needed. For glue-down floors or polished concrete, use an oscillating tool or angle grinder.
- Clean like a pro. A dusty subfloor ruins even the best installation. Vacuum with a HEPA filter.
- Accept reality on concrete. Some damage is normal. Focus on a functional, not flawless, surface.
Removing carpet tack strips doesn’t have to be a nightmare. With the right approach, accept patching on concrete, use the right tools on wood, and clean thoroughly, you’ll have a smooth, professional-ready subfloor in under an hour. Your new floor will thank you, and you’ll be walking on your finished installation before the weekend is over.