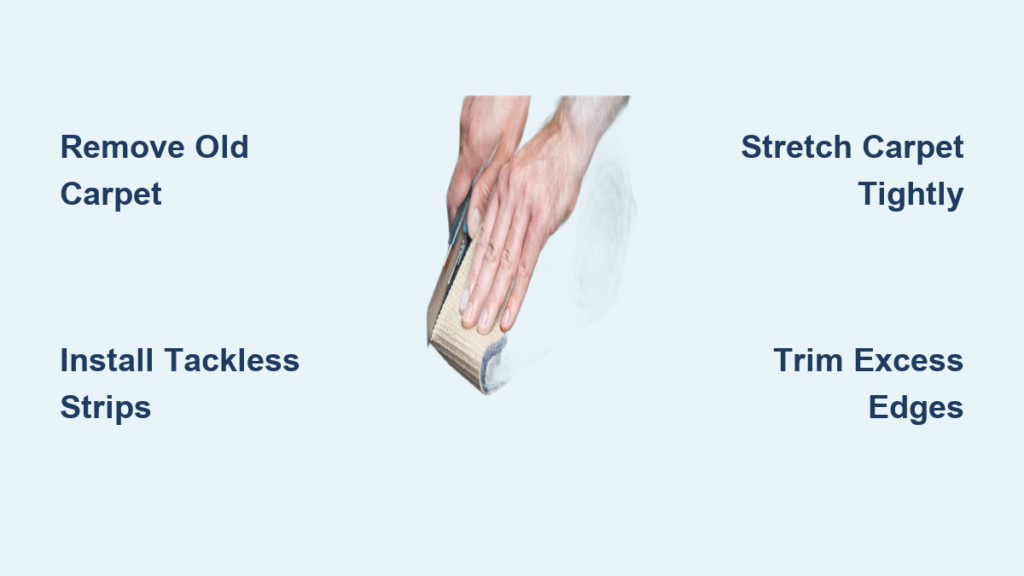
Replacing carpet can transform a room by reviving tired floors, improving insulation, and adding soft comfort underfoot. If you’re wondering how to replace carpet yourself, the good news is that it’s entirely doable with the right tools, preparation, and technique. While many homeowners hire professionals, a DIY approach can save hundreds of dollars, especially if you’re replacing wall-to-wall carpet in a single room. With a clear plan and rented equipment, you can achieve a clean, professional-looking result in a weekend.
This guide walks you through the full process, from removing old carpet to stretching and securing the new one, using proven steps that ensure a smooth, wrinkle-free finish. Whether you’re upgrading for style or replacing damaged flooring, mastering this skill gives you control over cost, timing, and quality.
Remove Old Carpet and Clean the Subfloor

Before new carpet goes down, the old flooring must come up. This step sets the foundation for a flawless installation.
Clear the Room Completely
Remove all furniture, rugs, and obstacles. If you’re working in a bedroom or living area, move items into another room or hallway. Protect doorways with drop cloths to avoid scuffing trim or hardwood.
Cut and Pull Up Old Carpet
Use a carpet knife to slice the old carpet into manageable strips about 3 to 4 feet wide. Start in a corner and cut toward the center. Pull each strip up by hand or with pliers. Be cautious of staples or tacks that may still be embedded.
Remove Old Padding and Debris
Once the carpet is out, roll up and discard the padding. Check the subfloor for leftover staples, nails, or glue. Remove any residual glue, staples, or paint using a putty knife or floor scraper. Any bumps or debris can show through the new carpet, so a smooth surface is essential.
Sweep and Vacuum the Subfloor
After clearing all remnants, sweep the floor and vacuum it thoroughly. A clean subfloor prevents dirt from grinding between the padding and carpet, extending the life of your new floor.
Prep the Room for New Carpet
Proper preparation prevents problems later. This stage ensures your new carpet lies flat and fits perfectly.
Paint Before Installing Carpet
If you plan to paint walls or trim, do it before laying carpet. Spills or splatters on new carpet are hard to remove. Painting first keeps your flooring clean and avoids touch-up issues.
Remove Quarter-Round or Baseboards
Quarter-round trim around the perimeter must be removed so carpet can tuck neatly against the wall. Use a flat pry bar and hammer to gently pull it off without damaging the baseboard. If you are changing flooring types, take the baseboards off and install new ones before or after laying the carpet. Label and store pieces for reinstallation after the carpet is down.
Remove Doors for Easier Access
If there are doors that open into the space you’re carpeting, remove them. This includes closet doors. Removing doors makes stretching and trimming easier and prevents damage during installation.
Install Tackless Strips Around the Perimeter
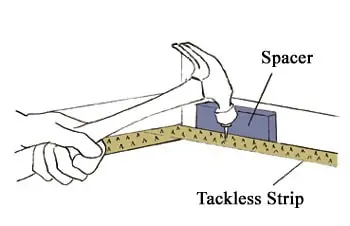
Tackless strips hold the carpet in place by gripping the edge with angled pins. Proper installation is critical for a tight, wrinkle-free fit.
Cut Strips to Fit Room Dimensions
Tackless strips come in 3- to 4-foot lengths and are installed around the room’s perimeter. Measure each wall and cut strips with a hacksaw or metal snips. Leave a half-inch gap between the strip and wall so the carpet can slide into place and be stretched.
Nail Strips in Place
Use a hammer and casing nails to secure the strips. Drive nails through the center holes, angling them slightly away from the wall. The pins should face the wall, ready to grip the carpet backing. Install strips end-to-end around the room.
Avoid Tacks in Doorways
Do not install tackless strips across doorways or thresholds. Exposed tacks can pierce the carpet and become tripping or injury hazards. Use carpet tape or adhesive to secure carpet edges in these areas instead.
Lay and Secure Carpet Padding
Padding isn’t just for comfort. It decreases room noise, adds insulation, and increases carpet lifespan. Installing it correctly supports the final stretch.
Choose the Right Padding Thickness
Padding comes in various thicknesses, but remember that quality relates to density, not necessarily thickness. Match your padding to your carpet type and check manufacturer recommendations to avoid voiding warranties. Some padding includes a waterproof layer that protects against mold.
Unroll Padding Perpendicular to Carpet Direction
Decide the direction you want to install your new carpet, then unroll the padding so it lies perpendicular to the carpet’s direction. This minimizes seams and improves stability. Butt edges tightly together without overlapping.
Staple Edges to the Subfloor
Staple the padding down close to the tackless strips using a staple hammer. When stapling pad seams, alternate the staples so they aren’t placed next to each other. Stretch the padding to ensure sections fit snugly together, and make sure the tacks remain exposed. You may need to cut away some padding to reveal them.
Cut Around Obstacles
Use scissors or a utility knife to cut padding around vents, pipes, or pillars. Leave a small gap between padding and walls to prevent bulging when carpet is stretched.
Mark and Trim the New Carpet
Precision here ensures a clean, professional fit.
Measure and Mark for Trimming
Measure the longest part of the room, then add 3 inches. If you have exterior space, move the carpet outside to mark the back for trimming. Roll the carpet so the back side faces out and keep rolling until you can see the marked areas. Use chalk to draw a line from one mark to the other.
Cut Excess Carpet
Trim the carpet across the back following the chalk line using a carpet knife and straightedge. After trimming, move it back inside for wall-to-wall installation. Unroll it and line it up in the room as straight as possible, keeping about 3 extra inches by the walls.
Seam Multiple Carpet Pieces

If your room is wider than the carpet roll (usually 12 or 15 feet), you’ll need to join sections.
Cut Straight Edges for Seams
Even factory-cut edges can be uneven. Use a carpet knife and straightedge to trim both edges cleanly. The cut should be perfectly straight so pieces butt together without gaps. Double-check each edge even if the carpet company cut it.
Apply Seaming Tape
Position a piece of seaming tape below the carpet’s seam with the sticky side facing up. Center it so each carpet edge covers half the tape. This creates a strong, flexible bond.
Melt Tape with a Seaming Iron
Heat your rented seaming iron to the proper temperature (typically 300 to 400°F) and set it on the tape for about 15 to 30 seconds. Shift the iron across the tape slowly, pressing the carpet seam into the soft glue.
Weight the Seam Overnight
Place something heavy on top of the seam to keep the sections in place until the glue dries. Keep seams parallel to each room’s central source of light to help hide the joint.
Stretch and Secure the Carpet
This is the most critical step. A poorly stretched carpet will wrinkle, buckle, or loosen over time.
Use a Knee Kicker for the First Edge
Pick one side of the room and connect the edge of the carpet to the tackless strips. Set the front of the knee kicker along the carpet approximately 3 inches from the wall, then hit the padded side. This stretches the carpet along the strips. Repeat every 12 inches down the wall.
Power Stretch the Opposite Side
For the far wall, use a power stretcher. Position it diagonally across the room with the end bar against the opposite tack strip. Extend the pole until the front claw grips the carpet edge, then push the handle down to apply tension far greater than hand tools can achieve.
Secure Corners and Edges
Use the knee kicker to stretch carpet into corners and wall nooks. For inside corners, fold excess carpet like wrapping a present. For outside corners, make relief cuts so the carpet lies flat without puckering.
Trim Excess Carpet
Once fully stretched, use a carpet knife to trim the overhang, leaving just enough to tuck under the tackless strip. Cut close to the wall, about a quarter inch past the pins. A clean edge ensures a tight fit.
Frequently Asked Questions About Replacing Carpet
Is free carpet installation really free from flooring companies?
When a flooring company offers free installation, they may have increased the cost of the material to cover labor. The “free” service is essentially built into a higher product price.
Do you need special tools for carpet installation?
Yes. If you’re planning DIY carpet installation, you’ll want to rent professional carpet installation tools including a knee kicker, power stretcher, seaming iron, and strip cutter.
How much carpet should I buy?
Measure each room’s length and width, then multiply to determine square footage. If you want a patterned carpet, purchase 5% more because you’ll need extra material to make sure the pattern matches.
Is it cheaper to install carpet yourself?
DIY can save money, but if the installation isn’t done correctly, it can actually cost more. Practice your techniques and ensure you have the right tools to set yourself up for success.
How much does it cost to install carpet yourself?
For an entire home, costs per 200 square feet range from $700 to $2,000 for materials. DIY installation adds tool and material rental costs, while professional installation includes service fees on top of materials.
Key Takeaways for a Successful Carpet Replacement

Replacing carpet yourself is a rewarding project that saves money and upgrades your space. Focus on three critical areas: thorough subfloor preparation, proper tackless strip placement, and correct stretching technique with both a knee kicker and power stretcher. These details determine whether your carpet stays smooth for years or develops wrinkles within months.
Your next step is to gather measurements, rent the essential tools (knee kicker, power stretcher, and seaming iron), and set aside a full weekend for the project. After finishing, reinstall quarter-round trim, rehang doors, and vacuum regularly to extend your new carpet’s life. This skill becomes a valuable addition to your home maintenance toolkit for future room makeovers.