
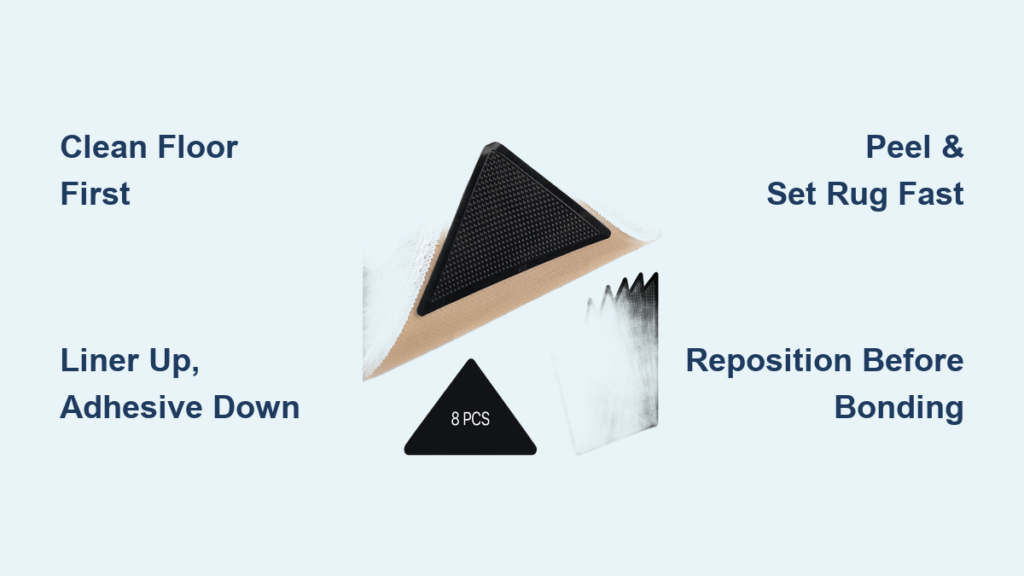
Slipping, bunching, or curling rugs are more than just annoying. They create real safety hazards in your home, especially if you have kids, pets, or elderly family members. Whether you’re dealing with a throw rug on hardwood or a large area rug in a high-traffic living room, rug gripper strips offer a fast, residue-free solution to keep your rugs firmly in place. Designed for all floor types and repositionable for flexible use, rug gripper is a smart upgrade for any home.
In this guide, you’ll learn exactly how to use rug gripper step by step, including best practices for different rug sizes, floor types, and carpet piles. You’ll discover why it works better than tape or pads in many cases, how to avoid common mistakes, and tips for long-term performance. By the end, you’ll be able to install, adjust, and maintain your rug gripper like a pro.
Prepare the Floor and Cut Strips
Proper preparation ensures maximum adhesion and a long-lasting hold. Taking a few extra minutes at the start will save you frustration later.
Clean the Floor Thoroughly
Dust, dirt, and moisture create barriers between the gripper and floor, weakening the bond. Before applying rug gripper, sweep, vacuum, or mop the area and let it dry completely. For sealed hardwood or tile, wipe with a dry microfiber cloth to remove invisible residues that could compromise adhesion.
Measure and Cut to Fit
Unroll the rug gripper and cut strips using scissors or tear along pre-perforated lines. For small rugs under 5 feet by 8 feet, cut 2 to 4 pieces for corners and mid-edges. For larger rugs, plan for perimeter coverage plus cross-strips every 2 to 3 feet.
Pro Tip: Cut strips slightly shorter than the rug edge to prevent visibility and peeling at foot traffic points. This keeps the installation clean and professional-looking.
Position Gripper with Liner Up
Correct orientation is critical. Flip it wrong, and your rug will not stick properly.
Place Adhesive Side Down
Lay the strip on the floor with the yellow plastic liner facing up. This means the sticky side is touching the floor. Press firmly along the entire length with your hand or a roller to activate the pressure-sensitive adhesive.
Reposition Freely Before Finalizing
One of the biggest advantages of rug gripper is that it is fully repositionable before the top liner is removed. If alignment is not perfect, lift and reapply. There is no loss of grip even after multiple adjustments.
Warning: Once the yellow liner is peeled off, the second adhesive side bonds to the rug and becomes semi-permanent. Make sure your positioning is final before proceeding.
Peel Liner and Install the Rug
This step locks everything into place, so work carefully and efficiently.
Remove the Yellow Protective Liner
After securing the gripper to the floor, peel off the yellow liner to expose the textured rubber surface. Work quickly and carefully to avoid touching the adhesive with your fingers.
Set Rug in Place Immediately
Lower the rug onto the exposed gripper strips. Align precisely, because once contact is made, adjustments are limited. Gently slide the rug into final position, ensuring full coverage over all strips.
Press Firmly Across the Surface
Walk back and forth across the rug, especially along edges and in high-traffic zones. This activates the dual-grip mechanism. The bottom adheres to the floor, and the top grips the rug’s underside.
Expert Note: For best results, apply body weight or use a floor roller. Vacuuming afterward will not dislodge properly installed gripper.
Optimize Placement by Rug Size
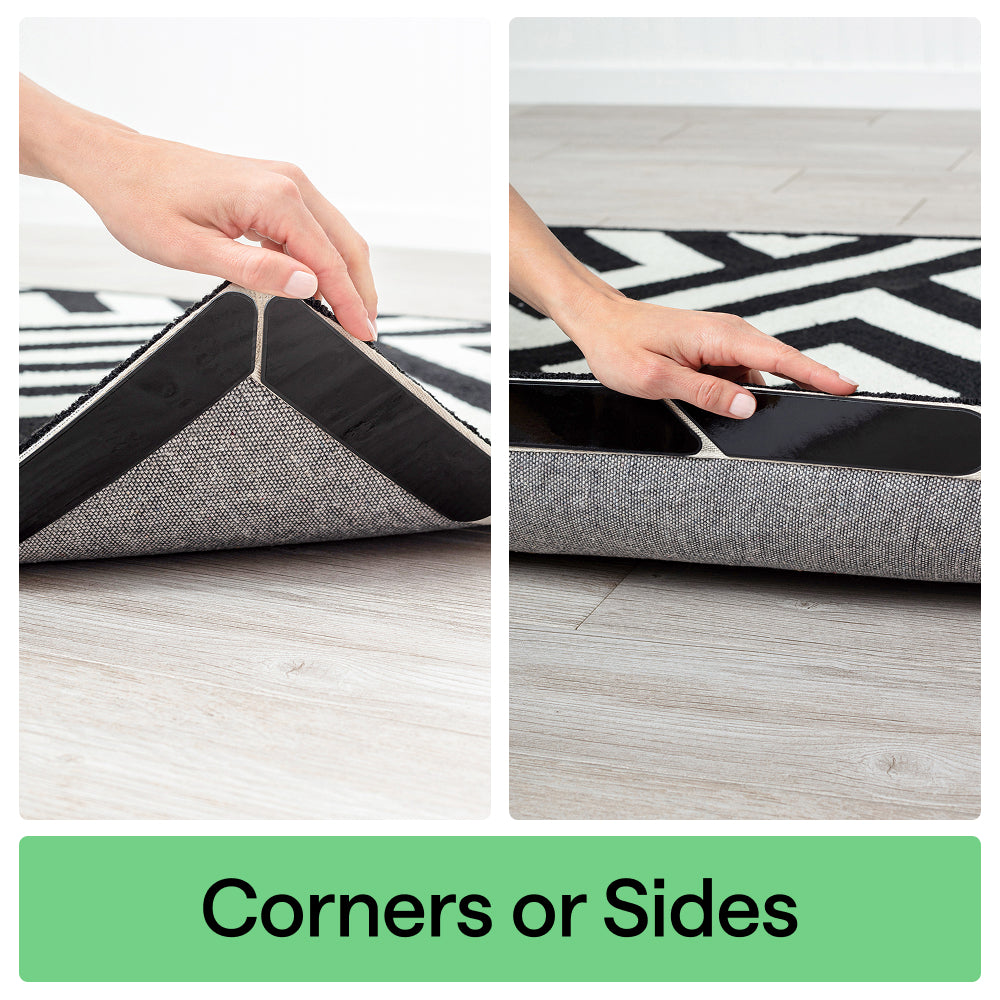
Where you place the gripper matters as much as how you install it. Different rug sizes require different strategies.
Small Rugs: Corner and Edge Support
For rugs under 5 feet by 8 feet, apply one central strip or place shorter strips at each corner and midpoint of long edges. This prevents lifting and shifting without wasting product.
Large Area Rugs: Grid or Border Pattern
Use a combination of full-length strips along all four edges plus cross-strips every 2 to 3 feet for interior stability. This mimics a full rug pad’s effect while remaining adjustable and cost-effective.
Runners and Hallways: Continuous Edge Grip
Apply uninterrupted strips along both long sides. Add transverse strips every 3 feet to resist foot-driven slippage. This method works ideal for stair runners or entryway mats.
Pro Tip: Focus extra strips under walking paths. This targets the most common wear zones and keeps your rug most secure where it matters most.
Use Rug Gripper on Carpet Safely
Rug gripper works on carpet, but effectiveness depends on pile height.
Works Best on Low-to-Medium Pile
Rug gripper excels on short-pile or flatweave carpets where direct contact with gripper fibers is possible. The adhesive bonds to the carpet base, not just surface fibers, creating a secure hold.
Less Effective on High-Pile Carpets
Deep, plush carpets reduce stability because the gripper can shift within soft fibers. In these cases, consider a carpet-to-carpet non-slip pad instead. RugPadUSA Carpet Lock or similar felt-and-rubber pads are designed specifically for deep pile.
Placement Tips for Carpeted Floors
Apply strips at all four corners and reinforce along edges and under furniture legs. Combine with light furniture weight for added security. Avoid placing gripper under loose fringe or frayed backing.
Avoid Common Installation Mistakes
Even small errors can compromise performance. Watch out for these pitfalls.
Do Not Skip Floor Cleaning
Installing on dusty or oily surfaces causes premature detachment. Always clean first, even in new homes where fine particles accumulate quickly.
Never Remove Liner Too Early
Peeling the yellow liner before positioning the gripper on the floor wastes the product. The exposed adhesive will collect debris and lose effectiveness.
Do Not Overlap Strips
Stacking strips creates uneven surfaces and bulges under the rug. Keep them evenly spaced and flat for consistent grip.
Avoid Excess Exposure to Heat
While indoor-rated, prolonged exposure to direct sunlight or heating vents may degrade adhesive over time. Do not use rug gripper outdoors unless the product specifically specifies weather resistance.
Maintain and Reuse Rug Gripper
Longevity depends on proper care and environment.
Clean With Mild Soap and Water
If gripper collects dust or pet hair, remove the rug and wipe strips with a damp cloth and mild detergent. Some models are machine-washable, so check the packaging for specific instructions.
Restore Adhesion When Needed
Over time, grip may weaken due to debris buildup. Cleaning often restores full function. Replace gripper only if cracked, torn, or no longer sticky.
Store Unused Rolls Properly
Keep in a cool, dry place away from UV light. Seal in original packaging to protect adhesive from contamination.
Pro Tip: Save leftover strips for future use on seasonal rugs or temporary placements. Rug gripper is too useful to throw away.
When to Choose Rug Gripper vs. Rug Pad
Each product has its strengths. Know when to use which.
Choose Rug Gripper When You Need
Targeted anchoring such as just corners or edges. Renter-friendly installation with no residue and easy removal. Quick fixes for slipping rugs. Customizable layouts for odd-shaped rugs. Cost-effective solutions for multiple small rugs.
Choose a Full Rug Pad When You Want
Cushioning and comfort underfoot. Noise reduction in multi-level homes. Thermal insulation on cold floors. Whole-surface protection against wear. Use on high-pile carpet.
Best of Both: Use rug gripper on the pad’s corners to prevent the pad itself from sliding. This gives you cushioning plus security.
Troubleshoot Gripper Problems Fast
Fix issues before they become hazards.
Rug Still Slipping
Check three things. Was the floor cleaned before installation? Are enough strips used, aiming for 60 to 70 percent coverage? Are strips placed under high-traffic zones? Add more strips or switch to a grid layout if needed.
Hard to Remove
If gripper resists peeling, warm the area with a hair dryer for 30 seconds. Lift slowly from one corner. Use rubbing alcohol on a cloth to clean any residual stickiness, but test in a hidden area first.
Rug Curling at Edges
Gripper prevents movement but does not fix curling. To flatten a curled rug, reverse-roll it for 24 to 48 hours before installing gripper. Use rug weights or furniture on corners. Apply gentle heat with a hair dryer to relax fibers.
Maximize Safety and Rug Longevity
Beyond grip, rug gripper offers hidden benefits for your home.
Prevent Tripping Accidents
Secured rugs eliminate trip risks, which is especially important for seniors, kids, and pets. One smooth step could prevent a serious fall.
Protect Flooring From Damage
Gripper acts as a shield against scratches from dragged furniture, abrasion from shifting rugs, trapped grit that grinds into wood or tile, and color transfer from rubber-backed rugs.
Extend Rug Life
By minimizing movement, gripper reduces fiber fraying, edge wear, and pile crushing, especially in hallways or living rooms. Your rugs stay looking newer longer.
Frequently Asked Questions About Rug Gripper
Do I need rug gripper on carpet?
Yes, if the rug slides or you have children or pets. It is essential for lightweight or smooth-backed rugs on low-pile carpet.
Can I reuse rug gripper?
Yes, but only before the top liner is removed. Once bonded to the rug, it is no longer repositionable.
Will it damage hardwood floors?
No. Rug gripper is specifically engineered to be safe on hardwood, laminate, tile, and vinyl. It leaves no residue and causes no scratches.
How long does rug gripper last?
With proper care, 2 to 5 years or more. Replace when visibly worn or no longer adheres firmly.
Can I vacuum over rug gripper?
Yes. Once installed, it lies flat and will not be disturbed by vacuuming. Avoid aggressive beater bars on exposed edges.
Is rug gripper safe for pets?
Absolutely. It is non-toxic, produces no fumes, and prevents slips that could injure animals.
Key Takeaways for Using Rug Gripper Effectively
Rug gripper is a simple, powerful tool for home safety and rug maintenance. The key to success lies in proper surface preparation, correct orientation with the yellow liner facing up, and strategic placement based on your rug size and floor type. For best results, clean your floors thoroughly before installation, aim for 60 to 70 percent coverage, and focus extra strips under walking paths.
Whether you are renting, rearranging, or protecting valuable flooring, knowing how to use rug gripper correctly makes all the difference. Install it right, maintain it well, and enjoy a slip-free floor for years to come. For stubborn curling, combine gripper use with reverse-rolling or gentle heat treatment before installation. Your rugs will stay flat, your family will stay safe, and your floors will stay protected.







