
Weaving a rope rug is a smart, sustainable way to repurpose old climbing ropes, marine lines, or even clothesline into a durable floor covering. Whether you are upcycling retired gear or crafting a stylish kitchen mat, rope rugs are tough, long-lasting, and surprisingly simple to make once you know the right method. This guide covers everything you need to get started, including the three main weaving techniques, essential tools, materials, time estimates, and expert tips to avoid common pitfalls. You will learn how to weave a flat, professional-looking rug using pegboard, spiral sewing, or loom methods, each with its own strengths depending on your skill level and available tools.
Choose the Best Weaving Method for Your Skill Level

Compare the Three Main Techniques
Three primary approaches dominate rope rug weaving, each producing a durable result but varying in complexity and tools required. Pegboard weaving creates a tight, grid-like pattern ideal for indoor rugs. It uses a nail-studded board to guide an over-under sequence and works best for climbers repurposing retired ropes. Spiral coil sewing builds a circular rug by wrapping rope in fabric and stitching coils together. This method offers full color customization and works well for large floor rugs. Loom weaving is the simplest method, ideal for beginners. You simply weave rope back and forth like a basket to make flat door mats from recycled marine lines.
Your choice depends on available tools, time, and the desired look of your finished rug.
Match Method to Your Experience
Beginners should start with loom weaving because it requires minimal equipment and produces solid results quickly. Intermediate crafters with a sewing machine can tackle spiral coil rugs, which take more time but allow creative fabric use and larger sizes. Pegboard weaving demands precision and physical effort, making it best for those comfortable with detailed patterns and tight rope tension. The pull-through process in pegboard weaving is physically demanding, often compared to belaying twenty climbing pitches, so consider your stamina before choosing this method.
Gather Materials and Tools for Rope Rug Making
Select the Right Rope
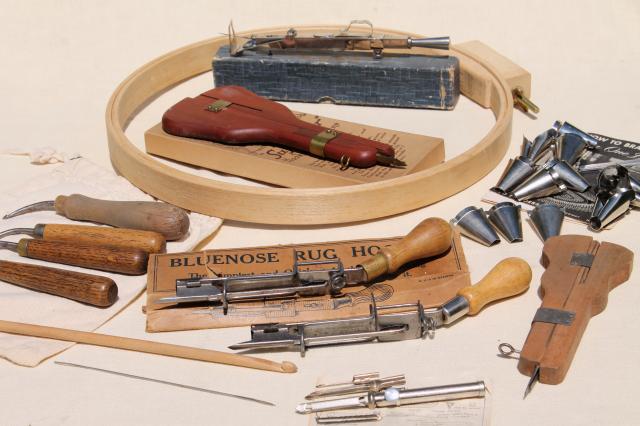
Use clean, durable rope between ¼ inch and 10mm thick. Popular choices include retired climbing rope (9 to 10.2mm dynamic), which is strong, colorful, and widely available from gyms or climbers. Marine or crab-fishery rope offers heavy-duty construction and weather resistance. Synthetic clothesline is soft, flexible, and easy to sew, making it ideal for spiral rugs. Cotton clothesline is less durable but more eco-friendly. Always wash rope before use, especially climbing lines with chalk or dirt buildup, and cut rope into 20-meter lengths for easier handling.
Collect Essential Tools
For pegboard weaving, you will need a sturdy plywood board (minimum 50 by 70 cm), 18 or more screws or nails (1½ inch #10 wood screws with plastic tubing), a hammer or drill, a hot knife and lighter for cutting and sealing rope ends, and a Speedy Stitcher Sewing Awl for joining ends. For spiral sewing, gather a heavy-duty sewing machine, a jean needle and heavy thread, fabric scissors, an iron and spray bottle for flattening, and an extension table to support large rugs. For loom weaving, you need a simple loom (homemade or purchased), scissors, and a lighter to melt rope ends. All methods benefit from clear labeling, good lighting, and ventilation when melting rope.
Build a Pegboard Loom for Tight Weaves
Mark and Install Pegs
Cut a plywood board to size, ensuring it is at least 50 by 70 cm. Use a pre-made pattern or design your own grid by marking peg positions evenly around the perimeter. Number each peg sequentially (1, 2, 3…) and write numbers directly on the board for easy tracking. Drive screws or nails into each mark and slide plastic tubing over the threads to reduce friction and prevent rope wear. Avoid asymmetrical spacing because uneven measurements cause lopsided results. If your layout uses uneven intervals, adjust to symmetrical measurements for better weave alignment.
Draw the Weaving Pattern Onboard
Instead of referencing a screen while you work, trace the weaving pattern directly on the board using thick and dashed lines. A thick line indicates where the rope passes over, while a dashed line shows where it passes under. Color-code intersections if you are using multiple ropes to minimize errors during the first pass. This visual guide keeps you on track without constant reference to external documentation.
Weave Using the Pegboard Method
Start the First Pass
Begin with approximately one-quarter of your rope length at peg #1. Wrap the rope around each peg in numerical order, following the marked pattern at each crossing. Keep the rope flat and aligned, and do not skip pegs because even one missed turn can distort the entire rug. Watch for drifting, and if the rope veers off course, pause and realign immediately because small errors grow quickly. Use a melted rope tip to prevent fraying, sealing the end with a hot knife while cutting.
Pull Through Remaining Rope
After completing the first loop, start pulling the rest of the rope backward through the initial weave. Feed the loose end through each segment, matching the original over-under path, then pull completely through each span. Use a second person to help, with one person feeding and one pulling. Repeat for three to four passes depending on your rope length and desired tightness. A triple weave uses three passes and is the standard approach, while a quadruple weave uses four passes for a tighter, more durable result. The fourth pass can be extremely tight, so stop at three if resistance is too high. A 60m climbing rope typically allows a quadruple weave with about 11.5 feet leftover, while a 50m rope may only support triple weaving.
Finish and Secure the Pegboard Rug
Join the Ends Cleanly
Once weaving is complete, flip the rug and hold both loose ends together. Cut and melt the tips with a lighter, then sew them together using a Speedy Stitcher Sewing Awl for a strong, invisible seam. An alternative method for synthetic ropes is fusing ends with a hot knife and gel, as recommended by EDELRID. Straighten edge loops and push any loose sections inward for a clean appearance.
Tighten and Flatten the Rug
Apply rubberized coating such as Dip-It to the back of the rug for added stability and weight. This prevents slipping, especially on hardwood floors. Let the coating dry fully before using the rug.
Make a Spiral Fabric-Wrapped Rug
Wrap Rope With Fabric
Cut ¼-inch clothesline into 10 to 15-foot lengths. Cut fabric into 2-inch wide strips, using approximately 9 yards total across multiple patterns. Wrap one end of the rope with fabric, angling slightly to progress down the line. Sew straight down the center with a jean needle and the longest stitch length. Overlap new fabric strips by 1 to 2 inches to hide seams. Join new rope lengths by wrapping both ends together and sewing through all layers. Keep the wrap snug but not tight because excess tension warps the rope.
Coil and Sew the Rug
Start coiling from the center outward by placing the wrapped rope in a tight spiral. Use the widest zigzag stitch on your sewing machine to sew between coils, not through the center. Rotate the rug clockwise as you sew, and do not pull or push the rope. Maintain even tension to prevent curling. Use an extension table beside your sewing machine, matching its height exactly to the machine bed using books or shims to support the growing rug.
Fix Curling and Waviness in Spiral Rugs
Prevent Uneven Tension
Curling happens when you pull the rug while sewing. Let the machine feed the fabric naturally and keep the rug flat and level. Support outer coils fully and avoid stretching or bunching during the sewing process.
Correct Wavy Rugs
If waves appear in your rug, try steam ironing the back. Lay the rug on carpet, spray with water, and iron on the highest steam setting. Place heavy books on wavy areas and let dry overnight. Test early by steaming a small section mid-project to see if waves will resolve. For severe curling, use a seam ripper to remove the last few rows and resew with relaxed tension.
Complete the Spiral Rug
Finish the Outer Edge
When the rug reaches your desired size, wrap the final rope end with fabric, covering the tip completely. Sew straight for several inches to secure, then tuck the end underneath the rug. Use zigzag stitch to sew over and hide the end. End on a straight section rather than a curve for cleaner tucking.
Weave a Simple Loom Rug
Set Up the Loom
Use a basic loom with parallel warp strands stretched evenly. These can be made from the same rope or a sturdier material. Ensure all strands have equal tension because too loose or too tight causes uneven weaving.
Weave the Weft Rope
Thread the weft rope (the moving strand) through the warp using an over-under basket weave pattern. Maintain a steady rhythm and melt rope ends lightly with a lighter to prevent fraying. Overlap final rows slightly for durability. Finish by trimming excess and sealing ends.
Customize Your Rug Design
Mix Colors and Patterns
For pegboard rugs, use two colored ropes such as red and blue for contrast. For spiral rugs, alternate fabric patterns for a random, artistic look. For loom rugs, swap weft colors every few rows. Rotate fabric types or rope colors to distribute shades evenly and avoid clumping similar colors in one area.
Adjust Size and Shape
Pegboard rugs are rectangular, with size depending on board and rope length. Spiral rugs are circular and can grow to any diameter, with a 55-inch diameter reported by experienced crafters. Loom rugs are custom, cut warp to desired width. Use symmetrical peg spacing to prevent lopsided results.
Maintain and Extend Lifespan
Clean Spotwise
Never soak a rope rug. Instead, blot spills immediately and use a mild soap with a damp cloth. Air dry flat and never machine dry.
Flatten When Needed
If curling returns over time, reapply steam and weights. Store the rug flat when not in use to maintain its shape.
Add Non-Slip Backing
Apply rubberized paint to the underside to add grip and weight. This is especially helpful on slick floors and prolongs the rug’s usability.
Troubleshoot Common Problems
Rope Won’t Pull Through
If the rope is hard to pull through, the weave may be too tight or the rope too thick. Use a melted tip to stiffen the end, work with two people, and consider reducing to a triple weave instead of quadruple.
Rug Is Lopsided
Asymmetrical peg spacing causes lopsided rugs. Redesign the board with even measurements and verify spacing before driving pegs.
Fabric Wraps Wrinkle During Sewing
Uneven wrapping or tension causes wrinkles. Rewrap the section, use a longer stitch length, and iron fabric strips before wrapping.
Sewing Machine Struggles
Thick layers or resistance can strain your machine. Use a heavy-duty needle, raise feed dogs if possible, and support the rug fully throughout the sewing process.
Save Time With Expert Tips
Work Smarter, Not Harder
Pre-cut rope into 20-meter lengths for easier handling. Label pegs clearly and draw the pattern on the board rather than relying on memory. Use slack markers at tight bends to prevent bunching.
Speed Up Spiral Sewing
Pre-wrap several rope sections before starting. Pre-cut fabric into consistent strips and use an extension table from the beginning of the project.
Join Ropes Seamlessly
For continuous length, butt ends together and wrap with fabric. Sew through all layers and hide the seam inside the coil.
Make an Eco-Friendly Rope Rug
Upcycle With Purpose
All methods turn discarded rope into functional art. Climbing gyms often give away retired ropes, fishermen discard old marine lines, and old clothesline is widely available. This is zero-waste crafting at its best because nearly every inch of rope gets used.
Use Sustainable Materials
Cut fabric from old clothes or sheets. Choose non-toxic glue or thread and avoid synthetic coatings if possible. You are not just making a rug, you are reducing landfill waste while creating something beautiful and functional.
Key Takeaways for How to Weave a Rope Rug
Weaving a rope rug transforms forgotten materials into a tough, beautiful floor covering. Whether you choose the precision of pegboard weaving, the creativity of spiral sewing, or the simplicity of loom weaving, success comes down to three factors: preparation, patience, and the right tools. Follow your chosen pattern carefully, maintain even tension throughout the process, and seal every rope end to prevent fraying. With these steps, you will create a rug that lasts for years while giving new life to old rope. Start with a small project, learn from each attempt, and soon you will be weaving rugs that are as functional as they are sustainable.
Frequently Asked Questions About How to Weave a Rope Rug
What type of rope is best for weaving a rug?
Retired climbing rope (9 to 10.2mm), marine rope, and synthetic clothesline work best. Climbing rope is ideal for pegboard weaving because it is strong and colorful. Clothesline works well for spiral sewing because it is soft and flexible.
How long does it take to weave a rope rug?
Time varies by method and size. Loom weaving takes 1 to 3 hours for beginners. Pegboard weaving takes 2 to 6 hours depending on experience. Spiral rugs take 6 to 17 hours, with a 55-inch diameter rug requiring about 17 hours.
Can I use old climbing rope for a rug?
Yes, retired climbing rope is excellent for rug weaving. Wash it first to remove chalk or dirt, cut into manageable 20-meter lengths, and use the pegboard or loom method for best results.
How do I prevent my rope rug from curling?
Maintain even tension while sewing and avoid pulling the rug. If curling occurs, steam iron the back and place heavy books on wavy areas overnight. Apply rubberized coating to the back for added weight and grip.
Do I need a sewing machine for all methods?
Only the spiral coil method requires a sewing machine. Pegboard and loom weaving use manual techniques with basic tools. A heavy-duty machine with a jean needle is essential for spiral rug making.







